Step-by-Step Guide to Window Replacement Rockville, MD Homeowners Can Trust

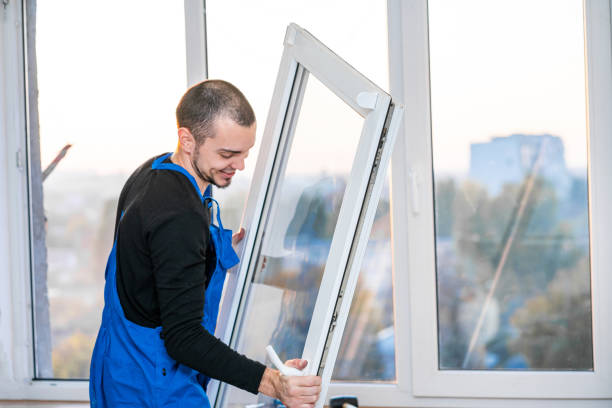
Installing new windows in your home can significantly enhance energy efficiency, curb appeal, and overall comfort. Whether you’re upgrading outdated windows or addressing structural issues, understanding the window installation process is essential to achieving a seamless experience. Below is a step-by-step guide to help homeowners navigate this project with confidence.
Step 1: Assess Your Existing Windows
The first step in any window installation project is evaluating your current windows to determine the scope of the job. Consider the following:
– Are there drafts or noticeable air leaks?
– Is condensation forming between glass panes?
– Are frames or sashes damaged, warped, or rotten?
– Do you want to improve energy efficiency or update aesthetics?
These observations will help you decide whether repair is sufficient or full replacement is necessary.
Step 2: Select the Right Windows for Your Home
Choosing the right windows requires careful consideration of several factors:
1. Material Options:
– Vinyl: Affordable and low-maintenance.
– Wood: Traditional look with great insulation but requires upkeep.
– Aluminum: Durable and ideal for modern designs.
– Fiberglass: Energy-efficient and long-lasting but comes at a higher price point.
- Glazing Choices: Double-pane and triple-pane glass maximize energy efficiency by reducing heat transfer. You may also opt for Low-E (low emissivity) coatings to block harmful UV rays.
- Style Preferences: Popular window styles include casement, double-hung, sliding, bay, bow, and picture windows. Match the style with your home’s architectural design for uniformity.
Step 3: Measure Accurately
Precise measurements ensure that your new windows fit properly without gaps or misalignment issues. If hiring professionals, they will handle this critical step; however, if doing it yourself: – Measure width at three points (top, middle, bottom) inside the frame. – Measure height from sill to top frame on both sides and center. – Use the smallest measurements as your reference dimensions.
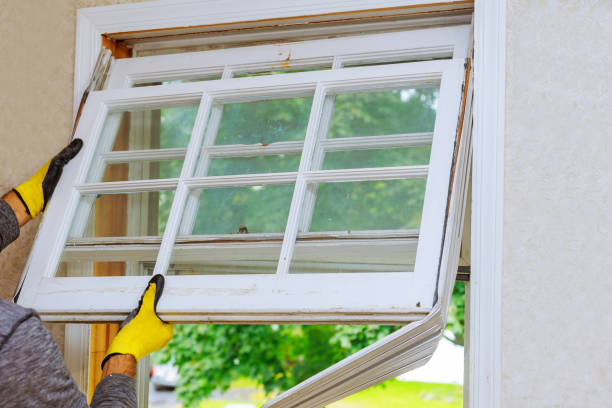
Step 4: Remove Old Windows
Before removing old windows: 1. Prepare tools such as pry bars, screwdrivers, utility knives, and safety glasses. 2. Remove interior stops carefully to reuse them later. 3. Loosen screws holding frames in place. 4. Slide out old sashes and remove debris.
Pro Tip:
Dispose of old materials responsibly by recycling where possible or consulting local waste disposal regulations.
Step 5: Inspect & Prepare Openings
Check existing window openings for structural damage such as rotting wood or moisture buildup: – Clean out dirt and caulk residue around edges. – Apply waterproof flashing tape along sill edges for protection against leaks. – Repair framing if needed before proceeding further.
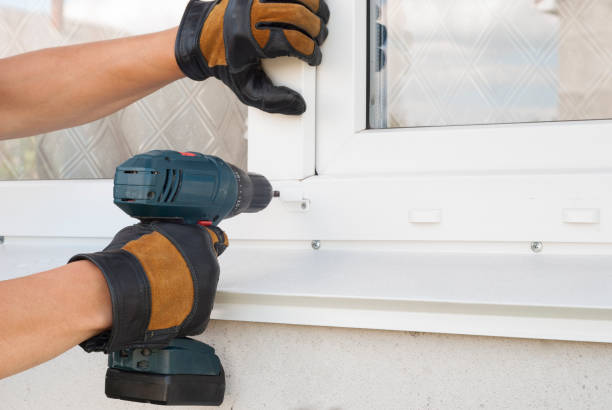
Step 6: Install New Windows
Follow these steps during installation: 1. Position replacement window into opening carefully. 2. Use shims strategically along edges for level adjustments. 3. Secure frame using screws through pre-drilled holes while maintaining plumb alignment. 4. Seal gaps with expanding foam insulation around edges for an airtight fit.
Table – Common Window Installation Tools
| Tool Name | Purpose | Notes |
| Pry Bar | Removing existing trim/frames | Use with caution |
| Level | Ensuring proper alignment | Check both vertical/horizontal |
| Flashing Tape | Waterproof barrier | Essential for longevity |
| Caulking Gun | Sealing gaps | Choose weatherproof caulk |
Step 7: Reinstall Trim & Finishing Touches
Once installed securely: – Reattach interior/exterior trim pieces previously removed. – Paint or stain trim as desired for a polished appearance. – Clean glass panes thoroughly before use.
This systematic approach ensures that each stage of window installation is executed efficiently while minimizing potential challenges homeowners may face during this process
What to Expect During the Windows Rockville, MD Installation Process
Understanding what happens during a window installation process can help homeowners feel more confident and prepared. While professionals handle the heavy lifting, knowing the various stages ensures a seamless experience. Below is a step-by-step overview of what you can expect during a professional window installation.
Pre-Installation Assessment for Window Installation Rockville, MD
- The new windows fit properly.
- Any structural issues, such as rotting wood or damaged frames, are identified.
- Appropriate tools and materials are ready for installation.
Typically, this assessment is done prior to installation day during the initial consultation or site visit.
Enhance Your Home’s Protection with Replacement Windows Rockville, MD
- Placing drop cloths or tarps around the work area.
- Covering furniture near windows.
- Removing window treatments such as blinds or curtains (if not already done by the homeowner).
These precautions minimize mess while ensuring your personal belongings remain undamaged.
Steps for Effective Window Repair in Rockville, MD
- Unscrewing or prying away hardware holding the old frame in place.
- Detaching caulking, adhesives, or trim securing the window.
- Inspecting for water damage or rot around the opening once cleared.
If any issues like wood rot are found, they may need immediate attention before proceeding with new window placement.
Professional Window Glass Replacement Rockville, MD Services
- Positioning: The installer places each frame into its designated opening for an exact fit.
- Leveling: Frames are adjusted for proper alignment using shims and levels to prevent air leaks or operational problems.
- Securing: The installer secures windows in place using screws or fasteners specific to your window type.
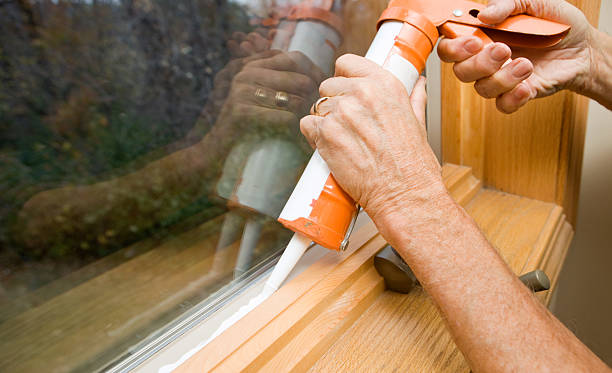
After securing each unit, installers apply insulating materials like foam sealant or caulk around edges for weatherproofing.
Finishing Touches
- Trim pieces are reattached or replaced if necessary.
- Excess sealant is trimmed away for a clean appearance.
- Window operation (opening/closing) is tested thoroughly by installers.
This step ensures that every detail meets professional standards before finalizing work on your property.
Clean-Up Process
- Removing debris such as old frames and glass shards from inside/outside areas.
- Cleaning newly installed windows so they’re free of fingerprints or smudges.
- Restoring furniture arrangements if relocated during prep work.
You’ll likely be left with nothing but fresh-looking windows ready for use immediately after project completion.
Additional Tips for Homeowners
- Clear pathways to all affected areas in advance (both indoors & outdoors).
- Keep pets in a separate room where noise won’t cause distress while workers perform tasks nearby.
By preparing ahead of time and working with experienced professionals who follow these steps diligently, homeowners can enjoy long-lasting results from their upgraded window systems without hassle.
How to Choose a Reputable Company for Your Window Installation Needs
Nova Exteriors Inc. Rockville
(301) 396-7509
https://www.novaexteriors.com/rockville-windows
Selecting the right company for your window installation is a crucial step in ensuring a successful project. Not all companies offer the same level of professionalism, expertise, or quality, so careful consideration is essential. Below are several key factors and actionable tips to help you make an informed decision when choosing a reputable window installation company.
Do Your Research
Begin by researching local companies that specialize in window installations. Look for businesses with experience in your area as they are more likely to understand local building codes, weather conditions, and architectural styles.
- Online Reviews: Check reviews on trusted platforms like Google, Yelp, or Better Business Bureau (BBB). Pay attention to both positive and negative feedback to get a balanced perspective.
- Referrals: Ask family members, friends, or neighbors for recommendations based on their experiences with local contractors.
- Company Website: Browse company websites to assess their services, certifications, and professionalism.
Verify Certifications and Credentials
A professional window installation company should hold valid certifications and licenses specific to the field. These credentials demonstrate that the company meets industry standards and has undergone required training.
- Look for manufacturers’ certifications (e.g., Andersen Certified Contractor or Pella Platinum Certified).
- Confirm that the business holds liability insurance and workers’ compensation coverage.
- Verify licenses through your state’s licensing board or similar regulatory body.
Assess Their Experience and Expertise
Experience matters when it comes to window installations. Working with an established company ensures they have encountered various challenges and know how to address them effectively.
Questions to ask during your evaluation: 1. How many years have you been in business? 2. Do you specialize in residential or commercial projects? 3. What types of windows do you install (e.g., vinyl, wood-clad, fiberglass)?
Compare Quotes – But Don’t Choose Solely Based on Price
When gathering quotes from different companies, aim for transparency over cost alone. A quote should include details such as labor expenses, materials used, warranties offered, and timelines.
| Company Name | Material Type | Warranty Offered | Estimated Cost | Completion Timeline |
| ABC Windows Inc. | Vinyl | Lifetime warranty | $8,500 | 3 days |
| Home Pro Installers | Fiberglass | 20-year warranty | $10,200 | 4 days |
| Local Experts Co. | Wood-Clad | Limited warranty | $9,000 | 5 days |
While affordability is important, prioritize quality workmanship over selecting the cheapest option available.
Evaluate Communication and Customer Service
- Prompt responses to calls or emails
- Willingness to provide detailed answers about their process
- Transparency regarding potential challenges or delays
- Request references from past customers.
- Visit completed projects if possible; this gives real insight into their workmanship quality.
Ask About Warranties
Reputable companies typically provide warranties on both materials and labor. Ensure you understand what is covered under each warranty before making your decision.
Key considerations include: – Duration of coverage – Whether warranties are transferable in case of selling your house – What voids warranty terms (e.g., improper cleaning techniques)
Final Thoughts
Choosing a reputable window installation company requires research and diligence but pays off significantly by providing peace of mind during your project. By evaluating credentials carefully while balancing costs with quality service guarantees—and factoring in insights from customer feedback—you can confidently hire professionals who align perfectly with your needs.
The Benefits of Scheduling a Free In-Home Consultation for Window Replacement
When it comes to replacing your windows, scheduling a free in-home consultation is one of the smartest decisions you can make. This step provides homeowners with valuable insights, allowing them to make informed choices while ensuring their investment aligns with their needs and preferences. Below are some of the key benefits of taking advantage of this service.
Personalized Assessment
- The current condition and efficiency of your windows
- Specific measurements for precise fitting
- Design considerations that complement your home’s architectural style
- Any structural challenges that may need attention
This customized assessment ensures that the proposed solutions are tailored to your home rather than offering one-size-fits-all options.
Improved Cost Transparency
| Factor | Impact on Cost |
| Number of windows | More windows mean higher overall costs |
| Window materials | Wood, vinyl, or composite affect pricing |
| Energy efficiency options | Higher ratings may increase upfront cost but save money long-term |
| Installation complexity | Unique designs or older homes may require specialized work |
This process eliminates surprises down the line and allows homeowners to budget effectively.
Expert Recommendations on Styles and Features
- Frame materials: Vinyl, fiberglass, aluminum, or wood options based on durability and appearance
- Glass types: Single-pane vs. double/triple-pane for energy efficiency and noise reduction
- Design styles: Double-hung, casement, bay/bow windows, sliding windows, etc.
Professionals can also guide you toward additional features like UV coatings or impact-resistant glass if applicable to your climate.
Addressing Questions in Real-Time
- How long will installation take?
- What steps are involved in removing old windows?
- Are there warranties for both products and labor?
Having clarity on these concerns helps set realistic expectations about the project timeline and deliverables.
Confidence in Your Decision-Making
Making major changes to your home can feel overwhelming without proper guidance. A free consultation simplifies decision-making by providing all necessary information upfront in a professional setting where you don’t feel pressured into making commitments prematurely. This allows homeowners time to thoroughly review their options before proceeding confidently.
Scheduling an in-home consultation is a straightforward way to start any window replacement project off right—combining convenience with detailed insights catered specifically to your needs. With no obligation involved, it’s simply a value-added opportunity worth considering when planning this important home improvement task.
Preparing Your Home for a Successful Window Installation Day
Proper preparation is key to ensuring a smooth and efficient window installation process. Taking the time to ready your home can minimize disruptions, protect your belongings, and allow the installers to focus on their work. Below is a comprehensive guide to help you prepare your home for a successful window installation day.
Clear the Installation Area
- Remove Furniture: Move furniture, such as couches or tables, at least three feet away from windows. This creates enough space for installers to maneuver their tools and materials.
- Take Down Window Treatments: Remove curtains, blinds, shades, or valances from all windows scheduled for replacement. This allows installers direct access to the window frames.
- Clear Decor: Take down any wall hangings, artwork, or decor positioned near windows as vibrations from tools may cause them to fall.
Protect Your Belongings
- Use drop cloths or plastic sheeting to cover furniture and floors in rooms where windows are being replaced.
- Remove fragile items like vases, picture frames, and collectibles from shelves near installation areas.
- Place outdoor furniture near windows in a secure location or cover it with protective tarps if moving it isn’t an option.
Ensure Access for Installers
- Unlock doors and gates that provide access to your property.
- Remove obstructions like potted plants or garden equipment near exterior window locations.
- Keep pets in a secure area away from installation zones for their safety and that of the crew.
Communicate Special Requirements
If there are unique aspects of your property that could affect installation (e.g., difficult-to-reach windows), inform the company ahead of time so they can plan accordingly.
Consider Safety Precautions
- Keep children away from work areas during installations.
- Ensure pathways leading into work zones are free of tripping hazards such as rugs or small objects.
- Avoid entering active work zones unless absolutely necessary.
Create an Organized Timeline
Discuss timelines with your installer beforehand so you know what areas of your home will be impacted each step of the way.
| Preparation Activity | Recommended Timeframe |
| Furniture removal | 1–2 days prior |
| Window treatment removal | 1 day prior |
| Covering belongings | Day of installation (morning) |
| Securing outdoor spaces | 1 day prior |
Proper planning ensures everything runs efficiently on installation day while keeping your home safe and organized throughout the process.
Preparing Your Home for a Successful Window Installation Day
Proper preparation is key to ensuring a smooth and efficient window installation process. By taking the time to prepare your home, you can not only help the installers work more effectively but also protect your belongings and reduce any disruptions. Below are practical tips to get your home ready for window installation day.
Clear the Work Area
- Removing furniture: Move couches, tables, and other large items away from windows where work will take place.
- Taking down window treatments: Remove all blinds, curtains, shades, and rods from the windows being replaced.
- Clearing decor: Take down wall hangings or decorations near the installation area to avoid accidental damage.
For rooms with limited space, consider temporarily relocating furniture to another part of the house. This will create ample room for tools and equipment.
Protect Your Belongings
- Cover nearby furniture with drop cloths or plastic sheeting.
- Roll up area rugs in rooms where installation will occur.
- Seal vents in those areas to prevent dust from spreading throughout your home.
Additionally, if possible, designate storage spaces for fragile or valuable items outside of high-traffic zones.
Provide Outdoor Access
- Removing patio furniture near exterior windows.
- Clearing pathways leading to entry points or around landscaping.
- Unlocking gates or outdoor barriers before the team arrives.
These steps will minimize delays caused by restricted access.
Prepare Kids and Pets
- Arrange for pets to stay in a closed room or offsite during work hours.
- Explain the process to young children so they understand which areas are off-limits during installation.
If needed, consider scheduling activities outside of the house on installation day.
Confirm Installer Requirements
- Will they require access to power outlets?
- Should you provide any materials like ladders?
- Are there parking requirements for their vehicle(s)?
Addressing these details ahead of time ensures a seamless workflow on installation day.
Checklist: Preparing for Window Installation
| Task | Completed? |
| Remove furniture near windows | [ ] |
| Take down curtains/blinds | [ ] |
| Cover nearby furniture & rugs | [ ] |
| Clear outdoor areas around windows | [ ] |
| Secure children & pets | [ ] |
| Confirm installer requirements | [ ] |
By following these steps and utilizing this checklist, you’ll help set up a smooth process while minimizing stress associated with major home improvement projects. Taking proactive measures ensures that both homeowners and professionals experience an efficient and successful window installation day.
Preparing Your Home for a Successful Window Installation Day
Proper preparation is essential to ensure a smooth and efficient window installation process. By taking the time to get your home ready, you can minimize delays, protect your belongings, and create a safe workspace for the installation team. Below are steps and tips to prepare your home for a stress-free window installation day.
Clear the Work Area
To allow installers to work without obstruction, clear any furniture or décor near the windows being replaced. This includes:
– Moving furniture at least 3-4 feet away from the windows.
– Removing curtain rods, blinds, or any other window treatments.
– Taking down nearby wall hangings or fragile decorations that could be disturbed during installation.
Protect Your Belongings
Window installation can create dust and debris, so it’s important to protect your belongings:
– Use drop cloths or plastic sheets to cover furniture and floors in the work area.
– Consider temporarily relocating valuable or delicate items (e.g., electronics, artwork) to another room.
Provide Access Inside and Outside Your Home
Installers will need access both inside and outside your home to properly remove old windows and install new ones. To facilitate this:
– Unlock any gates or fences that lead to exterior windows.
– Trim bushes, trees, or plants near outdoor windows so they don’t obstruct access points.
Prepare for Noise and Disruption
Window installation can be noisy at times due to tools such as drills or hammers being used:
– Inform family members about potential disruptions ahead of time so they can plan accordingly.
– If you have children or pets sensitive to loud noises, consider making arrangements for them in another part of the house during installation hours.
- Step-by-Step Guide to Window Replacement Rockville, MD Homeowners Can Trust
- 6 Essential Things to Consider Before Window Installation Rockville, MD
- Expert Tips for Window Installation Rockville, MD: Reputation and Experience Matter
- Essential Factors to Consider When Replacing Windows in Rockville, MD Homes
- Choosing Windows Rockville, MD: DIY vs Professional Installation for the Best Results
- Identifying a Broken Window Seal and Replacement Options for Windows Rockville, MD
- Understanding Window Replacement in Rockville, MD: Full vs. Glass Only