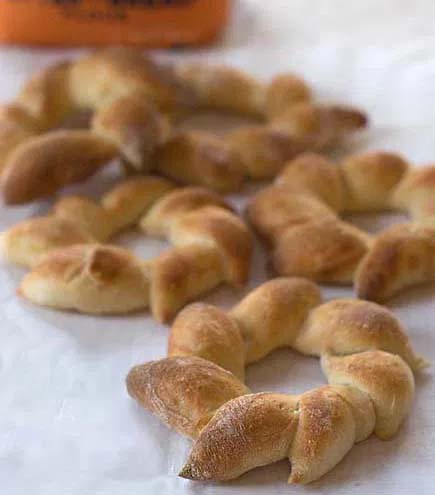
Every year I bring my onion and rosemary focaccia to the our dear friend’s neighborhood Super Bowl party. It’s a real crowd-pleaser, and a perfect accompaniment to the savory dips and platters that typically ring the buffet table. And our hosts always serve ice cream bars at halftime so we can munch while we enjoy the show. No complaints! But this year, in honor of Bad Bunny’s halftime performance, I’m making the case for Mallorcas (pronounced “my-yorkas,” more or less), a sweet, fluffy Puerto Rican treat. I think they’ll be a lovely counterpoint to the usual salty snacks.
Easy to assemble and beautiful under a snowy dusting of powdered sugar, Mallorcas are made from sweet enriched dough wound into a coil. You can make them from brioche dough (very rich) or challah dough (slightly less rich). Both are delicious.
Laura and I spent a fabulous week in Puerto Rico years ago for a destination wedding, where we discovered other culinary delights, like tres leches and arroz con dulce, and admired sun-drenched, candy-colored streetscapes like this one in Old San Juan …
A hundred years ago, my grandmother came to this country at age 22, having grown up on plain Eastern European fare like beets, cabbage, and potatoes, plus the occasional meat or fish when her family could afford it. Sweet desserts weren’t really in the picture. In America, when others would grab a doughnut to go with coffee, she’d ask for rye bread, put cheese on it, and declare that it was “better than cake” (the originally proposed title of Artisan Bread in Five Minutes a Day). I like sweets well enough, but, like Grandma, I tend to find things too sweet. I crave savory flavors first and foremost, even at the holidays, when everyone else is relishing sweet baked goods. There are plenty of enriched, sweet holiday loaves made with my five-minute dough here on this website (like stollen, panettone, and sufganiyot). If you’d like to sample those, click here. But if you’re like me, and you want something festive-looking but more like bread than cake, read on. This wreath loaf is a showstopper, easy to make and delicious. Why should dessert get all the glory?
Readers have been asking me about baking stones for holiday gifts, which I heartily endorse, so here’s my rundown of the options. Baking stones are sometimes sold as “pizza” stones, but no matter how they’re labeled, they’re great for freeform loaf breads as well.
My Top Pick: Ceramic
My personal favorite for a ceramic stone, when I’m making more than one bread or pizza, is a large rectangle, so there’s little chance of stray ingredients going overboard and burning on the bottom of your oven:
1. The Old Stone brand 14-Inch by 16-Inch baking stone. Note that none of the ceramic stone manufacturers guarantee their product against eventual cracking, but my Old Stone is over 20 years old and still going strong. It’s heavy and a half-inch thick, so it’s got lots of heat mass, producing a great crust, as long as it is properly preheated. I prefer a 40-minute preheat with a stone this thick, or even an hour. And because of the large size, you can bake multiple loaves or small pizzas and nothing falls off the edge. Old Stone also makes a 16-inch round versionand it’s considerably lighter. Note: I’ve avoided the Pampered Chef ceramic stones because readers have written to say that they’re prone to cracking and I had the same experience with a borrowed one (awkward).
… on to a couple of metal options:
My Top Pick: Metal
2. When I’m making a single bread or pizza, I prefer using lighter, pre-seasoned cast-iron. The Lodge Cast-Iron 14-Inch Pizza Pan is virtually crack-proof, unlike thin ceramic stones (not the Old Stone above). Cast-iron has different properties so it can preheat in 20 minutes and still create a crispy, caramel-colored bottom crust (your oven’s result may vary, so experiment to be sure the short preheat is working for you). It can even be preheated, at least partially, on the stovetop! Because iron conducts heat fast, it also cools off quicker.
Splurge Pick
3. Another indestructible non-ceramic “stone” is the Baking Steel (its actual brand name). Like the Old Stone ceramic above, it’s large, so it prevents ingredients from going overboard. It works well, but it’s pricey:
Budget Pick
4. If you’re not ready to invest in a pizza/baking stone, heavy-gauge baking pans are a reasonable option. I like the uncoated Chicago Metallic pan, and though you won’t get as crisp a crust, it’s great for newbie bakers and especially good if you’re in a hurry (quick preheat). Preheat the pan and put the bread or pizza (well-dusted) directly onto it, without parchment or Silpat to get the crispest crust. If you use parchment or a Silpatbe sure to remove it for the last few minutes of baking to crisp up the bottom crust (watch for manufacturers’ recommendations on maximum allowable temperature). You can also take the bread or pizza off the pan and crisp up the crust directly on an oven rack.
Reconsidered Pick
5. In the past I’ve recommended unglazed, food-safe terra cotta garden tiles, mostly because they’re easy to find and inexpensive. But they’re thin and small, so you have to push several together to make it work. The one time I tried this (at a demonstration; again, awkward), flour and cornmeal slipped between the tiles and burned on the bottom of the oven for a smoky mess, so I’ve since avoided them. If you’ve had better luck, let me know!
Also Nice to Have
What if your giftee already has a baking stone? Bench Scrapers are excellent for cleaning ceramic stones. Use one to scrape off excess flour, cornmeal or cheese. AVOID SOAP or your stone may impart a soapy taste or odor. Just use hot water and let it dry slowly in a cool oven to avoid cracking. For the Lodge pre-seasoned cast-iron pan, scrape it if there’s visible thick, burned-on gunk. You can then brush it with hot soapy water, according to Lodge’s care instructions.
Food and pizza for thought, no? Happy December, everyone. More soon!
Note: BreadIn5.com is reader supported–when you buy through links on the site, BreadIn5 LLC earns commissions.
I’ve talked about using stand mixers before, and it’s not required for my method… but it’s nice to have. There are Black Friday deals around for the KitchenAid brand, which is the only one I’ve ever used (10 years on now so it’s pretty durable). Here’s a Black Friday sale link to a five-quart Tilt-Head KitchenAid, for which is big enough for a full batch of the Master Recipe.
We’re doing the restaurant route with friends again this year. It’s sure to be a decadent, relaxing treat, but we already know we’ll miss the leftovers — maybe the best thing about Thanksgiving? So, Laura and I are going to cook a mini-Thanksgiving of our own favorites sometime this weekend. We don’t mind turkey twice in one week, so long as it’s dark meat. And since it’s just the two of us, we’ll probably just ask our butcher to save us a couple of thighs. (Bonus: turkey parts are much easier to roast than the whole bird.) Laura will make a pumpkin pie, and, as always, I’ll be making my grandmother’s stuffing recipe. Traditional cranberry sauce, mashed sweet potatoes, and of course, Parker House Style Rolls will be on the menu too; scroll down for links to the recipe, and nine others. Happy Thanksgiving!
Philosopher Henry David Thoreau was an environmentalist and early naturalist. In 1845 he built a tiny one-room cabin on the shores of Walden Pond in Concord, Massachusetts, to experiment with living simply and deliberately. There he grew and gathered his own food and wrote in his journals—living off the grid before there was a grid.
Thoreau even made his own bread. He was inspired by a traditional bread of the Indigenous people of his beloved Massachusetts: unleavened cornmeal flatbread. In his famous book Walden; or, Life in the Woods (1854), he wrote:
“… Bread I at first made of pure cornmeal and salt, genuine hoe-cakes [sometimes made on the blade of a hoe], which I baked before my fire out of doors on a shingle on the end of a stick of timber sawed off in building my house; but it was wont to get smoked and to have a piny flavor. I have tried flour also; but have at last found a mixture of rye and cornmeal most convenient and agreeable…”
Unleavened, smoked, and piny? Not too appealing. But reading about Thoreau’s recipe got me thinking about Anadama Bread, another New England specialty, which also includes cornmeal. And what could be lovelier in fall than the aroma of Anadama warming your own soon-to-be chilly kitchen?
The version here is not quite so flat as Thoreau’s, but not as lofty as more typical Anadama bread, which generally calls for all-purpose flour, cornmeal, molasses, and milk or butter. It is closely associated with New England, and Massachusetts in particular—possibly Rockport and Gloucester, two of my favorite towns in the world. The cornmeal lends great flavor; if you love it, like I do, you may also appreciate a Portuguese cornbread that appeared in The New Artisan Bread in Five Minutes a Day. A version of that recipe and a Portuguese fish stew to go with it is here on the website, and as it happens the Portuguese fish stew is also associated with Gloucester and coastal New England.
This Thoreau-inspired loaf is delicious, with a touch of warmth and sweetness from the molasses, a subtle crunch from the cornmeal, and the savory depth of rye. It makes what is perhaps my all-time favorite toast for breakfast, and freezes (after slicing) exceptionally well. Expect 2-inch (5 cm) high slices (keep scrolling here if you’re seeing a blank space).
If you’re new to my method, start with my basic loaf then check back here, where you’ll note I’m presenting this recipe as a 2-pound single loaf, rather than a big dough-batch for daily baking. That said, you can double the recipe and store the dough for up to five days. And though I’m jumping the gun, Anadama would be a great addition to the Thanksgiving table next month. Be aware that cornmeal and rye can conspire to make for a dry crumb, so I mixed this as a very wet dough that can’t be handled or shaped at all, and won’t make a tall sandwich loaf:
1. Whisk together the flours, cornmeal, and salt in a 5-quart bowl, or, if you’re storing the dough, a lidded (not airtight) food container. Flavors will intensify with storage.
2. Combine the water, molasses, and yeast, then mix the liquid with the dry ingredients, using a spoon, a food processor (with dough attachment), or a heavy-duty stand mixer (with dough hook). With dough this wet, the stand mixer is the easiest way to go (scrape down dry bits with a spatula as you mix).
3. Use the spatula to pull the dough over itself to give the dough-mass some structure. This is hard to describe but you’ll see what I mean in these pictures:
4. Cover (not airtight), and allow the dough to rest at room temperature until it rises and collapses (or flattens on top), approximately 2 hours (it should double; go longer if it hasn’t). If you refrigerate the dough overnight, the flavor will intensify, and it can be refrigerated for up to 5 days (beyond that and you’ll find the results too dense).
5. Scrape the dough, doing your best to preserve a round shape, onto a heavy-gauge baking sheetprepared with parchment paper, allowing it to settle by itself into a flat-ish round. Do not try to flour and handle this very wet dough.
6. Allow to rest, loosely covered with an overturned bowl for 90 minutes.
7. Thirty minutes before baking time, preheat the oven to 450°F. Place an empty metal broiler tray on any other rack that won’t interfere with the rising bread.
8. Just before baking, use a pastry brush to paint the top crust with water. Slash the loaf with 1⁄2-inch-deep crossed cuts, using a serrated bread knife.
9. Slide the loaf directly onto the hot stone (or place the silicone mat or cookie sheet on the stone if you used one). Pour 1 cup of hot tap water into the broiler tray, and quickly close the oven door (if your oven window isn’t made of tempered glass, cover the window with a towel and remove before closing the oven door). Bake for about 30 to 35 minutes, until richly browned and firm, checking at the midway point for over-browning and decrease to 425F if needed. Carefully remove the parchment and bake the loaf directly on an oven rack half-way through baking. Because of the molasses, the crust will be very dark when the loaf is baked through.
10. Allow the bread to cool on a rack before slicing. You should end up with slices that are about 2 inches tall (5 cm).
Thoreau might approve. Here he is in my backyard, not exactly the natural connection he was looking for, but still...
Subscribe to my newsletter and hear about every new post: click here.
Note: BreadIn5.com is reader supported. When you buy through links on the site, BreadIn5 LLC earns commissions.
It’s the heart of summer now, and with Fourth of July entertaining on the immediate horizon (and super-hot temps all over the country), the grill is the place to bake bread if you don’t want to heat up the kitchen — and yes, it works. I’ve posted many gas-grill recipes over the years, because its such a great way to keep baking fresh bread in the warm months. Readers tell me it can be done on a charcoal grill (live coals), but it takes a lot more practice and results may vary. I find that the controllable heat from a gas grill is a better bet. A simple grilled flatbread is the easiest place to start — no toppings to monitor, and it never fails. A perfect accompaniment for summer salads and dips. Scroll down for details. Other summer posts:
As the holidays approach, people have been writing to ask where they can buy my holiday and celebration book. It’s become very hard to find because it’s been out of print for a while. You can find used copies at online sellers and used bookstores. But if you like Amazon Kindle electronic books, and you’re a Kindle Unlimited subscriber, you can now read it for free! For more info or to sign up, click here.
And here’s a round-up of my favorite sweet and buttery recipes for the holidays (click here)!
For Thanksgiving last year, my wife, Laura, and I went out to eat with friends — a first for us. It was lovely, liberating, and delicious. But this year we wanted to bring it back home. After all, what is Thanksgiving without the leftovers? And, more seriously, we’ve been empty nesters for a couple of years now, so with family scattered, and still feeling the aftereffects of the pandemic and a stressful election season, we crave the comforts of home cooking. I’ll be making the turkey, gravy — and doing my stuffing recipe, of course. Laura will make the cranberry sauce and one of her killer pies. Our friends will bring the other fixings. All that’s left is the bread! To continue the theme of comfort, this year I’m making soft, Parker House–style rolls, an American classic. You can use any of my doughs, but I’ll be using lightly enriched challah dough (see below) from the New Artisan Bread in Five Minutes a Day to get the soft, pillowy texture everyone loves, yet a roll that’s firm enough for soaking up gravy and making leftover turkey sandwiches. (See how I came back around to leftovers?) If you’re feeling adventurous, try mixing fresh herbs (like thyme or tarragon) into the dough and/or adding seeds to the top (like sesame or pumpkin) before baking.
Wishing you all a happy and delicious Thanksgiving, and lots of leftovers. (For other Thanksgiving bread and stuffing ideas, click here.)
Ingredients: makes 4 1/4 pounds of dough, about 24 three-ounce buns
1 3/4 cups lukewarm water (you can weigh water–14 ounces/400 grams)
1 tablespoon Instant, Active Dry, or Quick-Rise yeast (1 packet)
1 tablespoon kosher salt, or other coarse salt (if you have a salty palate, you can increase up to 1.5 tablespoons)
4 large eggs at room temperature, lightly beaten
1/2 cup (6 ounces/170 grams) honey
8 tablespoons (1 stick–4 ounces/115 grams) unsalted butter, melted (or substitute 1/2-cup of any vegetable oil, including olive oil)
7 cups all-purpose flour (35 ounces/990 grams)
Egg wash for painting top of buns (one egg mixed with a tablespoon water, milk, or cream)
Butter for greasing the baking pans and spreading over the top
Instructions: the dough
Mix the yeast, salt, eggs, honey, and melted butter (or oil) with the water in a 5-quart bowl, or lidded (not airtight) food container.
Mix in the flour, using a heavy-duty stand mixer (with the dough hook), a Danish, dough whisk, or a wooden spoon, until all of the flour is incorporated.
Cover (not airtight), and allow to sit at room temperature for about two hours, or until about doubled. Dough can be used immediately after the initial rise, though it is easier to handle when cold, especially for this particular recipe. Refrigerate and use over the next 5 days.
Shaping and baking the rolls
Prepare two 9-inch baking pans with butter.
Lightly flour the surface of the dough and break off (or snip with kitchen scissors) 3-ounce balls of dough (about the size of a small peach). Shape them gently with minimal flour, taking care not to incorporate much flour into the balls. Place them in the prepared pans and cover loosely with plastic wrap.
Allow the buns to rest about 60-90 minutes.
Preheat the oven to 350 F degrees
Paint the tops of the buns lightly with egg wash using a pastry brush. Bake for 25-30 minutes, depending on the size. They should be golden brown.
While still hot, brush the tops with butter to keep the crust soft…
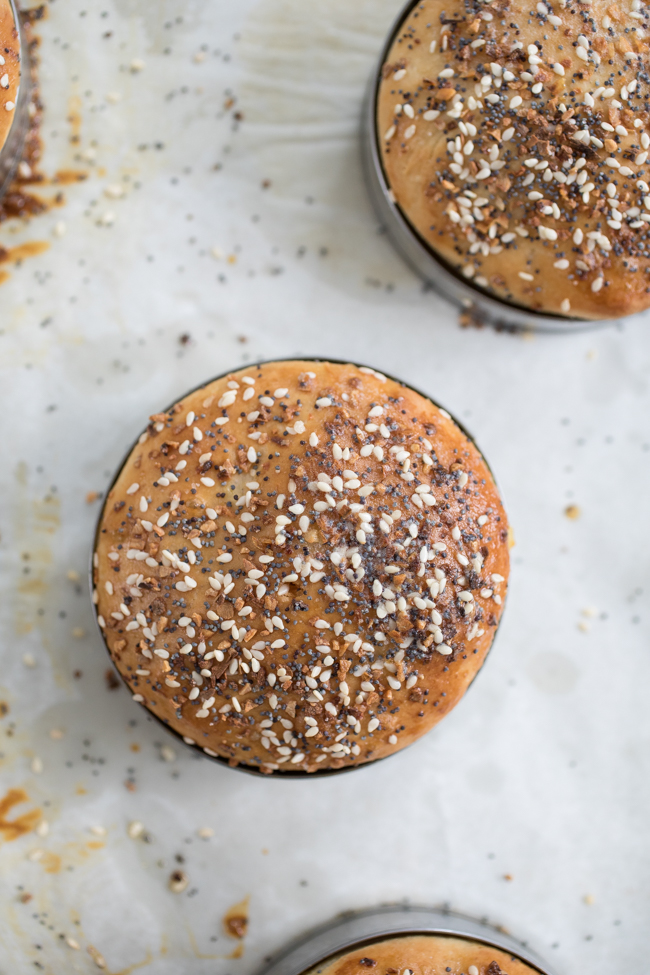
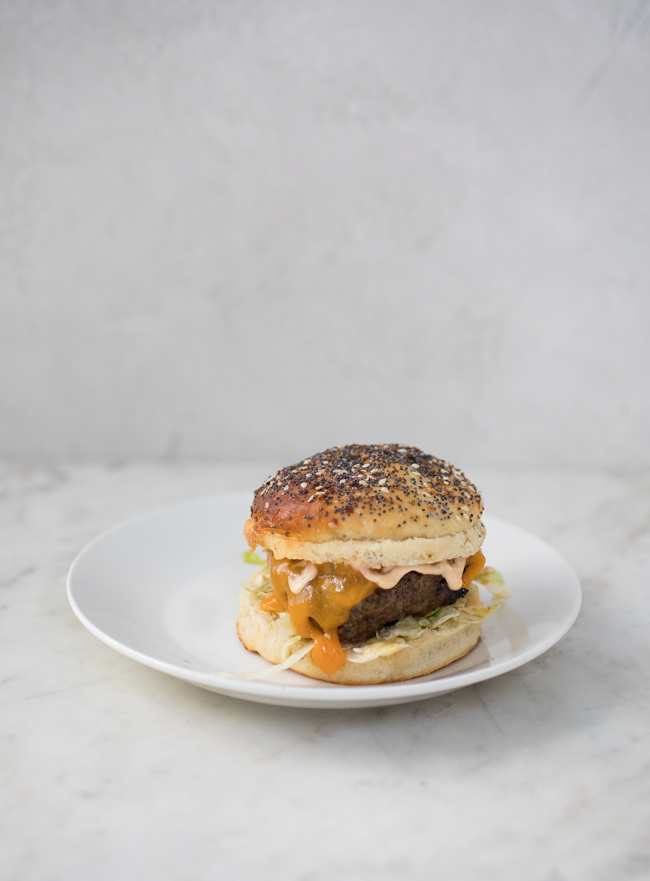
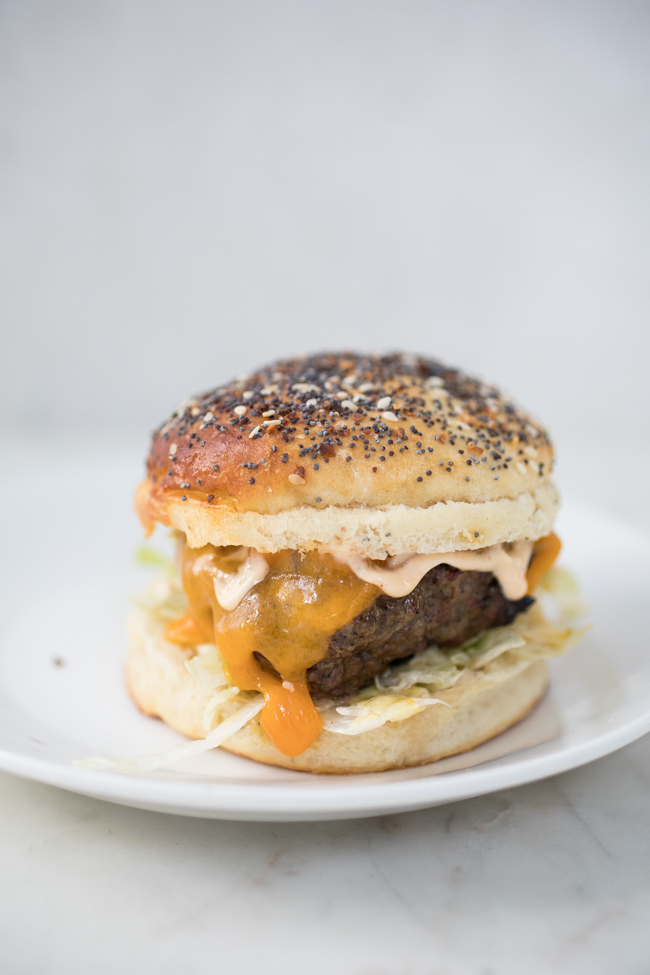
It’s almost Father’s Day and that might mean pulling out the grill this weekend and serving Dad up some serious burgers. Here’s a soft and delicious Potato Brioche Bun to serve alongside your favorite burger recipe, and it’s easy to put together. As with all my no-knead, refrigerated dough recipes, you can bake as little or as much as you want.
If cooking and mashing potatoes just seems like too much work (even for a holiday), you can always check out straight up Brioche Burger Buns, complete with Lamb Burger and Cilantro-Yogurt Sauce.
1 cup mashed Russet potatoes (sent through a food ricer for fine consistency, or mashed by hand)
8 tablespoons (1 stick) unsalted butter, melted
2 large eggs, room temperature
3 tablespoons granulated sugar
2 teaspoons yeast
1 1/2 teaspoons salt
4 cups all-purpose flour
Egg wash (1 egg whisked with 1 tablespoon water)
Seeds, for sprinkling (optional) – plain sesame seeds work fine; I used a bagel seed mix
Mix the water, potato, butter, eggs, sugar, yeast, and salt in a 5-quart bowl, or lidded (not airtight) food container.
Mix in the flour, using a spoon until all of the flour is incorporated.
Cover (not airtight), and allow to sit at room temperature for about two hours. Chill the dough for at least two hours, and up to 3 days.
The dough can be used as soon as it is chilled. This dough is way too sticky to use after the initial rise, but once it is chilled it is very easy to handle. That said, because potatoes can vary in their water-content, you may have to adjust the flour–you can add more after everything’s mixed, but give the dough a couple of hours on the counter to re-ferment or the buns will be dense.
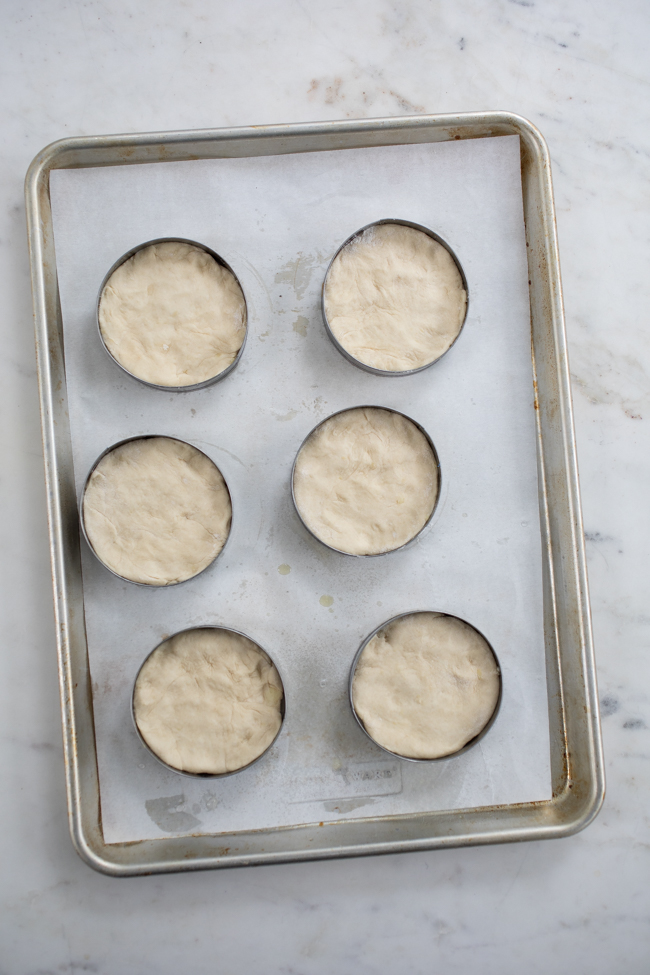
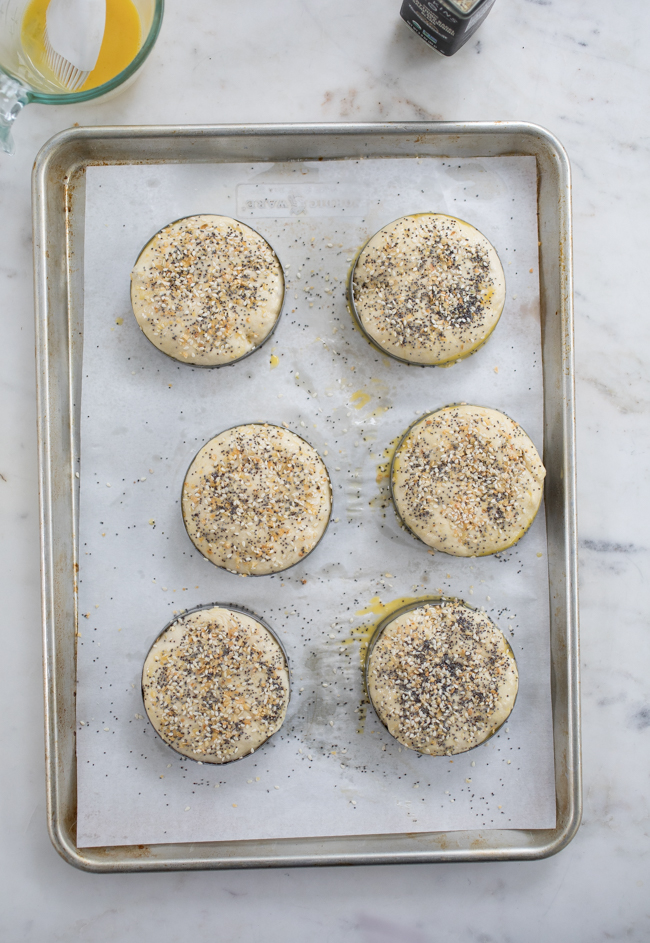
Divide the dough into 3 ounce pieces (this dough will make about 14 buns, but you can make less if desired). Gently smooth the pieces into round balls of dough. Grease six English Muffin Rings. Flatten the dough into 1/4-inch disks place them in the molds. If you don’t have rings you can make them free form, but they won’t keep their shape as well.
Cover loosely with plastic wrap (spraying the plastic with a little cooking spray will help it not to stick to the top of the buns) and allow the buns to rest for 30 to 60 minutes (depending on temperature of your kitchen), until the dough is just peeping over the top of the rings, and feels like a marshmallow when gently pressed/jiggled.
Place an oven rack in the center of the oven, and preheat your oven to 350 degrees.
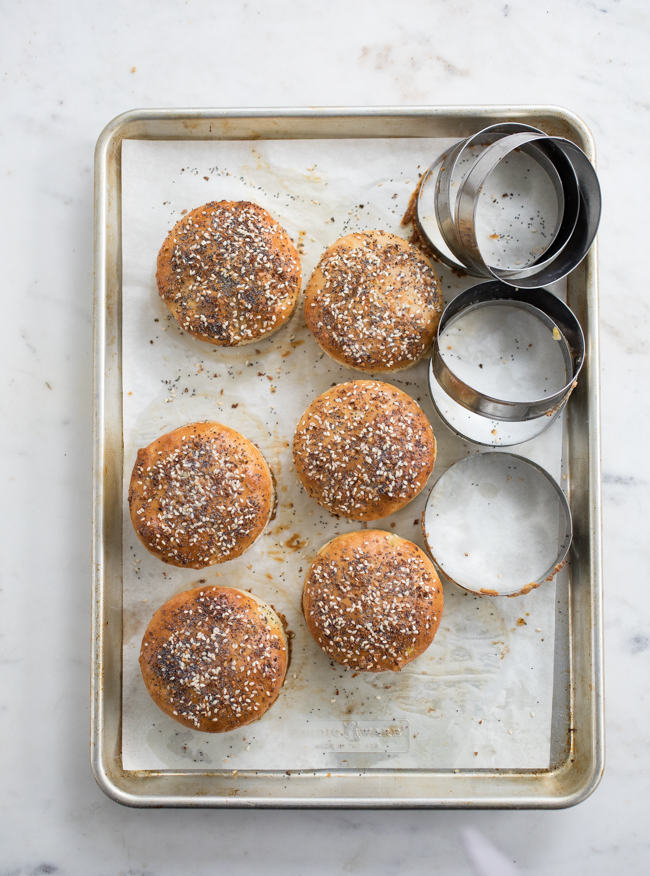
Use a Pastry Brush to paint on the egg wash, and then sprinkle with seeds if desired.
Bake for 20 to 25 minutes until they are golden brown (I baked with steam for an extra soft bun, but you don’t have to do that).
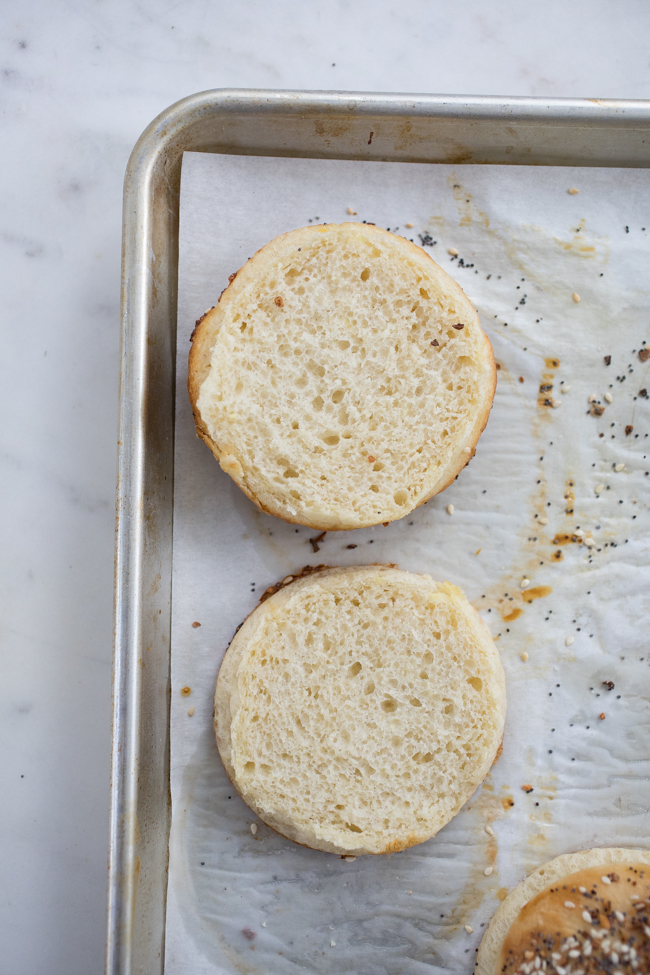
Perfect for loading with a burger and toppings, or just nibbling on with a slice of cheese.