Exporters From Japan
Wholesale exporters from Japan   Company Established 1983
CARVIEW
Select Language

There are so many quality, and free, image editing tools we can use nowadays that it can be difficult to choose the tool that will be most helpful for any given task or problem you’re trying to solve. Today we’ll focus on two tools that provide me with the most functionality while at the same time being easy to use.

If you’d like to use a powerful image editing tool that is fully compatible with Adobe Photoshop, and free to use, I’d recommend that you carve out 90 minutes to work through the following UVic Libraries Digital Scholarship Commons workshop: Image Editing with Photopea

For today we’ll look at 2 different tools to help use with traditional photo editing, and the other using Generative AI to modify existing images, or create completely new images.

Google Photos

If you have a Gmail account you can access Google Photos every easily. If you prefer Apple Photos then you can do everything below, except for “Magic Eraser”

  • Magic Eraser
  • Cropping
  • Filters

Gemini “Nano Banana” Image Creation

You can do similar things using Microsoft CoPilot, ChatGPT, or Google Gemini. I’ll be demonstrating Gemini today:

  • Create an image from a prompt only: “Create a photorealistic image of a killer whale jumping out of the water in the inner harbour of Victoria, BC Canada.” – Image
  • Create an action figure from an image: “Turn this pet into a collectible action figure, complete with a dynamic pose, detailed costume, and a glossy toy package box. Add a name logo on the box using the name Ziti Warrior Princess and make it look like something you’d see on a toy store shelf.” – Image
  • Remove the background from an image: “Leave the red object, and remove the background from the image and replace it with a pure, solid white backdrop.”Image

]]> https://richmccue.com/2025/10/24/edci-336-image-editing-intro/feed/ 0 6123 ANTH 100: Infographics with Canva & Zotero 1-Click Bibliographies https://richmccue.com/2025/03/28/anth-100-1-click-bibliographies-with-zotero-infographics-with-canva/?utm_source=rss&utm_medium=rss&utm_campaign=anth-100-1-click-bibliographies-with-zotero-infographics-with-canva https://richmccue.com/2025/03/28/anth-100-1-click-bibliographies-with-zotero-infographics-with-canva/#respond Fri, 28 Mar 2025 17:54:00 +0000 https://richmccue.com/?p=5798 Today, we’re going to cover two very different but important skills enabled by free to use software. I’ll demonstrate how Zotero can be a very useful tool and time saver when citing sources and creating a bibliography, but I’d encourage you to install and test it after class.:

  • Canva will help you create professional looking infographics without the help of a graphic designer. Here are the self-paced Canva Infographic workshop activities.
  • Zotero will help you save time, avoid heartache when citing sources and also help you create a bibliography with 2-clicks and in 5-seconds! Here’s the library workshop you can work through to learn about all it can do for you: Zotero Workshop (self-paced)

If you get stuck or have any questions during the workshop, please ask for help in the chat, and we will be happy to answer your questions or go to a breakout room to help you.

Resources:

]]>
https://richmccue.com/2025/03/28/anth-100-1-click-bibliographies-with-zotero-infographics-with-canva/feed/ 0 5798
Generative AI in K-12: Student Learning + Teacher & Admin Productivity https://richmccue.com/2025/01/29/generative-ai-in-k-12-student-learning-teacher-administrative-productivity/?utm_source=rss&utm_medium=rss&utm_campaign=generative-ai-in-k-12-student-learning-teacher-administrative-productivity https://richmccue.com/2025/01/29/generative-ai-in-k-12-student-learning-teacher-administrative-productivity/#respond Wed, 29 Jan 2025 21:44:26 +0000 https://richmccue.com/?p=5712
A double edge sword

Generative AI (GenAI) is top of mind as many educators struggle to address it with their students’ assignments, whether they don’t want their learners to use GenAI or if they want to model the responsible and ethical use of GenAI.

Workshop participants will explore the use of GenAI to assist with Student learning, and administrative support, as well as consider ethical and legal considerations. Participants will gain a basic understanding of GenAI and in the hands-on portion of the workshop, participants will explore GenAI tool usage and output evaluation for accuracy and biases. The workshop will also encourage informed, responsible GenAI use.

Learning Objectives

  • Understand GenAI: Define GenAI’s strengths & its limitations.
  • Using GenAI Effectively: Describe possible use cases for GenAI in school settings for administrators, teachers, & learners.
  • Practical Applications: Demonstrate how to write effective prompts for GenAI tools for academic, instructional, & administrative purposes.
  • Evaluate Quality & Reliability: Demonstrate how to critically evaluate the outputs of GenAI tools, for things like accuracy, relevance, & biases.
  • Ethical & Environmental Considerations: Describe some of the issues around the responsible use of GenAI in education.
  • District GenAI Policies: Explore district-level GenAI policy templates & examples.

Presentation Slides

Here is a link to the slides from my presentation to the Island Chapter of the BC School Superintendents Association. Below the embedded slides are hands-on activities, plus links to additional resources & suggested next steps.

Hands-on Activities

If you have experience with Generative AI tools I’d recommend you check out each activity in tern and skim over the activities until you encounter something that is new or interesting to you. If you’re fairly new to using GenAI tools then I’d suggest you start working through the first activity and go from there.

GenAI Intro & Prompt Design (Intro)

If you’re fairly new to using GenAI tools then this is where you will want to start with a gentle introduction to the sorts of things GenAI could potentially help you with: GenAI: Introduction & Prompt Design (Introduction)

NotebookLM a Personal Tool for Research & Productivity (Intermediate)

Notebook LM is a great Google tool that is free for anyone to use. It allows you to specify specific documents for it to use as data sources to respond to the prompts you give it, which makes it less likely to make mistakes or hallucinate. It does so much more as well and is one of my current favourite tools. Here’s the link to the workshop materials: GenAI: NotebookLM a Personal Tool for Research & Productivity (Intermediate)

  • Use the built-in prompts in the “Notebook guide” to quickly create: Briefing documents & an Audio summary of the documents in a 2-person podcast format
  • Prompt NotebookLM to create a summary based on who is the intended audience for the summary, and the purpose of the summary (for example meeting notes).
  • Summarize and analyze research literature such as journal articles, reports, presentations and videos including citations. Verify all facts and claims.
  • Summarize large numbers of short-answer survey responses, to help you quickly understand the key issues being brought up by respondents.

Transcription with Free AI Tools (Intermediate)

Transcribe audio and videos with locally installed software using the open-source and free-to-use Whisper.ai: Transcription with Free AI Tools (Intermediate)

  • Transcribe audio or video with Microsoft 365, Whisper.ai, & Zoom
  • Learn about the benefits and use cases for transcribing audio with Microsoft 365, Whisper.ai, & Zoom compared to other transcription technologies

Running GenAI Tools on Your Laptop (Advanced)

explore the use of Generative AI (GenAI) including installing and using local Generative AI software on a laptop, using specific documents as the training data for the GenAI tool, and performing sentiment analysis on free from survey questions. In the hands-on portion of the workshop, participants will explore GenAI tool usage and output evaluation for accuracy and biases: GenAI: Research Tools (Advanced)

  • Explore the use of advanced GenAI tools & techniques including installing and using local GenAI software
  • Explore GenAI tools using specific documents as the training data, analyze datasets, perform sentiment analysis on free-form survey questions, & assist with qualitative coding

Suggested Readings to Assist in Developing a District GenAI Policy

Recommended Books

Free GenAI Training from UVic Libraries

Generative AI (GenAI) tools are truly double-edged swords. They can be helpful to subject-area experts, making their work more efficient. However, for those who lack subject expertise, these tools can lead to embarrassment or worse if the facts and analysis provided by GenAI tools are not checked for accuracy.

This UVic Libraries GenAI workshop pathway series is designed to help subject area experts and non-experts, by offering foundational to advanced research & productivity skills training.

  1. GenAI: Introduction & Prompt Design (Introduction)
  2. AI: Tools for Literature Reviews (Introduction)
  3. GenAI: Spotting AI-generated content online (Introduction) – COMING SOON
  4. GenAI: NotebookLM a Personal Tool for Research & Productivity (Intermediate)
  5. Transcription with Free AI Tools (Intermediate)
  6. GenAI: Presentation & Multi-Media Tools (Intermediate) – COMING SPRING 2025
  7. AI: Tools for Literature Reviews (Advanced) – COMING SPRING 2025
  8. GenAI: Research Tools (Advanced)
]]> https://richmccue.com/2025/01/29/generative-ai-in-k-12-student-learning-teacher-administrative-productivity/feed/ 0 5712 Generative AI Meets Legal Education: Adapting to Change https://richmccue.com/2025/01/15/generative-ai-meets-legal-education-adapting-to-change/?utm_source=rss&utm_medium=rss&utm_campaign=generative-ai-meets-legal-education-adapting-to-change https://richmccue.com/2025/01/15/generative-ai-meets-legal-education-adapting-to-change/#respond Wed, 15 Jan 2025 19:48:12 +0000 https://richmccue.com/?p=5696 Presentation Slides

Here is a link to the presentation slides from my presentation to the Legal Educators about Generative AI & Legal Education. Below the embedded slides are links to additional resources & suggested next steps.

Resources & Next Steps

]]>
https://richmccue.com/2025/01/15/generative-ai-meets-legal-education-adapting-to-change/feed/ 0 5696
Flying Like a Bird: Childhood Dream Achieved https://richmccue.com/2024/12/28/my-first-fpv-drone-fligh/?utm_source=rss&utm_medium=rss&utm_campaign=my-first-fpv-drone-fligh https://richmccue.com/2024/12/28/my-first-fpv-drone-fligh/#respond Sat, 28 Dec 2024 21:50:00 +0000 https://richmccue.com/2024/12/26/my/ I achieved a childhood dream of mine today: flying like a bird… this was facilitated by First Person View goggles and my little DJI Neo drone. Here’s me swooping around the back yard while I’m physically standing on the deck. Not quite me flying by myself, but I was seeing everything like I was a sparrow or humming bird zooming around the back yard. 🙂

Here’s what I looked like while I was “flying”:

If you’re interested in a DJI Neo drone you can see what I used for this video:

Let me know if you give the little DJI Neo drone a try! For just $249 you can buy just the drone and one battery, but if at all possible I’d recommend starting with the Fly More combo. Enjoy!

]]>
https://richmccue.com/2024/12/28/my-first-fpv-drone-fligh/feed/ 0 5531
My Amazingly Versatile $249 DJI Neo Drone https://richmccue.com/2024/12/22/my-amazingly-versatile-249-dji-neo-drone/?utm_source=rss&utm_medium=rss&utm_campaign=my-amazingly-versatile-249-dji-neo-drone https://richmccue.com/2024/12/22/my-amazingly-versatile-249-dji-neo-drone/#respond Sun, 22 Dec 2024 16:25:55 +0000 https://richmccue.com/?p=5489 I bought the little DJI Neo drone for my birthday and have been loving it! The drone alone cost only $250 CDN and last weekend I was able to take the following beautiful panoramic video of my neighbourhood, and the San Juan Islands that are just of the coast of Victoria, BC:

My neighbourhood in Victoria, BC, Canada

Admittedly for the panoramic video above, I was using a controller and extra batteries that came with the $445 CDN DJI Neo Fly More package, but the quality of the video and photos that you can get out of this little drone are amazing.

The DJI Neo drone.

After testing the out in my back yard a couple of times, I took it on a day hike to Englishman River Falls, and used the built-in AI powered “Follow Me” mode show off some of the trails and log bridges along the river. You’ll notice at the beginning of the video how useful the propeller guards are as the drone bumps into a tree and then continues following me.

River trail & bumping into a tree & recovering.

The follow me mode, and five other built-in modes, do not require a controller and could be done with the $249 package. The Neo weighs only 128 grams, which is about 1/3 of the weight of a Tall Starbucks coffee. Its compact size, light weight, and propeller guards make it an excellent drone for quick videos while hiking or exploring.

The video below is a quick Rocket mode shot on the banks of the Englishman River. I have the height setting at 10 meters for this video which is the maximum height for this preset mode. The default height for this mode is 4 meters.

Circle mode is a fun way to show off what things look like when you’re in an open location with obstacles or people close by. You can vary the distance of the circle, up to 10 meters, which you can see in the video below.

Direction tracking mode is a great way to record video from beside you rather than from behind in Follow mode. Because the Neo doesn’t have any object avoidance detection capabilities, you’ll need to make sure that there isn’t anything in front of it that it will run into as it tracks you.

In this last video I use the controller in DJI Neo Fly More package, to orbit around a little condominium taking videos and photos as part of a roof inspection. When you’re taking longer videos like this it’s good to keep in mind that the rate fly time is 18 minutes, in a more real world setting with a bit of wind, I’m able to fly between 12-15 minutes.

As I said at the start, I’m loving playing with my little DJI Neo drone, and using it for some real work. The drone itself costs only $249 CDN, and you can manually control it with your phone, but are limited to flying it a distance of 50 meters away from you, and 30 meters hight.

The DJI Neo Fly More Combo with a controller, extra batteries and a charging station.

If you’re ready to buy one for yourself, I’d highly recommend purchasing the controller in Fly More package for $445 CDN. It comes with the drone, a controller, and 2 extra batteries to extend the time you’re able to fly. The controller allows you to fly it a maximum of 7 kilometres away from you to an altitude of 120 meters.

Have fun and fly safely!

]]>
https://richmccue.com/2024/12/22/my-amazingly-versatile-249-dji-neo-drone/feed/ 0 5489
From Self-Driving Cars to ChatGPT: AI Demistified in 20-Min https://richmccue.com/2024/11/13/from-self-driving-cars-to-chatgpt-demystifying-artificial-intelligence-in-20-minutes/?utm_source=rss&utm_medium=rss&utm_campaign=from-self-driving-cars-to-chatgpt-demystifying-artificial-intelligence-in-20-minutes https://richmccue.com/2024/11/13/from-self-driving-cars-to-chatgpt-demystifying-artificial-intelligence-in-20-minutes/#respond Wed, 13 Nov 2024 18:12:06 +0000 https://richmccue.com/?p=5333 Presentation Summary

In my presentation to the Canadian Club, I talked about what Artificial Intelligence (AI) is by using examples from movies and everyday life. We also explored the workings of AI and Generative AI (GenAI), detailing at a high level how large datasets and statistical models power them. We also reviewed some of the limitations of AI tools, discussed their use in various industries such as healthcare, finance, transportation, and education, and speculated about the future of AI and its potential impact on society. I concluded the presentation with resources for further exploration and reading.

Resources Referenced in the Presentation

Presentation Slide Show

If you’d like to see the whole slide show, including speaker notes (which contain many of the links to resources mentioned in the presentation, please check out the complete presentation. Below are the presentation slides without speaker notes:

AI Drone video following Rich around:

]]>
https://richmccue.com/2024/11/13/from-self-driving-cars-to-chatgpt-demystifying-artificial-intelligence-in-20-minutes/feed/ 0 5333
Moo Deng Drawing with Free Apple iPad App https://richmccue.com/2024/11/09/moo-deng-drawing-with-apple-freeform/?utm_source=rss&utm_medium=rss&utm_campaign=moo-deng-drawing-with-apple-freeform https://richmccue.com/2024/11/09/moo-deng-drawing-with-apple-freeform/#respond Sat, 09 Nov 2024 17:31:00 +0000 https://richmccue.com/2024/12/21/moo-deng-drawing-with-apple-freeform/ I had fun this morning doodling a Moo Deng on my iPad using the free pre-installed Apple FreeForm drawing tool. I was inspired by an Instagram short. Enjoy!

by Rich McCue

A short video showing how I drew it:

]]>
https://richmccue.com/2024/11/09/moo-deng-drawing-with-apple-freeform/feed/ 0 5486
Electric Car Winter Tips https://richmccue.com/2024/11/03/electric-car-winter-tips/?utm_source=rss&utm_medium=rss&utm_campaign=electric-car-winter-tips https://richmccue.com/2024/11/03/electric-car-winter-tips/#respond Sun, 03 Nov 2024 16:38:00 +0000 https://richmccue.com/2024/12/21/electric-car-winter-tips/ Tesla has helpfully published some tips for electric car owners who live in colder climates: Winter Driving Tips

Here’s my sketchnote cheat sheet:

Drawn by Rich McCue

]]>
https://richmccue.com/2024/11/03/electric-car-winter-tips/feed/ 0 5485
Anthropology Excel Pivot Table Activity – Intermediate https://richmccue.com/2024/09/17/anthropology-excel-pivot-table-activity-intermediate/?utm_source=rss&utm_medium=rss&utm_campaign=anthropology-excel-pivot-table-activity-intermediate https://richmccue.com/2024/09/17/anthropology-excel-pivot-table-activity-intermediate/#respond Tue, 17 Sep 2024 20:41:37 +0000 https://richmccue.com/?p=5235 Please re-create the pivot table below, using the following data set: Excel data.

If you get stuck, you should probably work through the Pivot table and charts activity in the DSC Excel workshop. If still stuck please ask the instructor for help.

Next Pivot Table tasks:

  1. Sort the pivot table by the “Total” column.
  2. Look at the categories in the pivot table and identify fields that should be combined or collapsed. Go to sheet #1 and search and replace the misspelled fields in the “data cat” field.
  3. Create a chart based on the cleaned data now in the pivot table.

Questions to reflect on and discuss after completing the pivot table:

  1. Why are there so many similar categories in the “data cat” field?
  2. Could some categories be collapsed together to make the table (and any charts made from it) easier to read without losing any important information?
  3. What are two or more other fields that it would be interesting to create pivot tables on?
]]>
https://richmccue.com/2024/09/17/anthropology-excel-pivot-table-activity-intermediate/feed/ 0 5235
Supercharge Your Makerspace Instruction Using the Lumi Multimedia Toolkit https://richmccue.com/2024/08/26/supercharge-your-makerspace-instruction-using-the-lumi-multimedia-toolkit/?utm_source=rss&utm_medium=rss&utm_campaign=supercharge-your-makerspace-instruction-using-the-lumi-multimedia-toolkit https://richmccue.com/2024/08/26/supercharge-your-makerspace-instruction-using-the-lumi-multimedia-toolkit/#respond Tue, 27 Aug 2024 00:37:03 +0000 https://richmccue.com/?p=5190 Do you want to make your makerspace skills and safety instruction more engaging and effective? Learn about the OpenSource Lumi toolkit which allows you to create & embed over 50 different types of H5P games, quizzes, videos, and other tools in web pages, along with informal feedback so learners can monitor their progress.

I created this conference video and infographic for the 2024 International Symposium on Academic Makerspaces at the University of Sheffield, from September 11-13, 2024:

Here is another helpful 2-minute Lumi-produced highlight video:

Resources to Get Started:

Citations:

]]>
https://richmccue.com/2024/08/26/supercharge-your-makerspace-instruction-using-the-lumi-multimedia-toolkit/feed/ 0 5190
HINF 485 – GenAI for Student Research Activities https://richmccue.com/2024/06/24/hinf-485-genai-for-student-research-activities/?utm_source=rss&utm_medium=rss&utm_campaign=hinf-485-genai-for-student-research-activities https://richmccue.com/2024/06/24/hinf-485-genai-for-student-research-activities/#respond Tue, 25 Jun 2024 00:29:51 +0000 https://richmccue.com/?p=5060
  • Local GenAI – Getting Started
  • GenAI for local documents
  • GPT4ALL API documentation
  • Search for Research Papers
  • Critically Review All GenAI Output for Errors
  • Privacy, The Environment & Generative AI Tools
  • If anyone is interested, here is a Clean Technica article about Tesla’s FSD AI problems and their attempted solution.

    ]]>
    https://richmccue.com/2024/06/24/hinf-485-genai-for-student-research-activities/feed/ 0 5060
    The ART of Storytelling with Data Visualizations https://richmccue.com/2024/05/29/the-art-of-storytelling-with-data-visualizations/?utm_source=rss&utm_medium=rss&utm_campaign=the-art-of-storytelling-with-data-visualizations https://richmccue.com/2024/05/29/the-art-of-storytelling-with-data-visualizations/#respond Wed, 29 May 2024 23:33:36 +0000 https://richmccue.com/?p=5034 It was my pleasure to present today at the UVic Communications COMMS CON 2024 on the Art of Storytelling with Data Visualizations. I did not record the presentation, but if you’re interested you can check out my presentation slides and speaker notes. If you look at nothing else, check out this UVic News story that I converted (in part) into the very slick Shorthand.com interactive website interface.

    Here are some of the examples I demonstrated in my presentation:

    UVic Libraries Digital Scholarship self-paced workshops (free of charge for anyone to work through on their own):

    ]]>
    https://richmccue.com/2024/05/29/the-art-of-storytelling-with-data-visualizations/feed/ 0 5034
    Our First Tesla Road Trip: Victoria, BC to Reno & Back! https://richmccue.com/2024/05/26/our-first-tesla-road-trip-victoria-bc-to-reno-back/?utm_source=rss&utm_medium=rss&utm_campaign=our-first-tesla-road-trip-victoria-bc-to-reno-back https://richmccue.com/2024/05/26/our-first-tesla-road-trip-victoria-bc-to-reno-back/#respond Sun, 26 May 2024 23:10:06 +0000 https://richmccue.com/?p=5000
    Rich with his Tesla Model 3 at a Supercharger

    My partner and I purchased our first 100% electric car in September 2023, but until this spring had not been on an extended road trip with it until just a couple of weeks ago in May 2024. The trip was from Victoria, BC, Canada to Reno, Nevada, a distance of about 1,375 KM (or 854 miles), which we drove over two days, stopping in Bend, Oregon on the way down, and then Vancouver, Washington on the way home. We were hoping that our experience fueling up our new Tesla Model 3 with electricity would be good enough that we would be comfortable selling our gas-powered Toyota.

    A map of the route our car suggested from Vancouver to Reno.

    Charging our Tesla Model 3 RWD at home, which has a maximum range of 438 KM, with our level 2 charger is arguably easier than gassing up our Toyota at a gas station, to say nothing of being much less expensive with our solar panels. That said, we’d few horror stories about others travelling with their electric cars and finding that some of the faster non-Telsa level 3 charging stations that they were planning on stopping at to charge their cars were either at capacity with other cars, leading to sometimes long wait times, or just broken down and unusable. In both cases, their trips were slowed down by unplanned extended stops while they waited for a level 3 charger to free up. That said, I’m happy to report that we had no problems at all at the 5 charging stops that we made in each direction.

    At all but one of the stops we made, we were the only vehicle at the charging stations (each with 8-16 chargers available), and at one station about 2/3’s of the chargers were occupied, so we had no problem finding a spot to charge. If we arrived at a Supercharger stop near a meal time we often stayed longer than our Telsa recommended and charged our car closer to 100% which meant that we could make the next Supercharge stop shorter. In either case, our Tesla made sure that we had more than enough get enough electricity in the battery to get us to the next charger (with some buffer for the unexpected). The estimated charge times in the image to the right ended up being overly pessimistic given the way we drove so our charge times were overall shorter than estimated (5 MPH over the speed limit until 70 MPH which we didn’t go over often except to pass slower vehicles).

    So, in the end for our whole trip, we spent $157 CAD on electricity at superchargers, compared with the estimated $300+ CAD we would have spent on gas for a similar-sized gas-powered vehicle. I added the “+” because the Airbnb we stayed at had a charging station that we were able to use at no extra cost as you can see in the image to the right (the red bars indicate Supercharging, the grey bars represent free chargers, and the blue bars indicate when we charge at home on solar energy). We ended up saving about 50% on energy costs for the trip, and it didn’t take any longer to travel which is what we were hoping for. A win-win situation!

    We ended up saving about 50% on energy costs for the trip, and it didn’t take any longer to travel which is what we were hoping for. A win-win situation!

    One important thing to note is that if you are travelling to or through an area without Tesla Superchargers you may not have the same experience that we did. Not that you won’t necessarily be able to charge your Telsa, but you will have to find 3rd party charging station to use, which does not seem as reliable as the Tesla network. Tesla helpfully provides a map of Superchargers around the world so you can see if there are Tesla charging stations on your route, as well as a route planner for the model of Tesla you’re thinking of purchasing.

    If you’re considering buying an electric vehicle in 2024 and plan on doing a fair bit of road-tripping, then you should seriously consider how a Tesla and it’s Supercharger network could make your road trips less stressful and more enjoyable. Happy road tripping!

    ]]> https://richmccue.com/2024/05/26/our-first-tesla-road-trip-victoria-bc-to-reno-back/feed/ 0 5000 StoryMap & More for PAAS 320 https://richmccue.com/2024/03/14/storymap-more-for-paas-320/?utm_source=rss&utm_medium=rss&utm_campaign=storymap-more-for-paas-320 https://richmccue.com/2024/03/14/storymap-more-for-paas-320/#respond Thu, 14 Mar 2024 18:06:38 +0000 https://richmccue.com/?p=4881 If you’d like feel free to review the slides for today’s workshop. For the activity portion of the workshop please complete the StoryMap JS activity below, and then you can choose from the other activities if you have any time left:

    Data Visualization poster

    Other optional data visualization activities:

    ]]>
    https://richmccue.com/2024/03/14/storymap-more-for-paas-320/feed/ 0 4881
    Knowledge Mobilization Tools for Dr. Nigel Lou’s Psychology of Immigration Class https://richmccue.com/2024/02/05/knowledge-mobilization-tools-for-dr-nigel-lous-psychology-of-immigration-class/?utm_source=rss&utm_medium=rss&utm_campaign=knowledge-mobilization-tools-for-dr-nigel-lous-psychology-of-immigration-class https://richmccue.com/2024/02/05/knowledge-mobilization-tools-for-dr-nigel-lous-psychology-of-immigration-class/#respond Mon, 05 Feb 2024 23:33:53 +0000 https://richmccue.com/?p=4777 Infographics with Canva

    Create a WordPress Website

    ]]>
    https://richmccue.com/2024/02/05/knowledge-mobilization-tools-for-dr-nigel-lous-psychology-of-immigration-class/feed/ 0 4777
    Video Editing & Podcasting In-Class Activities for EDCI 336 https://richmccue.com/2024/01/30/video-editing-podcast-in-class-activities-for-edci-336/?utm_source=rss&utm_medium=rss&utm_campaign=video-editing-podcast-in-class-activities-for-edci-336 https://richmccue.com/2024/01/30/video-editing-podcast-in-class-activities-for-edci-336/#respond Tue, 30 Jan 2024 18:40:17 +0000 https://richmccue.com/?p=4761 Introduction

    As you work through the hands-on video creation and podcasting activities below, please think about these three things while keeping in mind the subjects and grade levels you hope to teach:

    1. Would it be useful for you to make some of your own instructional videos or podcasts to help your learners? Are there videos that others have made that you could share with your learners to save your valuable time?
    2. What are some of the benefits your learners gain by creating their own video or podcast?
    3. Do you anticipate that your learners will have access to laptops to watch and/or create videos or podcasts?

    Video Editing Activities

    iMovie and ClipChamp are powerful tools that enable you to easily edit and modify video footage. Both software packages are free to use on their respective platforms and have numerous features that create wonderful effects. iMovie is created by Apple which supports Mac and IOS users whereas Microsoft ClipChamp is automatically included in Windows 11 (and downloadable for Windows 10 users). This workshop will walk you through the key features of these video editors.

    Podcasting Activities

    You might want to quickly look over these Podcast Planning & Tips before diving into the hands-on Podcasting activities below:

    Interactive Screencasts (Optional But Very Cool)

    STEP 1 – SCREENCAST RECORDING:

    • Note: You will need to use the Google Chrome or Microsoft Edge web browser as Screencastify is a Chrome plugin. If you don’t have one of these browsers, either talk to Rich about your options, or download and install either Google Chrome or Microsoft Edge on your laptop.
    • Select a website or web game that you are familiar with that you can demonstrate how to use in your screencast tutorial. For example, I’m a UnSplash.com fan so I’d open up Unsplash in preparation for making a screencast of how to use it.
    • Work through this screencasting with ScreenCastify activity, and create a 1-2 minute tutorial video for how to use the website you chose to demonstrate (25 min)

    STEP 2 – EDIT YOUR SCREENCAST:

    • I would like everyone to develop at least a basic competency in Video editing as video editing is an important tool for creating multimedia learning objects. Here is an example of the screencast style of video I would like you to create, using your own screencast recording, right after you finish watching it (2 min):
    • Edit the screencast video you just created using either the Mac or Windows tutorials depending on your laptop (please use the screencast video you just created and not the “miniature goat” video linked to in the tutorial).
    • Following the instructions in the tutorial, either upload your screencast video to YouTube (and then embed it in your Blog), or upload your video directly to your Blog. You will eventually include your video as part of your weekly reflection.

    Step 3 – Make your Screencast Interactive with H5P:

    You might want to watch the short H5P video below before you create your own Interactive H5P video on your OpenEd.ca blog:

    Make your screen cast (or edited video) interactive by working through this H5P interactive video activity: H5P Video Activity!

    ]]>
    https://richmccue.com/2024/01/30/video-editing-podcast-in-class-activities-for-edci-336/feed/ 0 4761
    SmartPhones & Social Media: Distraction & Privacy Invasion Machines -or- Bicycles for Our Minds? https://richmccue.com/2023/12/14/smartphones-social-media-distraction-privacy-invasion-machines-or-bicycles-for-our-minds/?utm_source=rss&utm_medium=rss&utm_campaign=smartphones-social-media-distraction-privacy-invasion-machines-or-bicycles-for-our-minds https://richmccue.com/2023/12/14/smartphones-social-media-distraction-privacy-invasion-machines-or-bicycles-for-our-minds/#respond Thu, 14 Dec 2023 17:14:58 +0000 https://richmccue.com/?p=4598 I had a great time talking with a wonderful group of grade 7 and 8 students at Westmont Middle School about SmartPhone, Social Media, and Privacy. Here are the slides from our chat:

    ]]>
    https://richmccue.com/2023/12/14/smartphones-social-media-distraction-privacy-invasion-machines-or-bicycles-for-our-minds/feed/ 0 4598
    Whisper.ai – Transcribing & Translating Audio for Free on Your Laptop – AKA not in the cloud! https://richmccue.com/2023/12/12/whisper-ai-transcribing-translating-audio-for-free-on-your-laptop-aka-not-in-the-cloud/?utm_source=rss&utm_medium=rss&utm_campaign=whisper-ai-transcribing-translating-audio-for-free-on-your-laptop-aka-not-in-the-cloud https://richmccue.com/2023/12/12/whisper-ai-transcribing-translating-audio-for-free-on-your-laptop-aka-not-in-the-cloud/#respond Tue, 12 Dec 2023 21:24:33 +0000 https://richmccue.com/?p=4572 Are you an academic researcher or podcaster looking for a free-to-use transcription tool that does not use US-based cloud processing to do its work? If that sounds like you, then I’d like to introduce you to Whisper.ai!

    Note: that the Whisper.ai link above is to the open-source code for the project which is quite difficult for non-programmers to use... don't worry I'll provide links to more user-friendly versions of the software below.
    A steampunk-themed academic setting featuring a female qualitative researcher using a computer. The researcher, a middle-aged Caucasian woman, is dressed in a steampunk-inspired business suit, complete with a tailored jacket, waistcoat, and trousers. She's seated at a desk, working on a Victorian-style steampunk computer, which includes brass elements, gears, and steam pipes. The computer screen displays a transcription interface akin to Whisper.ai. The room is adorned with steampunk decor like mechanical clocks, old books, and a vintage world map, creating an ambiance of retrofuturistic academia.
    OpenAI DALL-E 3. (2023). ChatGPT [Large language model]. https://chat.openai.com

    For example, I installed the Whisper Transcription software (for Mac’s which is a graphical wrapper on the open-source Whisper.ai command line tools) on my 14-inch M1 MacBook Pro, and it transcribed a 30-minute podcast interview in 1 minute and 15 seconds! Not only did it transcribe the interview, but it also gave me the option of grouping the transcribed text into paragraphs for each speaker, to make it easier for me to know who was talking at different points in the recording.

    For Windows users, a good option is GoWhisper which also uses a freminum model to fund the development of their Whisper.ai graphical interface.

    Whisper.ai Background

    Whisper.ai is an openly licensed project (MIT license) from the folks at OpenAI, however unlike ChatGPT which runs on cloud-based servers, and ingests your prompts as training data, Whisper.ai can be installed locally on your laptop and does all the processing on your computer. This eliminates the privacy concerns inherent in Otter.ai for example, which for Canadian-based researchers means that they do not have to write cloud-based computing into their research ethics proposals, and cloud-based storage consent into the consent forms that their research participants need to read and sign.

    The Mac-based Whisper Transcription software interface.

    While there are a lot of paid tools available for transcribing and translating speech to text like Otter.ai, and some free tools like YouTube that work fairly well, almost all of them use cloud-based services to process the transcriging. up until relatively recently, I have not encountered any free tools that will transcribe audio locally on my laptop without doing any processing in the cloud. Enter Whisper.ai from Open AI, the makers of ChatGPT!

    Whisper.ai Reliability

    Whisper.ai is quite reliable in my experience, but its reliability does vary by language. Below are charts provided by OpenAI outlining its reliability for various languages, and available language models. Note: The smaller bars on the charts below indicate more reliable transcription.

    Note: The smaller bars on the charts below indicate more reliable transcription.

    Whisper.ai Pros and Cons

    Why should you consider using a Whisper.ai based tool to transcribe your audio files?

    • Whisper.ai is free to use
    • Whisper.ai uses your computer’s processing power for transcription, so there are no worries about personally identifiable or confidential information stored in the cloud or potentially being used as training data for other AI tools
    • The graphical wrappers on Whisper.ai – Whisper Transcription & GoWhisper – are very easy to use
    • Whisper.ai relatively fast
    • The Mac-based Whisper Transcription software creates separate paragraphs for different speakers (which can make analyzing interviews easier for researchers)
    • Creates files for closed captioning video

    What are some potential drawbacks to Whisper.ai?

    • Whisper.ai is slower than Otter.ai (instead of processing a 30-minute interview in 20 seconds, Whisper.ai took 1 minute and 15 seconds on my M1 MacBook Pro).
    • The Free versions of both Whisper Transcription & GoWhisper – allow users to use smaller models for analyzing the audio, and require users to pay a licensing fee to enable the software to use the larger and more accurate models (but also slower)
    • Older computers will take longer to transcribe audio than newer faster computers

    Useful Whisper.ai Resources

    ]]>
    https://richmccue.com/2023/12/12/whisper-ai-transcribing-translating-audio-for-free-on-your-laptop-aka-not-in-the-cloud/feed/ 0 4572
    Christchurch & Heading Home to Canada https://richmccue.com/2023/11/29/christchurch-heading-home-to-canada/?utm_source=rss&utm_medium=rss&utm_campaign=christchurch-heading-home-to-canada https://richmccue.com/2023/11/29/christchurch-heading-home-to-canada/#respond Thu, 30 Nov 2023 04:02:00 +0000 https://richmccue.com/?p=5624 We woke up at Rakaia beach and had a leisurely morning sipping coffee and listening to the many birds nearby. After securing everything in our RV we started our one hour drive Christchurch, and more specifically to the Christchurch Gondola that overlooks the city.

    Pegasus Bay & the port at Lyttelton
    Starting our gondola ride to the peak of Port Hills

    An interesting, and from our perspective, accurate description of the Christchurch Gondola from their website:

    “The Christchurch Gondola offers stunning 360-degree views of the city and beyond from the summit station situated atop the Port Hills. See the snow-capped Southern Alps, sprawling Canterbury Plains and the sparkling waters of Pegasus Bay and the Pacific Ocean. Explore the many walking tracks amid fresh mountain air, learn about the history of the area and indulge in a spot of shopping at the Shop at the Top gift store. Sit back and relax with a snack from the Red Rock Cafe and take in the spectacular views. A must-do family-friendly experience perfect for locals and visitors alike.” – Chritchurch Gondola website

    After taking in the views from the summit station, we headed out for a small hike to the nearby peak of Mt. Pleasant and were rewarded with views of the huge Pegasus Bay surrounding the port Lyttelton.

    A kind couple took some pictures of us and Pegasus Bay

    The views all around were stunning, and we’d highly recommend a visit to the Christchurch Gondola on any day, but especially a sunny or clear day, to see the views of the city, the ocean and the mountains.

    We ate lunch in our RV in Gondola parking lot, which also provided us with a nice view of the Christchurch.

    A view of the coast beside Christchurch from Mount Pleasant

    After lunch we drove down town, and had trouble finding parking. We ended up circling and circling further and further from downtown to find a place where we could park our RV. As an added bonus it was free. We finally found parking in a commercial area about a 30 minute walk from down town. The good news is that our to downtown included a stroll through what seems like the Central Park of Christchurch. Hagley Park is huge, and is a beautiful mix of gardens, open fields, and sports fields. It covers 1.65 square kilometres compared to the 3.4 squared kilometres of Central Park in New York City. It looked like part of the park was being prepared for a music festival for the coming weekend.

    We’d booked an afternoon tram tour earlier in the morning over breakfast and enjoyed a tour of downtown Christchurch on a restored tram car that was 80 or 90 years old. The tour was in turn interesting, entertaining and educational. The cool New Zealand accent of the tram conductor didn’t hurt, but we learned a lot from the stories of what happened to individuals who lived through the 2011 Christchurch earthquake.

    The trolly that took us on our down tour of Christchurch

    On the tour, saw some of the remaining devastation from the earthquake several yrs ago. They’ve transitioned from stabilization to deconstruction, and then after that is complete, to re-development. From Wikipedia:

    “A major earthquake occurred in Christchurch on Tuesday 22 February 2011. The 6.2 earthquake struck the Canterbury region in the South Island, centred 6.7 kilometres (4.2 mi) south-east of the central business district. It caused widespread damage across Christchurch, killing 185 people in New Zealand’s fifth-deadliest disaster. Scientists classified it as an intraplate earthquake and a potential aftershock of the September 2010 Canterbury earthquake.” – Wikipedia article

    Christchurch Cathedral after the 2011 earthquake – photo by Wikipedia

    After a wonderful afternoon exploring down town Christchurch we walked the 30-minutes back to the camper, and lucky for us much of the walk was back through the beautiful Haley Park. We then drover north, and a little ways out of town to spend the night before we headed home at the Top 10 Holiday Park Spencer Beach. Got our camper plugged into our RV site’s power supply, and then decided to do some exploring. We walked to the amazing near by beach for a pre-dinner walk.

    Photo credit: Top 10 Holiday Parks

    The RV site was huge, with wonderful amenities, including up to date kitchens and showers. There were very view people at the park, so we had a lot of open space around us in the open field where we were parked. After dinner we starting packing all of our things up for air travel the next day.

    Photo credit: Top 10 Holiday Parks

    The next morning we packed up the last few odds and end we needed overnight and then prepared our RV camper to be returned. We wiped the camper down from top to bottom, took out garbage, then emptied out the grey and black water at the campground. On our way to the Maui RV location right beside the airport we filled the RV up with diesel and exchanged propane tank for a full one. We then stopped at McDonald’s for a small breakfast so we wouldn’t need to do anymore cleanup in the RV. We also stoped at the One World store for some Kiwi-based sweets to bring home.

    We had a couple of hours before our RV drop-off appointment so we decided to check out the International Antarctic Centre just a kilometre away from the Maui RV centre. We ended up spending all two hours we had at the Antarctic Centre. It was a much more interesting experience than we expected.

    The blue penguins were very cute both in and out of the water, and the staff at the centre were there to answer and questions people had.

    Blue penguins at the Antarctic Centre
    Blue penguins swimming in their pool

    There were some husky’s that a trainer brought in and told us about the life of a working husky back when they were the only mode of transportation on Antártica (besides walking of course). Those who wanted to were given an opportunity to give the two beautiful husky’s a pat and scratch.

    Learning about husky’s

    We also went into the “deep freeze room” to help people get a sense for what it would feel like visit the South Pole. When we entered the room there was a ready a couple of groups in the room, including one with people from India. The snow a cold seemed like a novelty to them, and when one of the staff noticed that our jackets weren’t done all the way up she asked us where we were from. When we said Canada, her said that she suspected we were from somewhere colder than India at least.

    In the deep freeze room

    As it got closer to the time we needed to return the RV, we dropped Heather off at airport with luggage, and I drove the 1K to the RV centre, and went through the 30 minute drop off procedure.

    Photo credit: Christchurch Airport website

    I then walked the 1km back to the airport, past the United States Antarctic Program hanger on the Airport grounds.

    After I arrived at the airport, Heather and I checked in our 1.5 hour flight to Auckland. We had a 3 hour layover before catching our flight to Vancouver. Unfortunately there was some sort of problem with the nose cone radar on the Air New Zealand Boeing 787 so our flight was delayed about 2 hours while they got it back in working order.

    It was a 13 hour return fright to Vancouver with a 2-3 hour layover in Vancouver before our 15 minute flight to Victoria.

    One our way home to Victoria, BC, Canada

    All in all we enjoyed an amazing trip to New Zealand. Another bucket list item that lived up to its reputation.

    ]]>
    https://richmccue.com/2023/11/29/christchurch-heading-home-to-canada/feed/ 0 5624
    Mount Cook & Lake Tekapo https://richmccue.com/2023/11/25/mount-cook-lake-tekapo/?utm_source=rss&utm_medium=rss&utm_campaign=mount-cook-lake-tekapo https://richmccue.com/2023/11/25/mount-cook-lake-tekapo/#respond Sat, 25 Nov 2023 18:47:00 +0000 https://richmccue.com/?p=5594 We woke up to amazing views of Mt. Cook and Lake Pukaki from our freedom campsite. After breakfast and coffee I decided to take a few pictures of the scenery before making our way to the White Horse Hill Campground we’d reserved in the National Park near the base of Mount Cook.

    Lake Pukaki & Mt. Cook off in the distance
    Sunset the previous nigh at our Lake Pukaki campsite

    I particularly wanted to take a few pictures of the beautiful purple flower we had seen by highways all over the north and sound islands. We wondered if it was an indigenous flower, or something imported from abroad. It turn out that the flowers are called Lupins, and are not native to New Zealand.

    Beautiful Lupins and our RV by Lake Tekapo

    Here is a description of how Lupins ended up all around New Zealand from the Discover New Zealand website:

    “Surprisingly, lupins aren’t native to New Zealand. They were introduced in the 1940s by a local farmer, Connie Scott, who had a vision of turning the harsh, barren landscape of Mackenzie Country into a more vibrant and lush environment. She scattered seeds all over the region, not knowing that this simple act would create a national sensation. Lupins were first brought in as a way to help stabilise the soil and add nutrients back to the land, but what no one realised was how quickly these flowers would spread and take root across the country. Nowadays, they’ve become synonymous with picturesque New Zealand landscapes. If you’re planning to visit during the blooming season, lupins are a must-see, but there’s more to these beauties than just their good looks.”

    Lupins by Lake Tekapo

    On our way to Mt. Cook, we decided to stop in Twizel for gas and noticed a community market in their main square. It was a beautifully sunny but crisp morning, and spent about an hour wandering around the market.

    At the local grocery store I bought a giant 360 gram Cadbury Dairy Milk Fruit and Nut chocolate bar for us to enjoy over the next couple of nights. I’m not sure why, but chocolate bars were very inexpensive in New Zealand. For example, this huge chocolate bar was only about $5.50 CAD!

    By the time we decided to hop in our RV and drive to our camp spot at Mount Cook, it was pleasantly warm in Twizel.

    Why is Cadbury chocolate so inexpensive in New Zealand?

    We arrived at the White Horse Hill Campground at the earliest possible time to hopefully get a campsite with a decent view of the the mountains and were lucky enough to get a good spot… until a tall camper parked beside us and blocked our view! Fortunately, we found an even better spot that backed onto a forested area.

    The White Horse Hill Campground at the base of the mountains
    Heather enjoying the mountain views at our campsite

    We chilled in the camper for a bit while we looked at All trails to figure out what hike we would do that afternoon. Because we were only staying for one night we decided to hike the world famous 11km Hooker Lake track before dinner time.

    There were a lot people who had the same idea as us, so the very accessible out and back trail was quite busy. The trail was very well maintained and the many boardwalks on the trail made is the track very accessible.

    Mount Cook

    The weather that afternoon was amazing and the scenery was spectacular. We highly recommend this rather easy hike with such amazing views!

    A Hooker Lake at the furthest point on the track
    Snow blowing off the top of a nearby mountain

    In the end, it took us about 2 hours and 20 minutes to hike the almost 11km out and back Hooker Lake track.

    Back at our RV, we made dinner together while listening to a podcast. After dinner we went for a short walk around the camp site to checkout the central kitchen and showering facilities for the following day. Before bedtime we watched a couple of shows that we downloaded while on the Twizel public wifi and then went to bed exhausted.

    The next morning it was again beautiful and clear but a chilly morning in the mountains before the sun was able to warm up the campground. We had an enjoyably slow morning sipping coffee, and then decided to warm up and stretch legs with a short hike before we had to vacate our camp spot. We enjoyed a short 3km out and back hike on the Kea Point Track that ended at a spot overlooking Hooker Lake.

    We waited until the very last minute that we could be in the campground before heading off to Lake Tekapo for a hike and short swim, and then onto a Top 10 RV campground in Geraldine, NZ for the the night.

    We decided to hike the 9.2km Mount John Walkway and along the way were able to enjoy amazing views of the deceptively tropical blue looking Lake Tekapo. The hike started with a fairly steep climb on a wooded hillside, and then opened up to a scrub brush track that passed by an observatory.

    The observatory on Lake Tekapo
    Lake Tekapo from near the start of the Mt. John Walkway hike

    After the hike Heather decided to take a quick, but bracingly chilly, dip into Lake Tekapo before we started our dive to the Geraldine Top 10 Holiday Park.

    We arrived at the Geraldine Top 10 Holiday Park before dinner time, so after we got settled in we looked for a restaurant near by but couldn’t find anything that looked great. In the end we bought some meat pies from a little grocery store and then took them back to our RV and warmed up there. We were boy quite tired after all the hiking we did in the hot afternoon sun, so we did some laundry and took it easy before bedtime.

    The Geraldine Top 10 Holiday Park – Photo credit: Top 10 Holiday Parks

    The next morning we did one more small load of laundry (forgot a few items yesterday), and then stretched our legs with a short walk around Geraldine’s Main Street, and purchased a few small wool items to take home with us for presents. We also bought time TimTam’s as a snack for our drive north along the coast.

    The Australian snack we learned to love in New Zealand

    On our 3-hour drive to the Rakaia Hut Campground, we had to stop on a highway for sheep crossing! Rakaia is right by the ocean with several kilometres of farms between the campground and the main coastal highway.

    On the gravelly beach at Rakaia

    After lunch, went by the beach and watched waves crash and saw three porpoises. We planning on walking down the beach aways to find a hiking trail, but the rocky beach made it too hard. We had spotty cell reception and wifi at the campground, but after all the hiking we did the previous day it was nice to have a chill afternoon. It was a windy but nice place to spend the evening.

    A view of the rising moon at the Rakaia campground

    Before we headed to bed we booked some activities and a campground for Christchurch the next day.

    ]]>
    https://richmccue.com/2023/11/25/mount-cook-lake-tekapo/feed/ 0 5594
    Roy’s Peak Amazing Views & That Wanaka Tree! https://richmccue.com/2023/11/23/roys-peak-amazing-views-that-wanaka-tree/?utm_source=rss&utm_medium=rss&utm_campaign=roys-peak-amazing-views-that-wanaka-tree https://richmccue.com/2023/11/23/roys-peak-amazing-views-that-wanaka-tree/#respond Fri, 24 Nov 2023 02:42:00 +0000 https://richmccue.com/?p=5551 We slept in the morning we were leafing Queenstown and enjoyed the delightful sound of rain gently falling on the camper roof. After our morning coffee, we packed up and hit the road heading for Lake Wanaka. Rainbow as the sun broke through the sky. On our way, we stopped at Puzzling World and cooked noodles with veggies for lunch. In the end, we decided we didn’t wanna go inside the exhibit but it would have been tempting to go in if we’d had younger children with us. We also got around to booking our RV sites and identifying freedom camping spots for the next few nights.

    #ThatWanakaTree on a windy day

    It was very windy when we arrived at Lake Wanaka and were not surprised to see whitecaps on the lake around the #ThatWanakaTree! It was so windy we decided to drive to the campground spot we’d booked about 20 minutes away on the lake.

    We arrived at Hampshire Holiday Park – Glendhu Bay, but it was still very windy and chilly so we hunkered down in our camper until the wind subsided and then went for a shoreline walk.

    Our evening walk along a Lake Wanaka trail after the wind died down
    Standing on the shore of Lake Wanaka with Roy’s Peak in the background

    We enjoyed another nice dinner in our RV, and then sat by the beach until the bugs came out as the sun went down. We listened to a podcast and played word games in the camper until we were tired enough to head to bed in preparation for our big hike the following morning..

    As planned as soon as we woke up we drove straight for the Roy’s Peak parking lot so we could hopefully find an unoccupied spot. One of the reviews we’d read the previous night mentioned that the lot typically filled up before 8am on sunny days. We arrived with the lot about one-third full, and enjoyed our morning coffee and breakfast in our RV before gearing up to begin our hike up Roy’s peak!

    All Trails Roy’s Peak description

    The All Trails app warned us that the average time to hike up and down Roy’s Peak was 7 hours and 26 minutes! We’d hoped that it wouldn’t take us that like to climb up and down the 1,310 meter mountain, and likely it took us just under 5 hours to make it up and down. That said, it was a taxing climb but we made it, and the views at the top were spectacular!

    The weather was a crazy mix of warm sun, cool breeze, cloudy, and some decent but temporary snow falling. It started out sunny and warm, with plenty of sheep beside the track, and plenty of sheep patties to avoid stepping in, but it was a beautiful start to the climb.

    A beautiful start to the climb of Mount Roy
    There were plenty of sheep to admire until about halfway up the climb
    A selfie after the snow and fog cleared out

    About halfway up the climb, clouds blew in, it got foggy and started to snow! We were prepared for weather like this but really didn’t expect to experience any snow given how beautiful the weather had been so far on our trip. The photo below is after the snow had stopped, and the fog had cleared out when we were over the halfway mark of the climb.

    Snow? Really!

    Almost at the summit, there was a very popular viewpoint for photos that we stopped at to take some pictures. We had to wait in line with other photographers for about 10-minutes before we could take our photos, including some photos of us that other hikers from Canada generously offered to take for us. The wait was well worth it as you can see from the next two photos:

    The summit provided us with amazing views and a beautiful spot to sit and enjoy a well-earned rest and lunch.

    One of the amazing views from Roy’s Peak

    And you can just see a little bit in the photos below, the mountain ranges across Lake Wanaka from Roy’s peak are the “Misty Mountains” from the Lord of the Rings movies. Because of the low clouds, as you can see in the two photos below, we only were able to enjoy occasional views of the “Misty Mountains” while at the top of Roy’s Peak. Even so, the contrast between the green around the lake, and the towering snowcapped mountains behind was breathtaking.

    Another beautiful view from near the top of Roy’s Peak
    In the middle of this photo you can see the RV Park on the edge of the lake that we stayed at the previous night
    Heather with a look of accomplishment on her face as we start our descent of Roy’s Peak

    The hike down was much easier on our legs and knees than the hike up. As an added bonus the fog and snow were no where to be seen and we could see some beautiful views that were hidden to us on our way up the mountain.

    Heading down Roy’s Peak
    The top of the “shoe lace” track down to Lake Wanaka

    On our way down at one point we heard a lone lamb bleating and then its mother responding some distance away. As they continued to exchange bleats the lamb eventually ran across the track in front of us and was eventually was reunited with its mother.

    A lamb reunited with its mother!

    The lamb then decided it needed a soothing nurse as we walked by 😉

    By the time we arrived at our RV at the base of the mountain we had walked almost 17km and climbed over 1,300 meters. Like the challenging “Mount Doom” hike on the North Island, climbing Roy’s Peak was well worth the effort!

    After the hike, we hopped in our RV and drove to a beautiful freedom campsite on the edge of Lake Pukaki. Once we arrived their was some ambiguous signage that made us think that it might not still be a freedom campsite anymore. We are all diced hoping that we wouldn’t get busted, but we had a peaceful night with no interuptions. We could even see Mount Cook off in the distance, which was our destination for the next day.

    ]]>
    https://richmccue.com/2023/11/23/roys-peak-amazing-views-that-wanaka-tree/feed/ 0 5551
    Beautiful Queenstown NZ in the Mountains https://richmccue.com/2023/11/21/beautiful-queenstown-nz-in-the-mountains/?utm_source=rss&utm_medium=rss&utm_campaign=beautiful-queenstown-nz-in-the-mountains https://richmccue.com/2023/11/21/beautiful-queenstown-nz-in-the-mountains/#respond Tue, 21 Nov 2023 22:10:00 +0000 https://richmccue.com/?p=5533 We had a gentle morning and did a short hike in some trails around the Dolamore Park campground, before packing up and driving along a scenic highway to Queenstown. We stopped to take some photos of the beautiful Lake Wakatipu just before arriving at Queenstown.

    One of our first views of Lake Wakatipu on our way to Queenstown

    On the edge of town beside the airport, we stopped at the Maui RV rental location to have our drawers fixed by their maintenance staff. The repairs only took about 30 minutes to complete, and we didn’t have any other problems for the rest of the trip.

    A day or two before on our freedom camping app we found a modern and well appointed Driftaway Holiday Park RV park just outside of Queenstown with an amazing view overlooking Lake Wakatipu. We booked one night there so we could explore Queenstown, have a hot shower and recharge all the batteries in the RV.

    The amazing view from our RV at the Driftaway Holiday Park

    After getting settled in at the RV park we decided to walk along a lakeside pathway to downtown Queenstown which was about 7km from us.

    Frankton to Queenstown walk map
    Some friendly ducks on the Queenstown waterfront

    The downtown area has a lot of activities going on and does a great job catering to all the tourists visiting this gem nestled between Lake Wakatipu and the surrounding mountains. Queenstown reminded me in a good way of a town like Canmore in Canada. We enjoyed some ice cream cones while we people-watched and heard people talking with accents from around the world. So far in our trip we think this was our favourite town. It had a good vibe.

    A view of the waterfront walkway and the mountains across the lake from Queenstown

    When we were ready to head back to the RV park, another 7km walk didn’t sound very appealing given how tired our legs were feeling, so we spotted a water taxi that stopped at a few different places on the lake including our RV park. When we arrived back we made dinner in the spacious common kitchen and then had nice long showers.

    The water taxi that took us the 7km back to our RV Park

    Before we went to bed we planned our next few days. We’d planned on staying one night in Queenstown, but when we saw how beautiful the area around the city was, we booked a second night at the Driftaway Holiday Park.

    Bike route map from Arrowtown to Queenstown

    The next morning we rented bikes at a bike shop only a 5-minute walk from the RV park. Heather chose an e-bike and I rented a regular mountain bike. We then started a 27km mainly uphill bike ride to the historic Arrowtown. There were some pretty steep sections of the mix of bike trails and roads on the route that Strava suggested for us, which Heather was able to motor up, and she kindly waited for me to huff and puff my way to the top. Over all it was a beautiful ride, and I was able to get the kind of cardio workout that I hadn’t been able to do so far on our trip.

    On our way to Arrowtown
    The hill here doesn’t look nearly as steep as it felt to me!
    Video of Rich riding over a pedestrian bridge over a small river.
    A deluxe Arrow Town water bowl for dogs

    In Arrowtown, we wandered around the formerly precious minerals mining town, exploring the little shops and eateries. We eventually found a nice place to enjoy an outdoor lunch and enjoyed to ambiance of the town.

    Heather brought a cool t-shirt in Arrowtown before we started our 27km ride back to the RV park. We couldn’t stay too late or we would arrive too late to return our rental bikes at the bike shop. As it turned out we had about 30 minutes to spare, even if if meant that I was huffing and puffing pretty hard when we pulled up to drop off our bikes.

    Meeting the local goats beside the bike route to Arrowtown
    We rode by a golf course and stopped in the shade for a few minutes to rehydrate and enjoy the beautiful scenery
    Crossing a narrow bridge on our bikes

    Once we were back at the RV park we made use of their shower facilities before starting on dinner for the night.

    Rainbow from our RV back window

    After that, we used the excellent RV park laundry facilities and then decided to walk about 2km to a grocery store. We’d done some meal planning so that we could stock up on food before we travelled to other smaller towns in the mountains. On our way back from shopping we were treated to a spectacular sunset that we were able to get a picture of before the sun went completely down. We arrived back at our RV in almost complete darkness, but we were stocked up and ready to drive to Lake Wanka the next day.

    ]]>
    https://richmccue.com/2023/11/21/beautiful-queenstown-nz-in-the-mountains/feed/ 0 5533
    Porotobello, Dunedin & The Harbour Cone Track https://richmccue.com/2023/11/19/porotobello-dunedin-the-harbour-cone-track/?utm_source=rss&utm_medium=rss&utm_campaign=porotobello-dunedin-the-harbour-cone-track https://richmccue.com/2023/11/19/porotobello-dunedin-the-harbour-cone-track/#respond Sun, 19 Nov 2023 22:13:00 +0000 https://richmccue.com/?p=5524 After visiting the blue penguin sanctuary in Oamaru, we continued our drive south to a small campsite in Portobello, 20 minutes outside of Dunedin on the Ortega Peninsula. It was a beautiful little RV park with a big kitchen, laundry facilities, and hot showers.

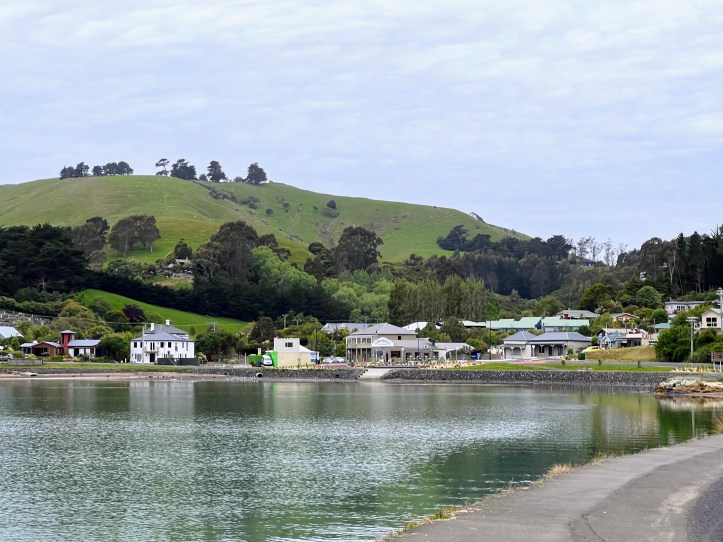
    We went for a short evening walk around the tiny town of Portobello, and then started our laundry before making a tasty brinner (breakfast-dinner). After that we took advantage of the trailer park wifi and watched a movie on Netflix.

    The next morning we ate some leftover “brinner” for breakfast (mmmmmm), had a hot shower and then decided to do a quick local hike before hitting the road again.

    Our expectations were pretty low for the Harbour Cone track, which turned out to be an extinct volcano. The start of the hike was quite steep following a fence line, before opening up to an equally steep sheep pasture on the hillside.

    As we zig-zagged up the hill we were able to admire the many sheep on the hill, while at the same time marking sure we didn’t step in any of the many fresh sheep patties.

    Once we reached the top we were treated to some spectacular views of not just Portobello, but of a near by shipping port, and towards the Pacific Ocean a beautiful estuary.

    Some sheep & the port near Dunedin beyond
    A beautiful view of the estuary and the Pacific Ocean beyond
    Enjoying the view on top of of the Harbour Cone
    The track along the fence on our way down to the RV Park
    A view of a “ribbon road” beside the Harbour Cone
    Screenshot

    We then hopped into our Maui RV, and drove to Gore, NZ to the Dolamore Park municipal campground. It was a large, beautiful and inexpensive camping area that we had basically to our own. That said there was no cellular service and the campground did not have any wifi that we could take advantage of.

    We hiked Dolamore Loop Track which ended up with a beautiful view of the valley and near by farms. At the lookout at the top of the loop we finally got some cell reception, so I called my mother to check in and see how she was doing back in Canada.

    While we still had some cell service we called the Maui RV support people to let them know we had a couple of kitchen drawers that kept opening when we went around corners, and made an appointment to stop in at their Queenstown location to get the drawers fixed up.

    When we arrived back from our hike, we made some dinner, showered, cleaned up, and then watched a downloaded movie, and planned our drive to to Queensland before heading to bed.

    ]]>
    https://richmccue.com/2023/11/19/porotobello-dunedin-the-harbour-cone-track/feed/ 0 5524
    From North Island Auckland to Christchurch & Oamaru on the South Island https://richmccue.com/2023/11/18/from-north-island-auckland-to-oamaru-on-the-southern-island-in-new-zealand/?utm_source=rss&utm_medium=rss&utm_campaign=from-north-island-auckland-to-oamaru-on-the-southern-island-in-new-zealand https://richmccue.com/2023/11/18/from-north-island-auckland-to-oamaru-on-the-southern-island-in-new-zealand/#respond Sat, 18 Nov 2023 17:17:00 +0000 https://richmccue.com/?p=5367
    Steam from a geothermal stream on Lake Taupo in New Zealand

    The morning after our massive hike over the Tongariro Crossing, we took it easy to let our bodies recover as we enjoyed a slow, gentle morning sipping coffee in bed. There was a hot water spot on the beach right by our hotel that I discovered as I walked to a nearby coffee shop. I didn’t even realize it was there until about an hour before we had to check out of our hotel. It’s too bad we hadn’t discovered it earlier, so we could have soaked in the hot water after our Tongariro Crossing hike to speed our recovery.

    We drove back to Auckland to catch our afternoon flight to Christchurch on the South Island. As an added bonus, Heather and I got an emergency row to ourselves on our short Air New Zealand flight. On our descent, I checked to see which hotel I’d booked us into, but couldn’t find a reservation in my email… then I realized that a month previous, we had to reschedule the pickup of our “Maui” RV rental to the next day because the pickup deadline was 4 PM, and we were landing just after 4 PM. Fortunatel,y I was able to hop on the Expedia app on my phone as soon as we touched down, and was able to book a room at a nice hotel near the airport before we pulled up at our gate.

    Our New Zealand Air flight from Auckland to Christchurch.

    We discovered that our hotel ended up being only about 100 meters away from the airport, which made taking the shuttle seem a little ridiculous. After we settled in, we wandered over to a little strip mall next door and ate some incredible mango chicken and naan bread. It was an unassuming little Indian food place called Little India Restaurant at the Spitfire Square.

    Little India Restaurant, Christ Church, NZ

    The next morning, I went to pick up a coffee at the nearby McDonald’s however, the coffee machine was broken, so we had to settle for black tea for our morning caffeine fix. The Maui RV rental location was less than a kilometre away, so I walked over and picked up our camper van, which took about 40 minutes to do all the paperwork and get an orientation on all the van’s systems. When I arrived back at the hotel, Heather was waiting with our luggage, so we loaded it up and hit the road!

    Heather & our wonderful Maui RV home on wheels for the next two weeks.

    We drove south along the coast and used the Rankers Camping NZ app to find a beautiful little freedom camping spot on a bluff overlooking the ocean in Timaru, called the Patiti Point Reserve.

    We enjoyed an amazing view of the ocean while sitting at the table in the back of our RV at Patiti Point.

    We did some exploring on our evening walk to the Timaru Botanic Gardens nearby. We met an elderly gentleman walking his dog, and enjoyed talking about his travels in Western Canada 50 years ago. While standing outside an aviary in the park, he also gave us some great NZ travel tips, including advice to stop in Oamaru the next day to see the blue penguin sanctuary there.

    Screenshot

    The morning before we headed to Oamaru, further south down the coast, we went for a long walk on the beach towards the Timaru port facility, and saw several cute little fur seals on the breakwater.

    At the very end of the bluff in the photo below, you can see a bit of white; that is our camper van, and as I mentioned, the bluff gives us a priceless view of the ocean.

    After our beach walk, we hopped into our Maui RV and travelled south on the main east coast highway. Interestingly, it was primarily a two-lane highway with occasionally passing lanes. The lack of places to pass cars was especially noticeable to us as the highway speed limit in NZ for RVs is 90 kilometres per hour (or 56 miles per hour). So frequently we would either be behind a big train of RVs cruising along at 90km/h or have several vehicles piled up behind us, passing us when possible. The good news about the lower RV speed limit is that we got excellent gas mileage from our diesel Mercedes RV, and our total fuel bill was much lower than we expected.

    We arrived in Oamaru around lunch time, so pulled into a grocery store to buy food for the next couple of days, and then drove to the waterfront to visit the blue penguin sanctuary and eat lunch.

    Unfortunately for us, the blue penguins were hunkered down in their dark nest boxes, so we could only see them in a darkened little building with red lights that 12 or so nests were attached to.

    It was very interesting learning about them, and it was a nice way to spend a couple of hours in Oamaru before heading further south along the coast to Dunedin.

    ]]> https://richmccue.com/2023/11/18/from-north-island-auckland-to-oamaru-on-the-southern-island-in-new-zealand/feed/ 0 5367 Hobbiton to Hiking Mount Doom https://richmccue.com/2023/11/16/hiking-mount-doom-mordor-aka-the-tongariro-alpine-crossing-nz/?utm_source=rss&utm_medium=rss&utm_campaign=hiking-mount-doom-mordor-aka-the-tongariro-alpine-crossing-nz https://richmccue.com/2023/11/16/hiking-mount-doom-mordor-aka-the-tongariro-alpine-crossing-nz/#respond Thu, 16 Nov 2023 18:55:36 +0000 https://richmccue.com/?p=4517 We started our Adventure in the Shire at Frodo’s hobbit hole.

    Hobbit on was just beautiful! Hard to believe it’s been 25 years since the first Lord of the Rings movie was in theatres.

    Then travelled to the edge of Mordor to start our hike.

    Clumps of lava a long ways from the mountain.
    A look back at the desolate terrain from eruptions over the years.
    A photo of “Mt. Doom” at the top of hike.

    We walked through the desolate landscape and eventually found the entrance to Sauron’s forge…

    The entrance to Sauron’s Forge… or possibly a lava vent.
    Something interesting looking coloured fluid coming out of a sulphur smelling steam vent that emptied into the aqua marine blue lake near by.

    But having the appetites of Hobbits we couldn’t spare the time to explore inside…

    One of the “blue” lakes near the top of our hike. Unlike the freezing cold glacier fed blue lakes in Canada, these ones are probably warm. We did not dip our hands in to see how warm they are as the blue lakes on the mountain are sacred to the Maori peoples.
    Kind of fun to find a little bit of snow on our way down the mountain.
    A glimpse of the huge lakes at the base of the mountain.

    Or we’d miss our reservation back at the Green Dragon in Hobbiton 😉

    Enjoying our well earned ciders back at the Green Dragon in Hobbiton 😉
    The lake in front of the Green Dragon, looking across at the mill and some of the 32 hobbit holes on the preserved movie set.

    Seriously though it was a challenging 6-hour hike, but with some amazing other worldly views to experience!

    The Tongariro Alpine Crossing, NZ
    ]]>
    https://richmccue.com/2023/11/16/hiking-mount-doom-mordor-aka-the-tongariro-alpine-crossing-nz/feed/ 0 4517
    Hiking The Tongariro Alpine Crossing – NZ https://richmccue.com/2023/11/16/hiking-the-tongariro-alpine-crossing-nz/?utm_source=rss&utm_medium=rss&utm_campaign=hiking-the-tongariro-alpine-crossing-nz https://richmccue.com/2023/11/16/hiking-the-tongariro-alpine-crossing-nz/#respond Thu, 16 Nov 2023 16:17:00 +0000 https://richmccue.com/?p=5659
    Enjoying the beautiful views and blue lakes at the top of the Tongariro Alpine Crossing

    We woke to a beautiful morning at our hotel on the shores of the beautiful Lake Taupō, which appears to be the largest lake in New Zealand. We had to get on the road early to make it to the pickup spot for the bus that would drop us off at the trail head for an epic hike up and over the world famous Tongariro Alpine Crossing. Mount Ngauruhoe’s cone like shape, which was where filming was done for the Mount Doom and Mordor scenes in the Lord of the Rings trilogy, was looming in the distance.

    For anyone considering doing the hike, please know that in November 2023 we had to go online to obtain a free permit from the National Parks Service before we could do the hike. Because the trail head and end of the trail are on opposite sides of the mountain most people will need to book a shuttle to get to and from the hike. We used the Tongariro Crossing Shuttle which cost $60 NZD per person and were quite happy with their service and our driver was amazing.

    Lake Taupō. Photo credit by My Blond Bucket List
    A helicopter changing out a porta potty cassette. Photo credit: Hut2Hut

    At the trail head our bus had to navigate around a truck with a tanker trailer behind it, and when I took a closer look at the tanker I saw that it had “Jet Fuel” written on the side. That was curious given that we were in the middle of no where and in a national park. A few minutes later we all discovered why there would be a tank jet fuel there when a helicopter dropped off something it had been carrying by a cable underneath it and then landed to refuel. The “thing” it was carrying was a porta potty cassette, and it was interesting to watch as it made six or seven more trips during the first hour of our hike.

    The start of the hike was a gentle incline on gravel paths alternating with boardwalks over some rocky areas. There were quite a few people starting the hike but we all soon stretched out over the trail.

    A quick selfie near the start of the hike

    As we progressed up the valley we started to enter lava fields with black clumpy boulders scattered around the boardwalk. The terrain became more and more desolate looking as we hiked closer to the beginning of the really steep part of the climb.

    Clumps of lava a long ways from the Mount Ngauruhoe.
    A map of the Tongariro Alpine Crossing trails

    The most difficult portion of the climb found us zig zagging back and forth up a very steep hill of ancient lava debris and boulders.

    We took our time and as we crested the steep section onto a table smooth lava plain, and were treated with amazing views of the valley we’d just hiked up on one side, the lava plain, as well as “Mount Doom.”

    A look back at the desolate terrain from eruptions over the years.
    Another view of the valley.
    A photo of “Mt. Doom” AKA Mount Ngauruhoe near the top of the hike.

    As we hiked across the lava plain there was a heavy mist on the far side of it that we ended up walking through on our way the crater ridge.

    The mist by the crater ridge.
    A higher crater ridge to the side of where we were headed.
    Heather on the top of the crater ridge with Mt. Doom in the background.
    We look so happy to have most of the uphill climbing behind us!

    On the other side of the ridge were the world famous blue lakes of the Tongariro Crossing. It was a bit chilly and windy, but the sky’s were blue and beautiful. The next day we saw in the news that the weather had turned and they had to close down the trail because of the rain, cold and wind conditions.

    Seeing the first of the blue lakes at the crest of the trail.

    The piercing blue lakes were in stark contrast with the mainly desolate lava and rock terrain with the occasional vent visible from the telltale sulfur laden steam coming from underground.

    Notice the steam coming out of the rocks to the top right of the lake.

    Another flat lava plain we walked by had at some point been been partially covered by a newer clumpy and lumpy black lava flow as you can see below. There were even a couple of pockets of snow where shadows from the edge of the flow cast shadows.

    A black lava field below one of the smaller volcano cones.

    As we started the down hill portion of the hike we noticed an old lava vent that looked like it was straight out of the Lord of the Rings movies and could easily have doubled as the entrance to Sauron’s Forge.

    A strange looking lava vent
    You can hear the wind and see sulfur laced steam rising from a volcanic vent.

    One of the most interesting things I saw on the hike was some interesting looking coloured fluid coming out of a sulphur steam vent that emptied into the aqua marine blue lake near by.

    Interesting sludge flowing into a blue lake

    Also interesting was the underwater vegetation in the lake that was thriving in this volcanic environment. In canada our blue alpine lakes seem to be devoid of visible aquatic vegetation, which I guess makes sense given how cold they are.

    Unlike the freezing cold glacier fed blue lakes in Canada, these ones are probably warm. We didn’t dip our hands in to see how warm they are as the blue lakes on the mountain are sacred to the Maori peoples and we were asked by park staff to enjoy our views of the lake and not touch the water.

    One of the “blue” lakes near the top of our hike.
    The last of the lakes we saw in the hike on a stunningly beautiful day.

    One our way down from the summit of the Tongariro Crossing, we walked through a handful of snow drifts in shadowy hollows on the south side of the mountains.

    Kind of fun to find a little bit of snow on our way down the mountain.

    Eventually we were treated to stunning views of Lake Taupō and another smaller lake nearby as we made our way down the track to the shuttle pickup point.

    A glimpse of the huge lakes near the base of the mountain.

    Even in the scrub brush a fair ways down the mountain there were plenty of steaming sulfur vents that if you couldn’t see the steam near the ground, you could definitely smell them.

    Our hike route on the Tongariro Alpine Crossing, NZ as recorded by an Apple Watch and mapped on Strava.

    Hiking the Tongariro Alpine Cross was a challenging 5-hour hike for us, but was completely worth it given the amazing other worldly views we experienced!

    ]]>
    https://richmccue.com/2023/11/16/hiking-the-tongariro-alpine-crossing-nz/feed/ 0 5659
    Te Puia Geothermal Valley in Rotorua NZ https://richmccue.com/2023/11/15/te-puia-geothermal-valley-rotorua-nz/?utm_source=rss&utm_medium=rss&utm_campaign=te-puia-geothermal-valley-rotorua-nz https://richmccue.com/2023/11/15/te-puia-geothermal-valley-rotorua-nz/#respond Wed, 15 Nov 2023 19:25:00 +0000 https://richmccue.com/?p=5354

    After our Hobbiton visit, we hit the road again, this time on our way to Rotorua to visit the Te Puia Geothermal Valley, along with the Maori culture centre situated in the middle of the geothermal activity and famous Pohutu geyser. 

    The entrance to the park and cultural centre was an amazingly beautiful and intricate carved arch to welcome all of the visitors. We started off by taking a quick look at the main guiser that the park is best known for, before heading back to the ceremonial village for a Haka that would take place just mid-afternoon.

    The Haka was entertaining, interesting, and educational. It was wonderful to learn about Mauri culture from the Mauri people themselves and in the context of a traditional Mauri village. The guiser nearby is a sacred site as well, so it was wonderful to be able to learn about the connections the Mauri people have to active geothermal sites across Aotearoa (aka New Zealand).

    Our guide also told us about one of the longest place names in Mauri, which is, Te Whakarewarewatangaoteopetauaawahiao, which translates to English means, The war dance of the war parties of Wāhiao.

    Once the tour was over we wandered around the park on our own and saw some amazing ponds of scalding hot bubbling mud, which is something I’ve never seen in Canada.

    All in all, we thoroughly enjoyed our visit to Te Puia and highly recommend it to anyone who visits the Rotorua area of New Zealand and would like to learn more about the Maori people and their culture.

    Late in the afternoon, we hopped back in our rental car to drive to our hotel on the shore of Lake Taupo, in preparation for our amazing Tongariro Crossing (aka Mount Doom) hike the next morning.

    ]]> https://richmccue.com/2023/11/15/te-puia-geothermal-valley-rotorua-nz/feed/ 0 5354 Hobbiton Here We Come! https://richmccue.com/2023/11/14/hobbiton-here-we-come/?utm_source=rss&utm_medium=rss&utm_campaign=hobbiton-here-we-come https://richmccue.com/2023/11/14/hobbiton-here-we-come/#respond Tue, 14 Nov 2023 22:54:00 +0000 https://richmccue.com/?p=4682 We headed south from the hot water beach toward Matamata (and the Hobbiton movie set) after enjoying a beautiful sunrise from the porch of our little cabin.

    Thankfully the road south was much better than the logging road we accidentally took the day before. Better, meant that the road was paved, but it was still very narrow and twisting, combined with driving on the “wrong” side of the road made the 3-hour drive challenging. The good news is that the views of the ocean road were spectacular in spots, even if we sometimes felt a little bit uncomfortable with big logging trucks flying by us in the opposite direction.

    We also learned if you don’t know the speed limit on a highway, it’s almost always 100km/hr no matter how windy the road is and how unsafe it would be to drive that fast!

    We were on our way to the Hobbiton Movie Set but stopped along the way at some lookouts and hiked around an old mining site nearby for an hour or so. It was amazing to see photos of the damage the miners did to the river valley and how nature has reclaimed the site and is breaking down many of the mining buildings.

    It was a great place to stop and enjoy a hike in an area that probably looked like an industrial waste land 100+ years ago, but seems to have recovered and is slowly reclaiming the buildings and mining infrastructure.

    We ended up doing a beautiful 2.3km hike called the Karangahake Windows Walk (All Trails link), before we hopped back in our car to drive to our Hobbiton Movie Set tour just after lunch.

    The Karangahake Windows Walk

    We arrived at Matamata in plenty of time for our tour of the Hobbiton Movie Set and had time to say hello to the resident sheep and check out the gift shop before we hopped on the tour bus that took us on a 10-minute drive to the movie set itself.

    The guide we had for our tour of the movie set was wonderful. She did a wonderful job giving us the back story on some of the interesting things that happened during the creation and filming on the site, along with plenty of trivia.

    There were 44 Hobbit hole facades that were built for the Lord of the Rings and Hobbit movies. We missed being able to go into one of the new Hobbit holes that were under construction while we were there by about 2 weeks.

    We ended our Hobbiton tour by visiting the Green Dragon Pub and enjoying a tasty Sackville Cider beside a roaring fire.

    It was a wonderful way to finish off our tour of Hobbiton before hopping on the tour bus and heading back to the gift shop and our car. As we neared our hotel in town, we saw a very appropriate-looking visitors centre for Hobbiton (aka Matamata)! It was closed, unfortunately, but when we looked through the windows in the front door we noticed that they had built a beautiful hobbit facade over top of quite a nice-looking stone building.

    P.S. Thanks to our good friend Deb, we learned the many dead animals we were seeing on the road in NZ are many possums 🙁

    ]]>
    https://richmccue.com/2023/11/14/hobbiton-here-we-come/feed/ 0 4682
    Arriving in Auckland & Hot Water Beach – NZ https://richmccue.com/2023/11/12/arriving-in-auckland-hot-water-beach-nz/?utm_source=rss&utm_medium=rss&utm_campaign=arriving-in-auckland-hot-water-beach-nz https://richmccue.com/2023/11/12/arriving-in-auckland-hot-water-beach-nz/#respond Sun, 12 Nov 2023 15:31:24 +0000 https://richmccue.com/?p=4542 We left Vancouver at 8:00 PM on November 10th and arrived in Auckland on November 12th at about 5:30 AM after an exhausting 14-hour flight from Vancouver.

    Two tired but happy travellers, ready to explore New Zealand, starting with Managere Mountain in Auckland.
    A white Yaris Cross, with left hand drive
    The Yaris Cross which helped us tour the north island.

    Dead tired, we immediately rented a car so that I could try my luck driving on the left (or wrong) side of the road. It probably would have been a better idea to rent the car after a good night’s sleep, but we had to get around town so we drove away from the airport in our cute and functional Toyota Yaris Cross rental car.

    After checking out All Trails for some nice walks nearby we drove to the Mangere Mountain Loop which is on a very old, very green dormant volcano just outside of Auckland.

    A view of Auckland from Menagere Mountain
    A view of Auckland from Mangere Mountain’s central crater looking out the side of the mountain that was blown away 50,000 years ago.

    It was a nice easy 1.9km hike to get our legs moving and heart rates up a little bit after a very long plane ride. The view from the top was beautiful to say nothing of the rolling green contours of the hill that hide it’s violent past. Here is a link to the All Trails map of the Mangere Mountain Loop hike in case you’re interested in checking it out.

    An orc grabbed me at the Weta Workshop Auckland.

    We then drove downtown, parked at our hotel and walked around downtown Auckland. We went to the All Blacks Experience which was an interesting experience with a quirky tour guide. Shopped at the Weta Workshop store where they had loads of Lord of The Rings and Hobbit-related things to purchase.

    We also checked out a Costco store which looks almost the same as North American Costcos (except that they had loads of summer-related items to purchase in preparation for the impending southern summer season). We returned to our downtown hotel and unsurprisingly slept very soundly.

    The next morning we checked out and headed to the Hot water Beach on the Coromandel peninsula. On the bad advice of Apple Maps, we drove on a treacherous narrow gravel road as 25A was closed for repairs. There were tons of cows and sheep all along the three-hour drive.

    The cute porch on our cabin with a beautiful view of the nearby forest at the Hot Water Beach campground.
    A view of Hot Water Beach from our hike up a nearby hill.

    When we arrived at our cozy hut at the Hot Water Beach Top 10 Holiday Park we took a short meander down to the beach and tried to dig a hole in the sand to find some hot water to soak in, but unfortunately, the tide was too high to get the full hot water beach experience. That said, we did enjoy a lovely couple of hours on the beautifully warm beach soaking in the sun and beautiful scenery. On our first full day in New Zealand, we learned if you don’t know the speed limit on any given road, it’s probably 100km/hr no matter how windy and narrow the road, no matter how crazy it might seem!

    100kph speed sign on a very winding road
    Driving on a country road in New Zealand, and you’re not sure what the speed limit is? No worries, it’s probably 100Kph no matter how winding the road might be 😉
    ]]>
    https://richmccue.com/2023/11/12/arriving-in-auckland-hot-water-beach-nz/feed/ 0 4542
    Generative AI & Student Transfers: A Useful Tool? https://richmccue.com/2023/10/30/generative-ai-student-transfers-a-useful-tool/?utm_source=rss&utm_medium=rss&utm_campaign=generative-ai-student-transfers-a-useful-tool https://richmccue.com/2023/10/30/generative-ai-student-transfers-a-useful-tool/#respond Mon, 30 Oct 2023 20:13:45 +0000 https://richmccue.com/?p=4445

    Can Generative AI tools help student admission and transfer professionals evaluate course transfer credits? The presentation slides and all other materials were created or curated by Rich McCue, MA, BComm (Digital Scholarship Commons Manager and Education Technology Instructor in the Faculty of Education). Here are the materials from the presentation:

    If you have any comments, questions, or suggestions please feel free to reach out to me at: rmccue@uvic.ca

    It is safe for a student to use AI for an academic assignment?
    ]]> https://richmccue.com/2023/10/30/generative-ai-student-transfers-a-useful-tool/feed/ 0 4445 Scaling Makerspace Learning – Embedding Workshops in for-Credit Classes https://richmccue.com/2023/10/18/scaling-makerspace-learning-embedding-workshops-in-for-credit-classes/?utm_source=rss&utm_medium=rss&utm_campaign=scaling-makerspace-learning-embedding-workshops-in-for-credit-classes https://richmccue.com/2023/10/18/scaling-makerspace-learning-embedding-workshops-in-for-credit-classes/#respond Thu, 19 Oct 2023 02:19:21 +0000 https://richmccue.com/?p=4419 I created this video and infographic to be part of the International Symposium on Academic Makerspaces – ISAM 2023 – which is being held this year at Carnegie Mellon University in Pittsburgh, PA. The video outlines some of the things that the UVic Libraries Makerspace (named the Digital Scholarship Commons), was able to lead workshops for over 20,000 participants in for credit classes in large part by partnering with faculty members to integrate makerspace workshops into their courses.

    Below is the infographic that I created to accompany the conference video. I’ve also included the script of the video below for those who might want to read it.

    “In January 2021 we led the largest workshop in our Library based Makerspace history! We taught our 3D Design & Print workshop to a 1st-year Robotics class of 191 students. Their Electrical Engineering professor wanted to make sure everyone had the skills to design custom-designed parts for their VEX Robotics kits.  

    While the number of participants in that workshop was unusually large, it is representative of the hundreds of workshops we’ve taught in for-credit classes at the invitation of professors since 2017. So far we’ve taught almost 20,000 workshop participants in for-credit classes compared to just over 7,000 who participated in drop-in makerspace workshops.

    One of the primary objectives of our makerspace is to provide hands-on making experiences to as many students as possible. That said, offering makerspace workshops through for-credit courses was not something that we planned for, but luckily it happened organically. From our opening day, we made our workshops available to all students, staff and faculty, which turned out to be one of the best decisions we made.

    Two months after opening our doors, a professor took our 3D Design & Print workshop and then asked us if we could lead the workshop for his EdTech class. Of course, we said yes! This was the first workshop we embedded in a for-credit class, and it opened our eyes to the benefits of partnering with professors, and we help them solve at least two problems:

    1. First, we help their students acquire skills that the professor didn’t feel “expert” enough to teach on their own, often in the service of alternate format assignments, which have become very popular with the advent of Generative AI tools.
    2. Second, we offer to teach in-class workshops even when the instructor is out of town.

    We always consult with professors requesting workshops to make sure that our curriculum aligns with their course objectives. We did this for the Robotics class by creating a new tutorial on how to modify VEX parts.

    One of the things that we often see in our workshops is that the level of engagement rises noticeably once the active learning portion of the workshop begins. Feedback from students is overwhelmingly positive. Most love the new “high-tech” maker skills they are acquiring.

    Here is some feedback from workshop participants:

    • A History professor said, ‘The library makerspace is an exciting venue where my students and I have been exposed to cutting-edge digital tools.’ 
    • A student emailed us saying, “The libraries makerspace workshops are the best-kept secret on Campus!”

    While we were fortunate to discover how helpful partnering with instructors can be to increase the reach of our workshops, there have been a few challenges:

    • First, makerspace classroom overscheduling has been a pain point. The main way we avoid overbooking is to run workshops in a professor’s classroom unless makerspace equipment is needed.
    • Second, as the number of workshop requests grew, our instructors eventually ran out of time to take on new workshop requests.
      • One solution was to hire “Graduate Assistants” to lead workshops in their areas of expertise. 
      • Secondly, we asked returning professors if they would like to lead workshops on their own using our curriculum and support.

    It’s hard to believe that we’ve taught 20,000 makerspace workshop participants in the past 6 years. Partnering with faculty to embed our workshops in their courses has in large part made it possible to reach so many students, many of whom did not know that there was a makerspace open to them in the library. The positive feedback we receive from both teaching faculty and students makes all the hard work we’ve done worthwhile.”

    ]]>
    https://richmccue.com/2023/10/18/scaling-makerspace-learning-embedding-workshops-in-for-credit-classes/feed/ 0 4419
    Generative AI, Academic Assignments & Assessment: Exclude or Embrace? (UVic Phychology Instructors) https://richmccue.com/2023/10/13/generative-ai-academic-assignments-assessment-exclude-or-embrace-uvic-phyc/?utm_source=rss&utm_medium=rss&utm_campaign=generative-ai-academic-assignments-assessment-exclude-or-embrace-uvic-phyc https://richmccue.com/2023/10/13/generative-ai-academic-assignments-assessment-exclude-or-embrace-uvic-phyc/#respond Fri, 13 Oct 2023 16:57:29 +0000 https://richmccue.com/?p=4413

    We had a wonderful discussion about AI and academic assignments with instructors from the UVic Psychology department. The presentation slides and all other materials were created or curated by Rich McCue, MA, BComm (Digital Scholarship Manager & Education Technology Instructor in the Faculty of Education) and Zahra Premji, PhD (Health Research Librarian). Here are the materials

    If you have any questions or suggestions please feel free to reach out to me at: rmccue@uvic.ca

    It is safe for a student to use AI for an academic assignment?
    ]]> https://richmccue.com/2023/10/13/generative-ai-academic-assignments-assessment-exclude-or-embrace-uvic-phyc/feed/ 0 4413 Generative AI, Academic Assignments & Assessment: Exclude or Embrace? (Council of Canadian Departments of Psychology) https://richmccue.com/2023/09/13/council-of-canadian-departments-of-psychology-generative-ai-academic-assignments-assessment-exclude-or-embrace/?utm_source=rss&utm_medium=rss&utm_campaign=council-of-canadian-departments-of-psychology-generative-ai-academic-assignments-assessment-exclude-or-embrace https://richmccue.com/2023/09/13/council-of-canadian-departments-of-psychology-generative-ai-academic-assignments-assessment-exclude-or-embrace/#respond Wed, 13 Sep 2023 22:24:14 +0000 https://richmccue.com/?p=4361
    Generative AI suggestions for instructors

    This is a presentation on generative AI and Academic Assignments by Rich McCue, MA, BComm (Digital Scholarship Manager & Education Technology Instructor in the Faculty of Education) and Zahra Premji, PhD (Health Research Librarian) for the Council of Canadian Departments of Psychology event in September 2023.

    If you have any questions or suggestions please feel free to reach out to me at: rmccue@uvic.ca

    It is safe for a student to use AI for an academic assignment?
    ]]>
    https://richmccue.com/2023/09/13/council-of-canadian-departments-of-psychology-generative-ai-academic-assignments-assessment-exclude-or-embrace/feed/ 0 4361
    Generative AI & Academic Assignments: Exclude or Embrace? (UVic’s Let’s Talk About Teaching Conference) https://richmccue.com/2023/08/28/generative-ai-academic-assignments-exclude-or-embrace/?utm_source=rss&utm_medium=rss&utm_campaign=generative-ai-academic-assignments-exclude-or-embrace https://richmccue.com/2023/08/28/generative-ai-academic-assignments-exclude-or-embrace/#respond Tue, 29 Aug 2023 01:01:18 +0000 https://richmccue.com/?p=4331
    Generative AI & Assignments - Where to Start?

    This is a presentation on generative AI and Academic Assignments by Rich McCue, MA, BComm and Zahra Premji, PhD for the UVic Learning and Teaching Support and Innovation’s (LTSI) Let’s Talk About Teaching (LTAT) event in August 2023.

    If you have any questions, suggestions or would like to explore the possibility of a DSC workshop for your class, please feel free to reach out to me: rmccue@uvic.ca

    When is it safe for students and others to use Generative AI?
    ]]>
    https://richmccue.com/2023/08/28/generative-ai-academic-assignments-exclude-or-embrace/feed/ 0 4331
    Sketchnoting: An Effective & Fun End-of-Semester Review Activity? https://richmccue.com/2023/05/19/sketchnoting-an-effective-fun-end-of-semester-review-activity/?utm_source=rss&utm_medium=rss&utm_campaign=sketchnoting-an-effective-fun-end-of-semester-review-activity https://richmccue.com/2023/05/19/sketchnoting-an-effective-fun-end-of-semester-review-activity/#respond Fri, 19 May 2023 18:30:34 +0000 https://richmccue.com/?p=4189 The last class of the semester for my undergraduate EdTech class was looming. While I wanted to make the class review of what we’ve learned over the semester more engaging than me droning on with my well-worn slide deck, did I want to put in the time and effort to create a more engaging last day of class experience? 

    Student Sketcnote of EdTech Highlights.
    by Anna MacDonell

    I thought back to my experiences as a learner at the end of the semester and remembered the best “last class” I’d ever experienced. In a self-regulated learning class, we create a Sketchnote of highlights of the course on the last day of class in small groups. It was a genius idea for a course review in Dr. Allyson Hadwin class, and a perfect way to end the first course of my graduate degree (Davis & Hadwin, 2021).

    As the end of the semester approaches, students may feel overwhelmed with all the assignments and tests they have to prepare for. They also often struggle to identify and summarize all the important concepts and information they’ve learned throughout the semester. This is where sketchnoting can come in handy as a powerful tool to help students retain and organize their new knowledge and skills. 

    The feedback from my students on the Sketchnoting activity was overwhelmingly positive. Several students told me (unprompted) that the Sketchnote they did in class was the best course review they’d ever done. With their permission, I’ve included several of their sketchnotes in this blog post. It was a wonderful way to conclude both sections of the Educational Technology class I taught (EDCI 336 at the University of Victoria), and I suspect would be a wonderful tool to use in many other K-12, undergraduate, and graduate courses.

    For anyone who is interested in trying it out, this is the format I used to run an end-of-semester sketchnoting activity (McCue, 2023), and here is the UVic Libraries DSC Sketchnoting workshop that my class completed earlier in the semester to introduce them to Sketchnoting: 

    by Hailey Whittaker
    1. Brainstorm with POST-IT Notes (20 min)
      • 10 min: First on your own, use Post-It notes to brainstorm and identify concepts, ideas, and pedagogies that are important to you. Identify 1 or 2 key takeaways from each module of the course.
      • 10 min: Compare your Post-It notes with your partner, and discuss any differences between them. Because of the different backgrounds and grade levels you will teach, there may be significant differences, and that is just fine.
      • Feel free to create new Post-It notes for yourself based on your discussion with your partner.
    2. Organize Your POST-IT Notes (5 min)
      • Next, individually you will organize your Post-It notes in a way that will allow creates visual relationships between the notes to help you prepare to make your sketchnote.
      • This is optional, but you might want to quickly draw simple doodles on your Post-It notes to visualize some of the concepts and ideas you’ve identified.
    3. Draw Your Sketchnote on Paper (30 min)
      • Continue to work on your own, and use a provided sheet of paper (11”x 17”), along with your pens, and highlighters (highlighters are optional) to create a sketchnote, using your organized Post-It notes to guide you.
      • Create Relationships Between Ideas with arrows or other connecting doodles. Bonus marks for connecting course content with prior knowledge.

    Some of the key reasons why I think that Sketchnoting is such an effective end-of-semester learning and review tool include:

    by Statia Burchart
    1. Boosts Memory Retention – Sketchnoting is a creative and graphic process that combines text with illustrations, symbols, and structures to record thoughts, ideas and relationships. This technique can be especially useful for undergraduate students as they review and consolidate their learning. One of the key benefits of sketchnoting in educational settings is that it can help improve memory retention (Meade et al., 2018). By combining text with visual elements, undergraduate students can create a more engaging and memorable representation of the material they are studying. This can help them better remember key concepts, ideas and relationships (Wammes et al., 2016) as a final course review or in preparation for a final exam.
    2. Increases Comprehension – Sketchnoting can also help undergraduate students organize their thoughts and ideas. By creating a visual representation of the material they are studying, undergraduate students can more easily see connections and relationships between different concepts. This can help them better understand the material and identify areas where they may need to focus their review efforts (Gansemer-Topf et al., 2021).
    3. Enhances Creativity & Helps Focus – In addition to improving memory retention and organization, sketchnoting can also be a fun and creative way for undergraduate students to engage with the material they have studied. By incorporating drawings and other visual elements into their semester-end summary, or weekly notes, undergraduate students can add an element of creativity to their learning practice, and in my personal experience, make it easier to focus on less interesting topics and relate them to other ideas and information I already know. This can help make the review process more enjoyable and engaging (Smith, 2016).
    4. Effective Communication of Learning – Another benefit of sketchnoting is that it can help undergraduate students communicate their ideas more effectively. By creating a visual representation of their thoughts and ideas, undergraduate students can more easily share their understanding of the material with others. This can be especially useful during group study sessions or when presenting their work to others (Gansemer-Topf et al., 2021).
    by Sophie Taylor

    Going forward I’m going to be using Sketchnoting every semester as a last day of class course review activity. By encouraging students to incorporate Sketchnoting into their review and study routines, undergraduate students can improve their memory retention, better organize their thoughts and ideas, add an element of creativity to their review process, and communicate their ideas more effectively.

    Here are all student sketchnotes from EDCI 336 who gave their permission to share them publicly: https://photos.app.goo.gl/h9eiKaCDhiGXf91J9 

    Davis, S. K., & Hadwin, A. F. (2021). Exploring Differences in Psychological Well-Being and Self-Regulated Learning in University Student Success. Frontline Learning Research, 9(1), 30–43. https://eric.ed.gov/?id=EJ1284915 

    Gansemer-Topf, A. M., Paepcke-Hjeltness, V., Russell, A. E., & Schiltz, J. (2021). “Drawing” your Own Conclusions: Sketchnoting as a Pedagogical Tool for Teaching Ecology. Innovative Higher Education, 46(3), 303–319. https://doi.org/10.1007/s10755-020-09542-6 

    Mccue, R. (2023). Sketchnoting to Reflect on the Term. Rich McCue v5.0. https://richmccue.com/2023/03/25/week-12-reflecting-on-the-term/ 

    Meade, M. E., Wammes, J. D., & Fernandes, M. A. (2018). Drawing as an Encoding Tool: Memorial Benefits in Younger and Older Adults. Experimental Aging Research, 44(5), 369–396. https://doi.org/10.1080/0361073X.2018.1521432

    Smith, R. S. (2016). The scientific case for doodling while taking notes. Quartz. Retrieved 6 May 2016, from https://qz.com/676557/the-scientific-case-for-doodling-while-taking-notes/ 

    Wammes, J. D., Meade, M. E., & Fernandes, M. A. (2016). The drawing effect: Evidence for reliable and robust memory benefits in free recall. The Quarterly Journal of Experimental Psychology, 69(9), 1752–1776. https://doi.org/10.1080/17470218.2015.1094494 

    ]]>
    https://richmccue.com/2023/05/19/sketchnoting-an-effective-fun-end-of-semester-review-activity/feed/ 0 4189
    Week 12 – Reflecting on the term https://richmccue.com/2023/03/25/week-12-reflecting-on-the-term/?utm_source=rss&utm_medium=rss&utm_campaign=week-12-reflecting-on-the-term https://richmccue.com/2023/03/25/week-12-reflecting-on-the-term/#comments Sat, 25 Mar 2023 15:44:17 +0000 https://edtechuvic.ca/edci336/?p=4069 We’re into the final stretch of our time together in 336, and we will be doing some reflecting this week on the major themes we’ve covered in the course, as well as choosing one of four different activities during the hands-on portion of the class. Enjoy!

    Learning Objectives:

    Pre-class Activities:

    Sketchnoting for review (this video focuses on sketchnoting in the science classroom) (8 min)

    3D Desing & Print introduction video (2 min)

    Smartphone photography video (7 min)

    Interactive story telling with Twine (7 min)

    Death by PowerPoint (9 min but a HILARIOUSLY funny video 😉

    Class Time

    We’re going old-school EdTech this week as you Sketchnote your key takeaways and important ideas from this course! Even though we’ve all experienced EDCI 336 together this semester, everyone’s sketchnotes will be different because everyone’s brought different things with them to the class, and we will be teaching learners of different ages, so what is very important to me might not be as important to my classmate.

    The photo below is of a group of education students sketchnoting to review the main themes and takeaways from a course on Self-Regulated Learning (SRL) at the end of the semester on a much larger sheet of paper than we will be using.

    Learners sketchnoting or drawing on a large sheet of paper to review course content at the end of the semester
    Learners sketchnoting or drawing on a large sheet of paper to review course content at the end of the semester – Photo Credit: Rich McCue, 2013

    post-in notes for brainstorming, unorganized
    by Rich McCue (2023)

    Step 1: Brainstorm with Post-It Notes (20 min)

    Step 2: Organize Your Post-It Notes (5 min)

    Step 3: Draw Your Sketchnote on Paper (30 min)

    Step 4: Post a Photo of Your Sketchnote to Your Blog (5 min)

    EdTech Training Resources

    These are mostly, but not all, free training resources for EdTech tools and related resources:

    Hands-on Lab Time

    This week you can choose your hands-on activity from one of four options: 3D Design & Printing -or- SmartPhone Photography -or- Interactive Storytelling with Twine -or- Death by PowerPoint (or how to create engaging presentations)…

    3D Design & Printing

    TinkerCad is a user-friendly surface that enables users to create 3-dimensional digital designs, which then can be 3D printed and made into physical objects. TinkerCad is useful for all ages and levels, as its features are user-friendly and free to use. TinkerCad makes 3D designing more accessible and grants the ability to publish designs under a Creative Commons license. In addition to this workshop, throughout TinkerCad there are numerous tutorials that model a hands-on approach to learning this software.

    SmartPhone Photography

    Smartphone photography focuses on using your mobile device to take beautiful pictures. Just because you don’t have a big fancy camera or the newest smartphone, you can still take amazing photos with whichever smartphone camera you currently own. Throughout the following activities, you will become more familiar with your smartphone camera app and become a better photographer as you learn about critical elements such as lighting, the story you are trying to tell and photo editing on your smartphone:

    Twine

    Twine is an open-source tool that can be used to create stories that are interactive and non-linear. Twine can be used for storytelling including embedded images, video, and audio if desired. Optionally Twine can also create game-based experiences which give readers options and choices throughout the story. All reader choices and selections in Twine stories are saved locally in the readers’ web browser and there is also no need to create an account, which means that there are little to no privacy concerns when using Twine in educational settings.

    Death by PowerPoint

    We have all been there before… In a class or a meeting, the presenter is reading text off of densely packed PowerPoint slide after slide. If it isn’t death by PowerPoint, reading text off poorly constructed slides to an audience is a very ineffective way to teach or convey information in a business setting. In this workshop, we’re going to focus on learning and using tips and tricks so your presentations engage and persuade, and not bore your audience to death by PowerPoint.

    Learning Pod Time & Homework

    ]]>
    https://richmccue.com/2023/03/25/week-12-reflecting-on-the-term/feed/ 1 4069
    Week 11 – Technology and Inquiry with Joanna Lake https://richmccue.com/2023/03/24/technology-and-inquiry-joanna-lake/?utm_source=rss&utm_medium=rss&utm_campaign=technology-and-inquiry-joanna-lake https://richmccue.com/2023/03/24/technology-and-inquiry-joanna-lake/#comments Fri, 24 Mar 2023 20:00:54 +0000 https://edtechuvic.ca/edci336/?p=1495
    Joanna Lake portrait photo
    Photo credit: Joanna Lake

    This week we are fortunate that Joanna Lake, who is a K-12 educator in Victoria, BC, has taken the time out of their busy schedule to engage talk to us about her inquiry-based learning practice and assessment in her middle school classes. Joanna is interested in using technology to provide authentic learning experiences and incorporating Indigenous pedagogy in both face-to-face and online learning environments. 

    When we move to the hands-on lab portion of our class time, we will review the semester in our learning pods by Sketchnoing highlights from each topic of the semester and then make visual connections between them.

    Learning Objectives:

    Pre-class Activities:

    As you watch the following videos, please do the following:

    Technology & Inquiry

    The Habits of the Inquiry Teacher (2 min)

    View this post on Instagram

    A post shared by Trevor MacKenzie (@trev_mackenzie)

    Four Pillars of Inquiry Based Learning - Explore a passion - Aim for a goal - Delve into your curiosities - Take on a new challange

    The Four Pillars of Inquiry (2 min)

    Inquiry in Rebecca Bathurst-Hunt’s Kindergarten Class

    See - Think - Wonder worksheet
    Photo: The Curious Kindergarten

    Rebecca Bathurst-Hunt, who is a kindergarten teacher at George Jay Elementry School in Victoria, BC often uses “See 👀, Think 💭, Wonder❓” exercises with her kindergarten learners to help them think more critically about the world around them. Rebecca typically does this by asking her learners to look closely at an object or an idea and then encourages them to ask themselves:

    Rebecca typically uses paper worksheets and clipboards for her young learners so that they can easily go outside to conduct inquiries in nature as well as in the classroom. As most of her learners are not yet writing, she encourages them to draw on their worksheets, and then Rebecca assists by writing a summary of the learners’ stated thoughts on the form.

    The video below uses the “See, Think, Wonder” technique with Google Slides rather than paper and clipboard, but the concept is the same no matter what media you choose to use as an instructor.

    “See, Think, Wonder”: A Visual Thinking Strategy using Google Slides (2 min)

    Inspirational Inquiry-Based Learning Sketchnotes

    Please skim through Trevor’s wonderful Inquiry-Based learning Sketchnotes. Trevor uses them to help scaffold the inquiry process for both learners and their parents. As you review the sketchnotes, ask yourself the following questions:

    Class Time

    Guest lecture and Q&A by Joanna Lake (follow her great Twitter feed)!

    Joanna graciously shared the slides from her presentation with us, which I hope will be particularly useful to you as you prepare for your practicums:

    Checkin scale with 9 guinea pigs
    Joanna Lake’s Guinea Pick check-in scale

    Hands-on Lab Time

    Sketchnoting

    We’re going old-school EdTech this week as you Sketchnote your key takeaways and important ideas from this course! Even though we’ve all experienced EDCI 336 together this semester, everyone’s sketchnotes will be different because everyone’s brought different things with them to the class, and we will be teaching learners of different ages, so what is very important to me might not be as important to my classmate.

    The photo below is of a group of education students sketchnoting to review the main themes and takeaways from a course on Self-Regulated Learning (SRL) at the end of the semester on a much larger sheet of paper than we will be using.

    Learners sketchnoting or drawing on a large sheet of paper to review course content at the end of the semester

    post-in notes for brainstorming, unorganizedStep 1: Brainstorm with Post-It Notes (20 min)

    Step 2: Organize Your Post-It Notes (5 min)

    Step 3: Draw Your Sketchnote on Paper (30 min)

    Step 4: Post a Photo of Your Sketchnote to Your Blog (5 min)

    EdTech Training Resources

    These are mostly, but not all, free training resources for EdTech tools and related resources:

    Learning Pod Time & Homework

    ]]>
    https://richmccue.com/2023/03/24/technology-and-inquiry-joanna-lake/feed/ 1 3506
    Week 10 – Blended / Online / Multi-Access Learning https://richmccue.com/2023/03/17/blended-online-multi-access-learning/?utm_source=rss&utm_medium=rss&utm_campaign=blended-online-multi-access-learning https://richmccue.com/2023/03/17/blended-online-multi-access-learning/#comments Fri, 17 Mar 2023 21:00:11 +0000 https://edtechuvic.ca/edci336/?p=1356 This week we are going to discuss the role that Flipped, Blended, Online, and Mult-Access Learning can play in our classrooms. Whether or not any of these modalities would be appropriate for your class is highly dependent on the age of your learners, the resources available to you at your school, and the speed of the internet and equipment in your learners’ homes. We will also explore how the Android Science Journal can be used, and look for ways that it can enable active learning at all age levels, and for individual or group activities (available for both iOS and Android phones and tablets). I’m looking forward to some good discussions and engaging hands-on experiences in our class time together. Enjoy!

    Learning Objectives

    Pre-class Activities

    Flipped/Multi-Access Learning

    A few years ago I completed my master’s thesis on flipped learning for information literacy instruction, so I am keenly interested in this topic. That said, while a flipped learning pedagogy, or a blended learning method, can be great tools to use in some circumstances, they are not panaceas and are not the best teaching tools in all situations and at all grade levels. The video below talks about how one elementary school teacher uses a modified Flipped teaching method to differentiate learning for her students to better meet their individual needs. (4 min)

    Please ask yourself the following questions:

    Multi-access or Hyflex Learning, and the goal of radical flexibility that some educators are pursuing for the learners in their classes. Please read the following article about Multi-Access Learning, and optionally listen to a portion of the embedded podcast about Hyflex Learning: 

    Please ask yourself the following questions:

    Active Learning with the Arduino Science Journal

    Watch this Arduino Science Journal introductory video (1 min). As you watch the video, think of ways you could possibly use the Arduino Science Journal to facilitate learner inquiries with a science component.

    This 1:21 video demonstrates six different ways you can use the science journal to engage in active learning experiments:

    Install Arduino Science Journal on your phone. The install links are at the bottom of the web page.

    Class Time

    Multi-Access vs Hyflex vs Blended (6 min)

    Hands-on Lab Time

    Arduino Science Journal

    “The Science Journal transforms your device into a pocket-size science tool that encourages students to explore their world. As they conduct eye-opening experiments, they’ll record observations and make new, exciting discoveries.”

    1. Arduino Science Journal app iconIf you haven’t done so already, please install Arduino Science Journal on your phone (note that there are versions available for Chromebook and iPad carts in schools). The install links are at the bottom of the web page.
    2. Complete the following activities:
      • Find an Android Science Journal module on Light, Motion, or Sound, that looks interesting to you and that would be appropriate for the grade level you hope to teach at.
      • Work through the activity.
      • Reflect on how the Science Journal might be a useful tool in your grade level (this could be part of your critical reflection). 
      • What questions might you need answers to before using (or not) Science Journal in your class?

    Learning Pod Time & Homework

    1. Learning Pod Time:
      • Work on Assignment 2 with your learning pod.
      • Catch up on any missing blog assignments (including any which I didn’t get full 100% on the rubric).
    2. Weekly blog post to document your learning in class:
      • Review the 336 Blog Post Rubrics to make sure you’re including all the minimally required elements for your weekly blog posts.
      • Here is a sample high-quality weekly blog post on the topic and/or technology of the week.
      • Please critically discuss this week’s topic and/or technology. If you’d like you can use the prompts below for inspiration:
        • Articulate the benefits and drawbacks of a flipped learning curriculum, including the potential pitfalls that need to be identified and prepared for.
        • Discuss the benefits and drawbacks of a Multi-Access or Hyflex approach to teaching, including the potential pitfalls that need to be identified and prepared for.
        • Identify an Arduino Science Journal activity that would be appropriate for the grade you hope to teach, and reflect on whether or not it would be difficult or impossible to do in a non-digital way.
      • Use the category, “weekly-reflection“.
    3. Weekly Free Inquiry blog post:
      • Document your free inquiry progress, reflecting on your progress, as well as identifying and evaluating helpful resources you found. Provide details on your learning progress (through success or failure).
      •  Employ a multimedia strategy in your post to help document your inquiry by using text and one or more other media to help make it more engaging (e.g., image, screencast, video, or other formats).
      • Utilize social writing strategies such as hyperlinks to blog posts (e.g., trackbacks) or to articles/resources consulted, including web pages, images, videos, etc.
      • Use the category, “free-inquiry”.
      • Share your post with your learning pod at your next meeting (usually at the end of class time).
    ]]>
    https://richmccue.com/2023/03/17/blended-online-multi-access-learning/feed/ 2 3503
    Knowledge Mobilization Workshop: Hands-on Activities https://richmccue.com/2023/03/14/knowledge-mobilization-hands-on-activities/?utm_source=rss&utm_medium=rss&utm_campaign=knowledge-mobilization-hands-on-activities https://richmccue.com/2023/03/14/knowledge-mobilization-hands-on-activities/#respond Tue, 14 Mar 2023 16:06:54 +0000 https://richmccue.com/?p=3472 Introductory Presentation

    Here are the slides from the Knowledge Mobilization presentation for your reference. And a lecture video using the slides.

    Workshop Activity

    Other KM Skills Activities

    After you finish the Infographic workshops, please feel free to explore these other hands-on Knowledge Mobilization (KM) skills activities to develop new skills:

    ]]>
    https://richmccue.com/2023/03/14/knowledge-mobilization-hands-on-activities/feed/ 0 3472
    Week 9 – Gaming in Education https://richmccue.com/2023/03/02/gaming-in-education/?utm_source=rss&utm_medium=rss&utm_campaign=gaming-in-education https://richmccue.com/2023/03/02/gaming-in-education/#respond Fri, 03 Mar 2023 00:00:58 +0000 https://edtechuvic.ca/edci336/?p=1379 I hope that you will find this week’s topic interesting, engaging, and a bit fun as we tackle Gaming and Gamification in Education. I’m looking forward to some good discussions and engaging hands-on experiences in our class time together. Enjoy!

    Learning Objectives

    Pre-class Activities

    Skim the American Psychological Association article on Gaming to Learn. While skimming, please ask yourself these questions from the article:

    Watch a CNN interview with Jon Roozenbeek on GetBadNews (4 min)

    Skim the Bad News Teachers Guide, and please ask yourself the following questions as you skim:

    Test, video game, or cool inquiry project?

    (15 min)

    Digital Escape Rooms in Education? 

    (15 min)

    Class Time

    Do games belong in schools? Please think back to times that you played games when in K-12 and as yourself these questions:

    1. What types of games have you seen played in a school setting?
    2. How have you seen or experienced electronic games being used in school settings? 
    3. Have you ever played a multiplayer educational game?
    4. What concerns do you have about introducing games as a teaching strategy?

    Let’s have a bit of fun and play the educational game, GetBadNews.com which aims to teach people how to critically evaluate the news and social media posts to help them identify the truely “fake news.”

    Bad News
    Bad News – Inoculating learners from fake news in social media and elsewhere

    Open GetBadNews.com in a tab in your web browser, and then as you play, please reflect on how well the creators of the game did the following:

    (4 min)

    Hands-on Lab Time

    As you play the games below, please think about the following:

    1. If you were to use this game as part of a lesson, does the game help achieve the lesson’s learning objectives?
    2. Are there instructions & explanations about underlying concepts?
    3. Does it include adaptive scaffolding mechanisms & guidance?
    4. Does gameplay offer just doable challenges?
    5. Are there dynamic in-game scores that provide learning progress feedback?
    6. Is a learning attitude promoted without time constraints or penalty scores?

    Game time!

    ]]>
    https://richmccue.com/2023/03/02/gaming-in-education/feed/ 0 3504
    Week 8 – Cross-Curricular Coding & Computational Thinking https://richmccue.com/2023/02/15/weej-8-cross-curricular-coding-computational-thinking/?utm_source=rss&utm_medium=rss&utm_campaign=weej-8-cross-curricular-coding-computational-thinking https://richmccue.com/2023/02/15/weej-8-cross-curricular-coding-computational-thinking/#respond Wed, 15 Feb 2023 22:00:26 +0000 https://edtechuvic.ca/edci336/?p=1553 This week will take a closer look at coding and computational thinking as cross-curricular tools we can use to enrich our curriculum, and potentially recommend tools our learners can use to aid them in their inquiries. I hope that there aren’t too many groans while I tell yet another fainting miniature goat story to illustrate an example of computational thinking.

    Week 8 Learning Objectives

    Pre-class Activities

    Watch the Digital Literacy + Computation Thinking for Children video below (4 min).

    Skim SD 61’s Computational Thinking resource web page.

    Watch this overview of a curriculum that integrates coding with English & Language Arts activities (4 min):

    In what ways could “coding” be used to enrich one of your favourite non-math subjects?

    Code with Scratch by MIT

    This is optional, but consider creating a Scratch account at MIT’s free Scratch website.

    You can use Scratch without creating an account, but you cannot save and share your programs with other people without an account. Note: Scratch is hosted by the Massachusetts Institute of Technology (MIT), and the data is stored in the USA and is subject to the US Patriot Act.

    Class Time

    (12 min)

    Links from the above instructional video:

    Hands-on Lab Time

    See what a finished, or nearly finished Scratch games look like by playing two or more of the games below in your favourite subject areas. This will allow you to see some examples of finished coding projects that are geared toward K-12 learners:

    Next, please explore the Hour of Code website or CS First websites below by searching for a coding project for the age group you want to teach at. Note that on the top you can filter based on grade. Then on the left-hand column, you can filter by topic, and activity type. Please select the activity type: “Self-led tutorial”, and the Language: “Blocks”:

    Complete one or more of the following coding activities:

    Learning Pod Time & Homework

    1. Weekly blog post to document your learning in class:
      • Review the 336 Blog Post Rubrics to make sure you’re including all the minimally required elements for your weekly blog posts.
      • Here is a sample high-quality weekly blog post on the topic and/or technology of the week.
      • Please do the following:
        • Embed or link, or post a screenshot of one of your coding projects into your blog post.
        • Either use the prompts below or critically reflect on Coding & Computation thinking on your own:
          • Can computation thinking help learners become better problem solvers?
          • Are there any non-math-related opportunities for integrating coding and computational thinking into your grade level’s curriculum?
          • Could computation thinking or coding turn math abstractions into concrete forms for students with their inquiries at the grade level you’d like to teach?
      • Use the category, “weekly-reflection“.
      • Share your post with your learning pod at your next meeting (usually at the end of class time).
    2. Weekly Free Inquiry blog post:
      • Document your free inquiry progress, reflecting on your progress, as well as identifying and evaluating helpful resources you found. Provide details on your learning progress (through success or failure).
      •  Employ a multimedia strategy in your post to help document your inquiry by using text and one or more other media to help make it more engaging (e.g., image, screencast, video, or other formats).
      • Utilize social writing strategies such as hyperlinks to blog posts (e.g., trackbacks) or to articles/resources consulted, including web pages, images, videos, etc.
      • Use the category, “free-inquiry”.
      • Share your post with your learning pod at your next meeting (usually at the end of class time).
    ]]>
    https://richmccue.com/2023/02/15/weej-8-cross-curricular-coding-computational-thinking/feed/ 0 3507
    Week 7 – Citizenship Online – Privacy, Safety, Bullying, Consent + Creative Commons Video https://richmccue.com/2023/02/15/week-7-creative-commons-citizenship-online-privacy-safety-bullying-consent/?utm_source=rss&utm_medium=rss&utm_campaign=week-7-creative-commons-citizenship-online-privacy-safety-bullying-consent https://richmccue.com/2023/02/15/week-7-creative-commons-citizenship-online-privacy-safety-bullying-consent/#respond Wed, 15 Feb 2023 16:00:42 +0000 https://edtechuvic.ca/edci336/?p=1127 This week should be both very informative, and fun! We are lucky that Jesse Millar has agreed to meet with us to talk about online privacy, safety, bullying and consent. After what is always an informative and interesting Q&A with Jesse we will further our video editing skills by learning new video techniques as we “re-mix” Creative Commons licensed video and audio clips.

    Learning Objectives:

    Pre-class Activities:

    The pre-class activities this week should take about 2 hours to complete.

    Watch our guest speaker Jesse Miller’s wonderful video on children, social networks, & media literacy (15 min):

    Learn more about your Digital Footprints & Google yourself: 

    Read the BC provincial government’s Online safety document. Please make sure to click on the “Expand All” button for each section of the document so that you can see all the tips and suggestions. After you finish reading the document please ask yourself:

    Watch: Remix Manifesto Documentary (86 min). Please ask yourself the following questions as you watch the video:

    Don’t forget that Orange Shirt Day is held every year at the end of September. “Orange Shirt Day is a day when we honour the Indigenous children who were sent away to residential schools in Canada and learn more about the history of those schools.” Please read this excellent CBC Kids multimedia article that outlines where Orange shirt day came from and why it’s important.

    Class Time:

    Citizenship Online: Privacy, Safety, Bullying, & Consent

    We will begin our session with Jesse Miller’s presentation on Citizenship Online: Privacy, Safety, Bullying, & Consent. The presentation will be followed by a Question and Answer period. Below is a presentation similar to what Jesse presented to the class, but directed a bit more towards parents (60 min).

    Creative Commons & Copyright

    (5 min)

    Rip.Mix.Learn! Discussion

    Please reflect on the video you watched in preparation for the class and answer the following questions for yourself:

    Hands-on Lab Time:

    Now we will get hands-on and you will make your own Screencast tutorial, edit your screencast and then make your screencast interactive using the H5P plugin on your OpenEd.ca WordPress blog. Let’s dive in!

    Step 1 – Slow Motion Video:

    Using the Libraries’ DSC Video editing tutorial you are going to find a Creative Commons licensed video clip and audio clip, and then create a short video with a slow-motion element, and include the audio clip in your video project.

    Step 2 – Green Screen Video:

    Homework:

    1. Weekly blog post to document your learning in class and to document progress on your inquiries (incorporate audio, video, and screen video capture into your blog posts this week).
      • Review the 336 Blog Post Rubrics to make sure you’re including all the minimally required elements for your weekly blog posts.
      • Here is a sample high-quality weekly blog post on the topic and/or technology of the week.
      • Please address complete the first prompt below and then either address three or more blog prompts, or reflect on something else that interests you from this week’s topic:
        • Post a video you made today as part of your reflection.
        • How can creative commons licensed materials help me as a teacher?
        • How can we help our learners manage their digital footprints?
        • What was the most interesting thing you found when you googled yourself?
        • Will you change your use of social media after the talk and Q&A with Jesse Miller?
        • Could video creation be effective learning resource and/or class activity at the grade level I hope to teach (with learners creating their own videos)
    2. Weekly Free Inquiry blog post:
      • Document your free inquiry progress, reflecting on your progress, as well as identifying and evaluating helpful resources you found. Provide details on your learning progress (through success or failure).
      •  Employ a multimedia strategy in your post to help document your inquiry by using text and one or more other media to help make it more engaging (e.g., image, screencast, video, or other formats).
      • Utilize social writing strategies such as hyperlinks to blog posts (e.g., trackbacks) or to articles/resources consulted, including web pages, images, videos, etc.
      • Use the category, “free-inquiry”.
      • Share your post with your learning pod at your next meeting (usually at the end of class time).
    ]]>
    https://richmccue.com/2023/02/15/week-7-creative-commons-citizenship-online-privacy-safety-bullying-consent/feed/ 0 3501
    Week 6 – Professional Development with EdCamps https://richmccue.com/2023/02/09/week-6-professional-development-with-edcamps-2/?utm_source=rss&utm_medium=rss&utm_campaign=week-6-professional-development-with-edcamps-2 https://richmccue.com/2023/02/09/week-6-professional-development-with-edcamps-2/#comments Fri, 10 Feb 2023 00:00:53 +0000 https://edtechuvic.ca/edci336/?p=1330 This week we are going to engage in some professional development and personal learning networking (PLN) development. An EdCamp is an unconference, which is a user-generated conference. There is no rigid pre-selection of session topics planned in advance. Instead, ideas for collaboration and conversation are determined as attendees identify common themes/topics that they would like to explore, and what they can teach others about.

    Before we start on our EdCamp we will talk about how Knowledge Management tools can be helpful tools to assist educators to collect and curate lesson plans, tools, and learning objects for their learners.

    Week 6 Learning Objectives

    Pre-class Activities

    What is an EdCamp? (4 min)

    What an EdCamp looks like for participants (2 min)

    Please review topics that have been discussed at other EdCamps for inspiration as you try to think of education or classroom topics that you might be interested in discussing or leading during our EdCamp on Friday. Might your group EdTech inquiry topic make a good EdCamp session topic?

    With the other EDCI 336 class, we will vote on topics at the beginning of class on Friday and may group similar topics together. Please take a quick look at this EdCamp organizers checklist to get a sense of how you might organize an EdCamp for your school or school district one day. Feel free to make a copy of the checklist if you think you might like to use it at some point in the future.

    Class Time

    I hope that you are coping well this week. If you are in class on Friday, you can let me know how you are doing by filling out my optional weekly Check-in poll. If you can’t make it to class, please email me to let me your doing, so that I can better support you in the coming weeks.

    Knowledge Management & Content Curation

    Especially at the beginning of your career as a teacher, it can be overwhelming trying to keep track of all the great tools and teaching methods that we are introduced to in class and bump into as we talk to our peers. One type of tool that can be helpful to keep track of all these resources are digital note-takers/organizers. Some of the most popular organizers used by teachers include:

    Over the years I have used Evernote, Microsoft OneNote, and Google Keep, but a few years back settled on Google Keep as it was free, and worked on my Mac laptop, Windows computer, Android phone, and iPad (all of them are cross-platform now). If you would like to use a tool for curating resources, please choose the one that you think would work best for you, but in my video below I’ll use Google Keep. I also use RainDrop as my general bookmark manager That said, all of these tools work in roughly the same fashion even though they implement their features in slightly different ways.

    The infographic below is a great example of the process many use for content creation. I personally tend to focus on steps 1 and 2, and unless I really, really like a tool I’ll skip #3, sharing.

    The Basics of Content Creation Infographic
    CC-BY-NC-ND – https://Teacher.Challenge.edublogs.org

    KM Curation Tool Demo (6 min)

    EdCamp

    If you are not able to make it to class this week, please work through the rest of this weekly post as it contains everything for the week, except for the student-driven EdCamp sessions on Friday. Also, at some point please connect with your learning pod for an Assignment 2 startup meeting.

    Hands-on Lab Time

    Feel free to explore the personal knowledge management and content creation tools we discussed at the beginning of class time.

    Learning Pod Time & Homework

    1. Reading Break Surprise: No critical reflection or free inquiry post assignments this week! I hope this will allow you to have some downtime so that you can recharge your batteries for the second half of the course.
    2. Learning Pod peer feedback:
      • Spend 10 minutes reviewing the Week 5 Critical Evaluation post from a different member of your learning pod.
      • Please make sure that everyone in the learning pod gets one of their blog posts reviewed.
      • Please be professional and kind as you provide feedback to your peers’ blog posts. Use this guide as you review peer blog posts today, and until the end of the semester: Blog Post Peer-Review guidance <- IMPORTANT INFORMATION – Do not review any peer blog posts until you’ve read this document.
    3. Start planning Assignment 2 – Group EdTech Guided Inquiry with your learning pod. Then do other following:
      • Here is a Group Project Planning Guide for you to review if you would like some general guidance on how to plan for a successful group project. Make your planning & research visible to Rich via one of the following platforms (or talk to Rich if you’d like to use something else):
        • A Google Doc. Share to rich@msys.ca
        • An Office 365 document. Share to rmccue@uvic.ca
        • A new shared Trello Board. Share to rich@msys.ca
      • Every member of the Learning Pod, please Submit the Learning Pod planning document URL or website URL to Rich in the Brightspace Assignment 2A. If you have any questions about this scaffolding assignment, please contact Rich directly.
    ]]>
    https://richmccue.com/2023/02/09/week-6-professional-development-with-edcamps-2/feed/ 1 3502
    Week 5 – Intentionality in Technology Enabled Learning Design https://richmccue.com/2023/02/01/week-5-intentionality-in-edtech-enabled-lerning-design/?utm_source=rss&utm_medium=rss&utm_campaign=week-5-intentionality-in-edtech-enabled-lerning-design https://richmccue.com/2023/02/01/week-5-intentionality-in-edtech-enabled-lerning-design/#respond Wed, 01 Feb 2023 09:00:10 +0000 https://edtechuvic.ca/edci336/?p=533 Welcome to week 5! This week we will talk about two useful frameworks that can assist us in evaluating educational technologies now and into the future. For our hands-on lab time, we will learn to use a low-tech and then a high-tech tool to perform a similar educational task and then reflect on their relative appropriateness using the two evaluation frameworks we discussed.

    Week 5 Learning Objectives

    Pre-Class Activities

    Evaluating Educational Technology Tools

    The SAMR (Substitution, Augmentation, Modification, Redefinition) model of technology adoption gives us a useful framework to evaluate the potential benefits of new educational technologies:

    What is the SAMR Model? (4 min)

    When evaluating a multimedia learning tool, please ask yourself, where on the ladder of the SAMR Model of technology integration does it evaluated fall (see the infographic below)? If the new educational technology does more than “substitute” another technology, are the additional benefits the tool provides worth the investment of your time, your learners’ time, and school budget compared to other tools already in use in your school district?

    Please read this excellent but concise SAMR article to round out our formal learning on this tool: SAMR Model – A Practical Guide for EdTech Integration (~5 min). 

    REFLECTION – Please reflect on the H5P instructional video you created:

    1. Compared to a lecture format of instruction, where does the H5P video you created sit on the SAMR spectrum?
    2. Could you modify your video or H5P interactivity to move your H5P video higher on the SAMR spectrum?

    SAMR Model
    SAMR model, illustrated by Sylvia Duckworth

    Let’s take a look at the SECTIONS model, developed by Tony Bates (2015). It provides a framework for evaluating the appropriateness of educational technologies for any given learning environment. SECTIONS stands for:

    (7 min)

    When considering using a multimedia learning tool, please ask yourself, what are the strengths and weaknesses of the tool as you evaluate it using the SECTIONS model? When it comes time to select the most appropriate tool or technology to help meet each of each learning objective I find it helpful to use Bates’ SECTIONS model to help evaluate the appropriateness of a particular technology. Bates’ model prompts us to critically look at each technology in light of.

    SECTIONS Model
    SECTIONS model by Tony Bates

    REFLECTION – Please reflect on the H5P instructional video you created: What are the strengths and weaknesses of your H5P video when evaluating it using the SECTIONS model?

    Class Time

    Hands-on Lab Time

    Now we will get hands-on and you will make your own Sketchnote edit and then make an infographic, both of which you can post on your OpenEd.ca WordPress blog. Let’s dive in!

    Sketchnoting

    (7 min)

    Work through the Libraries’ DSC workshop, Sketchnoting: Doodle Your Way to Better Grades. Please have fun while you doodle and remember, sketchnoting is not meant to be beautiful art, but instead a tool to help you (and your learners) remember important or interesting information!

    If you’d like to, please make your sketchnote on a topic of your choice rather than feeling like you have to use the provided article in the workshop handout. For example, you could make a sketchnote on SAMR or SECTIONS, or on your Free Inquiry topic. The subject for your sketchnote is up to you! Please ask Rich if you have any questions or concerns.

    Infographics

    (1 min)

    (2 min)

    (14 min)

    Work through the Libraries’ DSC workshop, Infographics with Canva. Please ask Rich if you have any questions.

    Learning Pod Time & Homework

    1. Learning Pod peer feedback:
      • Spend 10 minutes reviewing the Week 4 Critical Evaluation post from a different member of your learning pod.
      • Please make sure that everyone in the learning pod gets one of their blog posts reviewed.
      • Please be professional and kind as you provide feedback to your peers’ blog posts. Use this guide as you review peer blog posts today, and until the end of the semester: Blog Post Peer-Review guidance <- IMPORTANT INFORMATION – Do not review any peer blog posts until you’ve read this document.
    2. Weekly blog post to document your learning in class and to document your learning (incorporate audio, video, and screen video capture into your blog posts this week).
      • Review the 336 Blog Post Rubrics to make sure you’re including all the minimally required elements for your weekly blog posts.
      • Here is a sample high-quality weekly blog post on the topic and/or technology of the week.
      • Please complete the first two bullet points below and then critically discuss two or more of the following blog prompts (or if something else stood out to you this week, feel free to critically reflect on that but still complete the first two bullets):
        • Embed either a photo of the sketchnote you created during class time
        • Embed the Infographic you created in Canva.
        • How can the SAMR theory of technology adoption help you evaluate technologies that you might consider using in your classroom?
        • How could the SECTIONS model help you select the most appropriate tool or technology to help meet your learning objectives for your class?
        • Could sketchnoting benefit learners in the grade level you hope to teach at? If so how?
    3. Weekly Free Inquiry blog post:
      • Document your free inquiry progress, reflecting on your progress, as well as identifying and evaluating helpful resources you found. Provide details on your learning progress (through success or failure).
      •  Employ a multimedia strategy in your post to help document your inquiry by using text and one or more other media to help make it more engaging (e.g., image, screencast, video, or other formats).
      • Utilize social writing strategies such as hyperlinks to blog posts (e.g., trackbacks) or to articles/resources consulted, including web pages, images, videos, etc.
      • Use the category, “free-inquiry”.
      • Share your post with your learning pod at your next meeting (usually at the end of class time).

    Bibliography

    Bates, T. (2019). Teaching in a Digital Age – Models for media selectionhttps://pressbooks.bccampus.ca/teachinginadigitalagev2/chapter/9-1-models-for-media-selection/

    Duckworth, Sylvia. (2015, April 2). New #sketchnote The SAMR Model @karlyb @ICTEvangelist @ShakeUpLearning #elemchat @TheTechRabbi #ipaded #ipadedchat https://t.co/1lJAqEE6my [Tweet]. @sylviaduckworthhttps://twitter.com/sylviaduckworth/status/583778319235031041

    H. L. (2017). SAMR Model: A Practical Guide for EdTech Integration. Schoology Exchange. https://www.schoology.com/blog/samr-model-practical-guide-edtech-integration

    Selecting Educational Technologies: A Checklist | UNT Teaching Commons. (n.d.). Retrieved February 5, 2022, from https://teachingcommons.unt.edu/teaching-essentials/teaching-technology/selecting-educational-technologies-checklist


    ]]>
    https://richmccue.com/2023/02/01/week-5-intentionality-in-edtech-enabled-lerning-design/feed/ 0 3500
     
    Original Source | Taken Source