| CARVIEW |
Revolutionary War
The Continental Congress of 1776 sought to encourage enlistments and curtail desertions with the nation’s first pension law. It granted half pay for life in cases of loss of limb or other serious disability. But they had no money or authority so they left it to the states with lackluster success. Only about 3,000 Revolutionary War veterans ever drew any pension, and it was limited to those who had been disabled and the payments were quite low.
A new principle for veterans benefits, providing pensions on the basis of need (indigent), was introduced in the 1818 Service Pension Law. The law provided that every person who had served in the War for Independence and was in need of assistance would receive a fixed pension for life. The rate was $20 a month for officers and $8 a month for enlisted men.
The problem was that the pensioner had to prove that he was indigent and many never received a penny. In 1858 Congress authorized half-pay pensions to veterans’ widows and to their orphan children until they reached the age of 16, generally paying $4.00 to $10.00 a month depending on rank of the veteran.
Civil War
By 1868 New York Governor Reuben E. Fenton (“the soldier’s friend”) remarked that homeless veterans in New York State “numbered by the thousands.”
After the Civil War, veterans organized to seek increased benefits. The Grand Army of the Republic, consisting of Union veterans of the Civil War, was the largest veterans organization emerging from the war.
Until 1890, Civil War pensions were granted only to servicemen discharged because of illness or disability attributable to military service.
The Dependent Pension Act of 1890 substantially broadened the scope of eligibility, providing pensions to veterans incapable of manual labor. (Photo courtesy VA Dept.)
World War I
“The Veteran’s Bureau,” a columnist wrote in 1925, “has probably made wrecks of more men since the war than the war itself took in dead and maimed.”
After Dec. 24, 1919, all claims and payments arising from disability or death from World War I were regarded as compensation rather than pension. This was reversed in March 1933, when all payments to veterans were again regarded as pensions. It was not until World War II that the distinction between compensation and pension again was used.
The first director of the Veteran’s Bureau was relieved as director within two years and was later sentenced to prison and fined on charges of conspiracy to defraud the government on hospital contracts.
After returning from the Great War, many veterans faced destitution and did all they could to survive. In 1924 Congress passed the World War Adjustment Compensation Act, giving one dollar a day for service and 25 cents more for service overseas. There was a catch: If it was more than $50.00 it was issued in certificate form not payable for 20 years and not over $1500.00.
The veteran’s called these “bonus” certificates and marched on Washington, (see last 2 pictures above), some 15,000 by some estimates. They demanded immediate payments. They camped wherever they could. Some slept in abandoned buildings or erected tents. But many lived in makeshift shacks along the mudflats of the Anacostia River. With no sanitation facilities, living conditions quickly deteriorated in the “shanty town.
The bonus marches revealed serious shortcomings in how America cared for her defenders as they transitioned from military to civilian life. As a result, Congress passed the GI Bill of Rights. (Photo Courtesy VA Dept)
In 1933 Congress enacted the Economy Act which repealed all laws giving benefits for veterans and gave the authority to Roosevelt who radically created new acts that radically reduced veteran’s benefits.
World War II
In 1946, the VA had beds for about 82,000 patients but the VA rolls swelled to 15 million in just a few months and the hospitals were virtually all swamped. There were 26,000 non service related cases also on the waiting list. The VA was building new hospitals but had money for only 12,000 more beds. They came too few too late.
Health problems associated with atomic radiation also have received belated attention. The Radiation-Exposed Veterans Compensation Act of 1988 authorized disability compensation for veterans suffering from a number of diseases associated with radiation, 42 years after the exposure!
This specifically included veterans claiming exposure to atomic radiation during the detonation of nuclear test devices or during the U.S. occupation of Hiroshima and Nagasaki between September 11, 1945, and July 1, 1946
Korean War

Photo Lulu Vision Creative Commons License Find it Here
The Veterans’ Readjustment Assistance Act of 1952, called the Korean GI Bill, provided unemployment insurance, job placement, home loans and mustering-out benefits similar to those offered World War II veterans. The Korean GI Bill made several changes, however, in education benefits, reducing financial benefits generally and imposing new restrictions.
The effect of the changes was that the benefit no longer completely covered the cost of the veteran’s education.
Vietnam War

Photo eroksCom Creative Commons License Find it here
A major difference of Vietnam-era veterans from those of earlier wars was the larger percentage of disabled. Advances in airlift and medical treatment saved the lives of many who would have died in earlier wars. There were issues of Agent Orange which took many years to address. At first, the only allowable claims related to Agent Orange were for a skin rash, chloracne. The VA waited until 1991 to recognize for claim purposes two other ailments, soft-tissue sarcoma and non-Hodgkin’s lymphoma. (Photo Courtesy erokCom (Creative Commons License)
Vientnam veterans make up the preponderance of homeless veterans. 42% of the homeless veterans served in Vietnam. Many more served during the conflict but in non combat areas.
Many of these suffer from PTSD, alcohol and drug related illnesses that have not been properly addressed by the VA. The VA still claims that PTSD has no relationship to military service.
Gulf War

(Photo: Northwestfloridaonline.com)
Gulf War veterans are among the new faces of homeless veterans.
Afganistan and Iraq
News Headline: New York– Americans were dismayed to learn that soldiers wounded in Afghanistan and Iraq — “fallen heroes” were being warehoused in Building 18, a rat-and roach infested satellite of the Armu’s Walter Reed Medical Center.

- (Photo courtesy big gray mare A creative commons license
- Find it here
In addition, injured veterans are going bankrupt and losing their homes because the Veterans Administration (V.A.) holds up their benefit checks for years on end.
The men and women who fight for our country deserve better.
Is this any way to “support our troops?”
Update March 2010:
A Start
Source Politifact
VA secretary announces plans for more housing vouchers at Homeless Veterans Summit
Updated: Monday, January 4th, 2010 | By Robert Farley
On July 30, 2009, U.S. Sen. Jack Reed, D-R.I., introduced the “Zero Tolerance for Veterans Homelessness Act of 2009.” The bill would authorize a major increase in the number of vouchers available annually for homeless veterans through the VA Supported Housing Program. Specifically, the bill would increase the number of vouchers available to 30,000 in 2010, and then 10,000 more a year until 2014, when 60,000 vouchers would be available. The bill now sits in the Senate Veterans’ Affairs Committee.
On Nov. 3, VA Secretary Eric Shinseki convened the first-ever Homeless Veteran Summit in Washington, during which he unveiled an ambitious plan to establish new programs and enhance existing ones with the goal of ending homelessness among veterans over the next five years.
Oldtimer
Note: Some of the history information and early pictures came from the VA History website, later pictures came from recent posts and news articles, with attribution to sources. Link to Creative Commons License information.
]]>Insurance
Floodwaters are usually defined as water that touches the ground before it enters the house. That flooded basement where water came through the cement blocks will not be covered by homeowners insurance. You must have a separate flood insurance policy to be covered. Water that came through a hole in the roof or window that was caused by falling branches or wind generally are covered by homeowners insurance.
Apparently flood insurance is sold in at least three varieties. One that covers the house itself, one that covers only the contents (designed for renters) and one that covers the house and contents. Most mortgage companies only require the first. If you have flood insurance check to see if your furniture, carpets, clothing are covered or you may be in for a nasty surprise.
What are the problems involved?
Every home is affected differently by flooding. It depends on the type of construction and the height of the water in the house and whether it has been breached or moved by strong winds or moving water.
Breached homes (hit by floating debris or windstorm) and those pushed off of foundations have a high probability of requiring professional help or becoming not repairable.
All homes affected by flooding have one overriding problem: Water essentially ruins everything that it touches that is not waterproof. Drywall, carpets, furniture (particularly fabric covered), clothing, anything made of paper or cardboard, family documents, pressed wood such as found in inexpensive cabinets and flooring, and electronics all can be expected to be headed to the dump.
Most wiring, plumbing and some appliances survive, as does most of the framing if dried out soon and thoroughly enough. You should be aware that floodwater damaged homes can have lingering problems that may show up weeks, months, and even years later. If not properly dried out, you can have a “sick” house, one that is harboring mold, mildew and other toxins that affect those living there. Don’t take shortcuts.
Recovery Time Varies
You will notice that in areas where there is heavy flooding, some homes come back to life in a matter of weeks and others linger for a year or more and those often end up being removed entirely. If the home is salvageable, it is essential that work begin immediately and that a logical step by step process be followed. The suggestions here should help get a house recovered in the minimum time required to do it right.
Much of this article assumes the damage has been done and the waters have subsided. It is by no means all inclusive, but it is an efficient process to get your life back on track. It will take several weeks at best for even the lightest hit homes. Two months are about average for homes with water that rises above the baseboards.
Types of people affected. In my experience working on more than a dozen homes as a volunteer after hurricane Dennis in 2005, there are three categories of people affected. I’m going to address the rest of this article directly to them:
Renters. You should immediately contact your insurance company to seen if you have renter’s insurance that covers floods and then find a dry place to rent. You may also be eligible for assistance. Contact your local Red Cross, United Way, Salvation Army, or other prominent local service agency and see what is available. They should be able to direct you to a shelter until you get that dry place to rent. Some will be able to give rental assistance. Notify your church and your friends.
You should know that bedding, stuffed furniture and electronics (TV etc) that have gotten wet in floodwaters are almost never salvageable. Most lightly soiled clothing can be saved. Do not take anything wet into your new apartment. Take clothing to a commercial laundry and/or dry cleaners first. Dry the furniture you are trying to save carefully and remove all traces of mud. Put everything into storage until you find a new apartment. Consider volunteering to help your landlord or neighbors.
Landlords are those that have tenants in the house that was flooded. If you are a landlord, you should be aware that you will not get much priority in restoring your property except with paid contractors unless there are extenuating circumstances. You should first contact your insurance company and see if you are covered with flood insurance and follow their directions if you are. Let your church and your friends know. You should then contact local service providers, such as the Red Cross, for assistance with relocating your tenants but don’t expect to receive much more than referral of volunteers (who also want to help homeowners first). If you are old, infirm or disabled and this is your only source of income, then I expect volunteers to flock to help.
Homeowners are people who both own and live in the house that was flooded. Homeowners without flood insurance will have natural priority with service agencies and volunteers. If your flood insurance does not cover the contents, you may need assistance in replacing your personal property even if the insurance replaces your drywall for you. Everyone wants to get you back into your own home. You should first contact your insurance company and see if you are covered with flood insurance and to what extent (home only, home and contents) and follow their directions if you are. Let your church and friends know.
You should contact your local disaster relief agencies and service providers such as the Red Cross, United Way, Salvation Army, etc. in your area for assistance in locating volunteers to assist in recovering your house. The disaster relief agency may assist you in acquiring federal and/or state funding to help pay for some of the costs. If you do have flood insurance, then the volunteers should only be asked to help with the emergency part of the cleanup such as removal of furniture, etc. as the insurance will take care of the bulk of the work. If the contents are not covered, let the volunteer agency know and they may try to help secure donations to get you by.
As a homeowner without insurance, you will get the highest priority for assistance from volunteer agencies, depending on actual need. Some will assign case workers to work with you to help determine the need. If you have insurance, the need will naturally be less. If you are uninsured, elderly or with several children, you will go to the top of the list. If you are a retired banker, able-bodied and have good financial resources you will end up lower in the stack or left to hire your own contractor..
Damage Varies House to House.
What kind of damage can occur varies from house to house even in the same neighborhood. Some may be on concrete slabs and others sitting on cement blocks. Some may have basements and others not. Some may be further up the hill and get small amounts in the crawl space or onto the walking surface, while others may be up to the rooftops. Some may have pressed wood siding, others brick. Everything causes variations in the damage done and the cost of restoring the house.
Utilities and Government Actions
Condemned Sign Posted. You can expect your city or county code and health departments to pay a visit and may put a condemned sign and yellow tape on the door to your property. That does not mean your house has to be torn down or can’t be fixed. It means you can’t live in it until they agree it is safe to do so. You should make an appointment with them and be ready to outline your restoration process. They will usually let you go inside and begin cleanup operations.
You should be aware that there is a process whereby a house or neighborhood can be condemned and removed. It does happen when the damage is so severe that it cannot be repaired or the risk of being flooded again is too high, often after repeated floods. It is a long process and involves the government purchase of the land at fair market value.
Utilities Turned Off. You will also find that the various utilities will likely turn off the power at the pole and gas and water at the street or the meter. They may even remove the gas or electric meter. This is for your safety. You won’t need them to begin cleaning the place up. If you have equipment you need to use (a commercial dehumidifier, for example) you can ask for an inspection of your wiring and they may restore it.
Otherwise you can ask your utility for a “construction” or “temporary” meter and they will put one in your front yard that you can use to run power equipment. Interior wiring, including light switches and outlets are not usually harmed by flooding waters. This is because the circuit breakers often save them (and you). Your local inspectors will look at them before they let you restore poser.
The Recovery Process
Concrete Slab Construction Houses built on concrete slabs usually fare the best in the long run. However they may also have the deepest water in their homes. The furnaces and ductwork are usually above the floor and are more easily cleaned or replaced and since there is no crawl space, the flooring will not likely be damaged other than carpet and loose tiles or any wood flooring on the slab.
Crawl Space and Basement Construction: Houses built with craw spaces have a whole range of additional troubles. Standing floodwater in the crawlspace or basement will quickly cook up a brew of mold and mildew that will take a commercial service to kill it, if it can be done at all. You need to work fast to avoid serious problems.
Often the furnace is under the house or at least the ductwork and usually both will be full of water even if the water did not reach the walking surface. In addition, the sub floor (layer under your exposed floor) is often pressed-wood that has aged and will soak up water and begin to rapidly deteriorate. It is a difficult and dangerous environment to work in and it should be professionally dried out before entering.
All Houses:
Must-Do-Immediately Tasks
This list includes everything down to cabinet removal and sometimes power restoration, but it is critical to do it quickly. A lot of this is do-it-yourself level work but get all the help you can get It will take 4 to 10 people to just clean out the house. 20 would be a blessing and can be done in a few hours.
Everyone should be equipped with gloves, mask, long sleeves, long pants and shoes with non slip soles and cover the entire foot. There should be hand sanitizer available and lots of paper towels. This can be a dangerous job from the standpoint that there may be hidden broken glass, exposed nails as the drywall is removed, and critters looking for refuge as well as toxins already brewing.
Explain safety rules and the process. Start the day by outlining the safety considerations, then explain the process so that overzealous helpers do not get carried away and get ahead of the curve. Ripping off the drywall before you take off the door and window trim and the switch covers can add to the expense of recovery. Piling things in front of the doors or walkways and interior traffic patterns will just slow things down for everyone. Request that any nails in boards be bent over and turned down when thrown on the pile. Boards to be saved that have nails sticking out should be placed separately out of all walk patterns, preferably standing in a garage corner or tucked against an exterior wall.
The following instructions include all types of construction. The object is to get everything wet out of the house ASAP. This includes furniture, interior doors, carpets, baseboards and drywall to the extent it got wet. Be aware that you may have problems not considered here. Open all the windows and doors when you have workers on the site. Keep the windows partially open until the house is dry.
Get the furniture and other belongings out of the house, or at least off the floor that was flooded. Tag salvageable items and/or stand at the door to direct those things you want to try to save to a separate area well out-of-the-way, preferably dry like a carport. You will want to put anything salvageable into dry storage, but clean and dry them first. If the water made the carpet wet or if you can detect a moldy smell, it is not likely to be salvageable. If there is the least doubt, you should get a professional cleaner to look at them first
Wet carpets from floodwater have tiny microbes and spores galore that will fester over time and promote sickness later, even when well dried. Wet carpet will slow down your progress by a week or more if you keep it in the house. Pull it up as soon as possible and also remove the padding and take it all out to the curb. Most communities will do free pickup of flood damaged debris.
In almost all cases the baseboard and wet drywall will need to be removed to prevent mold from growing inside the wall..
Remove the baseboards first. If done carefully, some baseboards can be saved in a dry place. However, old wet wood will often split. Removal should be done with a flat iron pry bar, not a hammer. Sometimes you can punch a hole in the drywall and simply pry the baseboard off with the pry bar. Number the baseboards if you plan to try to save them so that you can put them back in the same place
Remove the electrical trim plates. Put them away in your car or a drawer somewhere with the screws or plan to buy new ones. They have to be removed to replace the drywall later, so put them away now.
Remove the interior trim on all doors and windows – number and save the trim. Removing the trim will aid in removing the drywall and will also open up spaces for captured moisture in the hidden spaces in the casing to escape. You may get the wet drywall out easily with the trim still on, but you won’t be able to get the new drywall in with the trim still in place, so remove it now..
Remove the interior doors and casings. Number them and remove to a dry place (garage or corner of a carport, for example) to aid in drying them out and to protect them. Use a saws-all to cut the nails through the casing shims if you have power, else pry carefully in stages all around using the flat iron. Doors with laminated wood facing (Luan) should be thrown out as they will just come apart later. Hollow core panel doors will sometimes separate but sometimes can be glued back after they are thoroughly dry.
Remove the wet drywall. Find the highest wet drywall level and go at least 4 inches above that. Try to select a point 1, 2, or 4 feet from the floor to make your new drywall go further. draw a chalk line at that level, cut and remove the drywall from there down. This is best done with a drywall hand saw. Make the cuts at a shallow angle as there may be wires or even pipes or air conditioner lines in the wall. I don’t recommend a ”saws-all” except in the hands of someone very capable and careful. I’ve seen a lot of cut wiring and pipes that greatly increase the cost of repairs. It is an easy job with a good drywall hand saw. If the cut does not follow the line carefully, it will slow up replacement later.
If the water level was above 4 feet, remove all the drywall. If the level is below 18 inches, take out the bottom 2 feet. If below 8 inches take out the bottom foot. Go higher if the drywall feels damp less than 4 inches from the lines mentioned here. Doing this in 1, 2 or 4 foot increments will reduce the amount of drywall you have to buy and reinstall because the sheets are easily cut to narrower widths and will go further. Take out all the drywall in a line all around the house. Don’t forget the closets as they will be the worst to mildew.
Punch a hole in one of the wall cavities with a hammer or prybar below your cut line. Grab the sheetrock with your hand and pull it off and have it carried outside onto a portion of the driveway. Often sheetrock will come off in large sheets.
Remove the nails. Have someone come behind as each wall is cleared and pull the drywall nails and remove any screws. Put them into a bag or can for disposal later. Nails that break off can often just be driven in flat. Have someone check the studs by running the edge of their hammer up and down them and along the bottom plate to detect any missed ones. Nails left on the wall will be snags for anyone working close by and will cause damage to new sheetrock if not noticed in time. May as well be systematic and find them all now.
Remove all bottom cabinets. Remove the bottom cabinets in the kitchen and bath, but start with the counter tops. Counter tops will usually have screws underneath that you can find (use a flashlight) from the open areas underneath, often in corners and near the middle. These hold the top to the cabinet. Sometimes there is also putty. Remove these screws, cut along the caulk along the back edges of the splash board.
Verify that the water is turned off at the meter, disconnect the faucet lines and, if necessary, remove the cutoff valves under the sink. Take out the trap and tape a plastic bag over the drain line. Remove the countertop by using a 3-in-one tool or flat iron prybar to lift the front and pull it away from the wall. Decide if you want it saved or not.
Remove the bottom cabinets. If you desire to salvage them, look behind the drawers and inside the back and remove any screws you can find that are holding them to the wall. Usually there will also be screws hidden behind the door edges in the front frame that hold the cabinets to each other unless they are built as one unit.
Remove all the screws and then use a sharp drywall knife to cut through any caulk between the cabinet and the wall. Slowly pry the back of the cabinet from the wall with a flat iron all around in stages so as to detect any missed screws. Older cabinets are often below the floor level as new layers of vinyl have been added over the years. They are seldom nailed to the floors, Tilt them forward and lift them up with a prybar.
Usually you will end up finding that the cabinets cannot be saved, but it is worth a try. Be aware that most modern cabinets have significant amounts of pressed wood and will harbor mold even if they don’t deteriorate during the flood. The cabinets must be removed to get to the drywall behind them and to the open spaces below them anyway. If the cabinets look good and the pressed wood has not deteriorated, Kiltz the back and bottoms of the cabinets (inside too if possible) to reduce the chance of mold and mildew later.
In my experience any cabinet that is no longer sold as a “standard” cabinet will also require you to remove and replace the top cabinets as well. Might as well do it, although I’ve managed to save two sets of top cabinets out of maybe 10 or 12 houses I’ve worked on.
Inspect the sub floor from the basement or crawlspace if you can get in there. At least look at the area over the crawl space door. If the sub floor is coming apart you will have to remove all of your flooring to get to it, remove and replace it all. I was in one house as we were removing carpet and someone broke through the floor. No injuries but the floor under the carpet was simply pressed wood (OSB) and was falling apart (it had termite damage too).
Houses with crawl spaces will usually require professional help. At the least, any trapped water needs to be drained from under there. This can be done by carrying in dry dirt to fill pockets of standing water, and by using sump pumps for sunken areas of the crawl space and basements.
Often the fuse panels and laundry are in basement areas. Furnaces are often in basements and many times in crawl spaces. Duct work can still be filled with toxic water and must be cleaned or removed. If it is flexible duct work, punch holes in the bottom of low spots, let the water drain, then remove them and replace with new duct work after the house has been dried out. A commercial dehumidifier and/or large blowers will be required to dry the basement or craw spaces completely. Any moisture remaining will just promote mold and fungi growth.
Mold and mildew will begin to grow on wet wood in the crawl spaces very quickly! You will see white spots and some with “hairs”. Black mold is the most dangerous and should be avoided completely. It will take commercial products made for the purpose to kill them. A thinned bleach spray will also work, but the danger to non-professionals doing this job is very high and loss of vision, lung and skin problems can be very serious. Vapors from cleansers will seep into the living areas and can be dangerous to anyone working above. Let everything dry and air out completely after using them. Professionals have the tools and the safety clothing and hoods to do this with no danger.
Get power restored. With any luck you can do that while you are still doing demolition if an electrician and the inspector agree. If not, there will be a point where you have finished the demolition where you can have an electrician and/or government inspector verify the safety of your house for electrical purposes.
That inspection may allow you to restore power. If the power system of your house is heavily damaged, consider asking the power company to install a temporary meter and pole in your yard. The point is that you need power to run fans and dehumidifiers to aid in the drying out process.
Drying it out. (1 to 3 weeks) Many governments require you to be inspected to verify that the house is dry enough to begin reconstruction. This means you can’t begin installing the new drywall until they say you can. If you get ahead of your inspection curve, you may be required to remove the drywall, inspect and replace it again. Work with your inspectors. They are your friends looking out for your safety.
Be aware that some cities and counties require the drying out process to be at least two weeks before they will inspect it. Ask them. If the wood is obviously dry you may get them to make an exception based on hardship. For your own good, it must be completely dry. Be nice to them at all times, very, very nice. particularly if you need some sort of exception, because they can make it easy or hard. They are nice people anyway, just doing their jobs but they don’t have time to argue with you. I am not and never have been an inspector if you are wondering. I’m just going from experience. Ask them what they expect you to do. It is ok to negotiate some and tell them why it is important to you , but don’t argue. Kiss of death. Besides there are good reasons for allowing wood to dry for a minimum amount of time.
Keep the screened windows open during dry weather and open the doors as much as you can. I’m not recommending that the doors be left open when no one is there. Close the windows partway up and lock them into place with a nail if necessary. Move the equipment around until the wood is obviously very dry, not “kinda” or almost dry.
Rebuilding – Get an inspection. Your inspector will want to check the dryness of your home, and will also want to look at the wiring and pipes that will be hidden later. If you had to have your flooring removed, then you will need them to look at the framing there too. Install the flooring if necessary and have it inspected. These inspections are for your own good. Always insist a contractor get a permit. While your inspector is there, ask him or her if they want to see the drywall nail pattern before you paint. Some do.
Drywall first. Once your inspectors give the ok, start putting up the drywall. Recheck the studs and bottom plates for overlooked nails first. Lay it sideways and make sure the thickness is the same. We had one house with a mixture of ½ inch and 5/8 inch drywall and some volunteers put in all ½ inch. I had to come behind them and replace a lot of it. 5/8 is typically used as firewall material, sometimes found in and outside furnace closets and walls that divide two apartments. and in flue chases.
Be aware that you can now buy “paperless” drywall. This is moisture resistant and does not provide anything for mold to grow on. It uses a fiberglass backing instead of paper. It costs more but if you have a damp basement that you choose to not waterproof, then use the paperless drywall material. Use “green rock” water resistant drywall in bathrooms.
Lift the drywall off the floor by the thickness of a scrap piece of drywall so the bottom never touches the floor. This reduces the chance that mopping or minor leaks or knocked over mop buckets will damage your new drywall later. The gap will be covered by the baseboard. Try to fit the drywall close to your cut line. Use a sharp edge or sanding block/rasp to remove rough edges and humps to get a tight fit.
Tape, mud and sand your joints. It usually takes 3 coats done over 3 days. A good drywall man can do this at little cost and you will never see the joint. Be aware that most off-the- street “expert drywall installers” may never have worked on drywall before, they just need a job or saw it being done somewhere. They will not do the job you need. Almost anyone can paint, but drywall mudding requires some experience. Get references and only use someone who does it for a living, a professional. A poorly done job will haunt you forever. Every line will show.
When the drywall is finished – all 3 coats and sanding – run your hands over all the joints. If you can feel the joint, it will show when painted. Fix it.
Prepare the door casings for reinstallation. I don’t recommend knocking the nails back through the wood. Use vice-grips to pull them out the other side (the side that never shows) or use a metal-cutting blade to cut them off flush with the wood (easiest). Pull any that have heads showing on the edge of a board where the trim was peeled off, or drive them in flush. Throw away the old nails and use new ones. Knocking them back out always damages the wood. The heads are embedded and split out ugly chunks of wood.
Install the doors. Then begin reinstalling the door casing and window and exterior door trim. Make use of the numbers you put on them when they were removed. Most will fit back easily where they came from. How the door closes and whether or not they stand still when opened is dependent on the door and its casings all being perfectly vertical. Make absolutely certain that the door casings are vertical. Use shims to get both sides vertical and spaced so that there is about 1/8 inch gap on each edge of the door, sides and top. Do the base boards last or you will have trouble installing the door trim.
Install the kitchen and bathroom cabinets. Do not install the baseboards on cabinet walls until you have the cabinets installed exactly as you want them. Put the tops on last. Make certain that plumbing hasn’t been damaged or clogged with debris before hooking the faucets and drains up. You may want to replace the valves under the sinks with new ones.
Caulkaround all the new trim and new cabinets next to the drywall. Use paintable caulk for everything. Some caulk just will not take paint and will look bad when you are done. Read the labels to be certain it is paintable. Latex is good. Sometimes large boxes of donated caulk show up. Be aware it sometimes is donated because it has started to harden or is a non paintable stock that is moving slow. They are a write-off for the company but not useful to you. Don’t use it if it is hardening or wrong type.
Inspection? Some inspectors want to look at the nail pattern in your drywall before you paint. This applies mostly to new houses but you should check with them first.
Sand, fill nail holes, and Paint everything, Painting is to beautify and protect your work. Too often the paint is slapped on walls and wood work that are not ready and the beauty part is lost. Visually inspect every piece of wood for nail pops and sink the heads with a nail punch. Fill the heads with wood putty. Sand any areas that have paint chips and thin coat (even drywall mud will work) anything you can feel is rough with your bare hands, let dry and then sand again. Prime the filled areas and all new drywall.
Install carpets. Let your carpet supplier do this for you. Most people do not have the skills required. After all this work, why have carpet with twisted with obvious wrinkles and loose areas showing? People will think you just reused your old carpet. Get it done right.
Get a final inspection and move back in.
Whew! Get that flood insurance now!
It will cost you only a few hundred bucks a year. Our area has had two 100 (plus) year floods in 4 years. Three in 45 years. It will happen again.
Note: there are at least 3 types of flood insurance. One for the house, a rider or separate insurance for the contents, and one for contents only. Most mortgage companies and any federally assisted mortgage requires flood insurance on the house (only) if if it is in the FEMA designated 100 year flood zone. This insurance can be purchased by anyone outside the flood zone, usually at a greatly reduced price. Be aware that it does not protect the contents unless you purchase that additional flood insurance.
It is my understanding that there is a 30 day waiting period for flood insurance to go into effect. You can’t hear a hurricane is coming and then decide to get flood insurance protection at the last minute.
Your homeowner’s policy does not cover flood damage to your home or its contents. You may see words that seem to cover it, but those apply to water coming through the roof or from broken pipes inside the house, not anything that comes through a patio door, seeps under a wall or pours out of a crack in a wall from the outside because by definition, those waters touched the ground first and thus are flood waters not covered.
You may live high up on a hillside with one side of your finished basement or downstairs area embedded against fill dirt. The nearest flood zone maybe 400 feet below you. However, if you develop a leak in your block wall and your carpet and drywall, clothing, furniture, electronics, etc. get wet, your homeowner’s policy will not cover it. Water that touches the ground first is considered flood waters even if it was not an overflow from a stream. So get flood insurance for at least the contents of your home. If your downstairs area has drywall, consider getting flood insurance for your home as well. It is cheaper if you are not in a designated flood zone.
If you own and live in a flood zone or rent to someone and furnish the carpet, etc, get flood insurance for both the house and contents in addition to homeowner’s insurance.
Renters can get flood insurance on their personal property. If you rent and your apartment gets flooded, you need to have that flood insurance on your property. The landlord is not liable in almost all cases.
I hope you were reading this just-in-case. If you are affected by a flooded house, my prayers go with you. Take care. Remember things are different case by case. I do hope that this helped you in some small way.
Oldtimer
]]>Note: If you came here looking for the homeless veterans site, this is it! If you came here looking for the homeless youth site, this is it!. I’m just taking a break to help out on a Habitat House and once a year I post what I saw, experienced and learned. Click on either of the two links in this paragraph or go to the side bar and select a category or search for what you want. Also look above the banner or to the right for popular articles on Homeless Veterans.
Tutorial – installing roofing shingles

Roof Ready For Shingles
This is the way Habitat volunteers see the house when they arrive on the scene on roofing day. Soon the roof will be covered front and back with volunteers. It is essential that the roofing be done early in the day and that there is plenty of water available. The felt and starter shingles are already in place.
We need to start this tutorial a little earlier than that.

Drip Edge Installation
This drawing illustrates drip edge installation. The drip edge must be installed in the order shown. The drip edge is a metal extrusion that goes along the horizontal edge (eave) of the roof under the roofing felt and along the sloping edge (rake) of the roof above the felt. Install the drip edge for the eave before the roofing felt is installed. Install the drip edge for the rake after the roofing felt is installed. Attach the edge using 7/8 ” roofing nails on 24″ centers. Unlike shown in the drawing, the rake edge goes all the way down and overlaps the eave edge. Trim the rake edge to match the eave using tin snips. When two pieces of drip edge meet in a joint, overlap the joint by 1 to 2 inches by trimming the top of one as needed to allow them to overlap. Joints on the rake drip edge should should have the upper one overlapping the lower one.
Also shown in this illustration is something called the “bird box”.
Click here for the rest of this tutorial:
Bird Box

This is the “bird box” detail for the corners of the roof. It is simply a 2 piece box that adds detail to the house and provides a place to mount corner lights. It just adds to the overall looks. Notice the rake drip edge is shown trimmed in this illustration and runs all the way to the facia.

tweet tweet
Roofing Felt Installation

Roofing Felt Installation

Starter Shingles
The edge of the roof is outlined with starter shingles that are placed on the roof with the tabs turned inward. This provides extra strength near the edge, higher wind resistance, and better resistance to water blowing under the edge of the shingles. Before starting, snap a line 11″ from the drip edge on the eave all the way across the roof. Have someone hold the line down in the middle of the roof and snap each side separately to minimize bounce and sag. Repeat for the rake (sloping) edge.
The starter shingles are nailed along this line, allowing a uniform 1 inch overhang of the shingle over the drip edge on both the eave and rake (12″ shingle on 11″ line). Notice that the eave edge starts with a shingle that has 1/2 tab cut off (6 inches) in the drawing, although that is optional in many areas. Outline the roof completely with these shingles. Butt the starter shingles end to end (do not overlap). Each shingle gets 4 nails located near and opposite the beginning of the drip line. See drawing “shingle layout below” if there is any doubt.

Starter Shingle Photo
Shingle Layout

Shingle Layout

Shingle pattern for multiple crews
Trimming the Edges

Shingles Overhang Rake Edge
The shingles should overhang the end (rake) of the roof and droop down until the entire roof is covered.
Pipe Flashing

Pipe Boot
Shown above is the proper installaion around a typical vent pipe. The flashing will already be there but not nailed down. Lift the flashing up and run the course below up to the pipe and notch as necessary. In the case shown above the pipe flashing has been dropped over the lower course and the follwing courses lap over the upper parts of the flange so that water sheds properly. The boot is sealed to the roof with asphalt calking and nails below shingles. Any nails are calked and located under shingles.
Shingles for Valleys

Valley Weave
There are two ways to install shingles in valleys. Both start with a 14″ wide aluminum sheet pressed into the valley from top to bottom. Roll out the aluminum and form it to the shape of the valley down the center of the sheet. Nail this sheet only on the long side edges. No nails within 6″ of the center!
Valley Weave
The drawing above shows the valley weave technique that is usually used on valleys between two roofs on the front of a house, sometimes also on the back. Shingles woven together both look better and hold up better to water dammed up from leaves on the roof.
Shingles from the shorter roof are extended to and lap over the valley but the ends on the other side are not nailed down at that time. Shingles from the other roof are woven in by crossing over one shingle and slipped under a shingle in the next course and nailed down. Form both sets of shingles snugly to the bottom of the valley. It is best to trim the ends as necessary to not extend under more than one course at a time to avoid a lumpy appearance. Do not put any nails within 6 inches of the valley from any direction!

Valley Weave Photo
Standard Valley
Install the aluminum as described above. Run the shingles from the shorter roof side over the valley and lap the other side by at least 12″. Make certain that no end joints end up in or near the center of the valley, preferably end them near or past the edge of the aluminum. Form the shingles snugly to the bottom of the valley. Do not place nails within 6″ of the center of the valley at any time from any direction!
Snap a chalk line down the center of the valley. Now extend the other side of the roof past the chalk line and cut it to match the chalk line. Cut only the newer layer, not those from the short side. The effect is one side is slightly higher than the other, forming a small step. Apply a bead of asphalt caulk about 1″ back from the cut edges and press it in.

Standard Valley Photo
Ridge Caps

Ridge Cap Photo

Making Ridge Caps

Ridge Vent Installed Photo

Ridge Vent, Top View

Bottom View Photo
Slide Show of Tutorial Pictures.
This Roofing Tutorial slide show contains all the pictures shown here and quite a few more.
Here is a link to the Roofing Tutorial pictures
Here is a link to my Habitat Build Photo Sets
There is at least one more tutorial coming, Hardi Plank siding.
Do you find these tutorials and pictures useful? Please let me know!
For those of you looking for the homeless veterans or homeless youth, this is also it. Click on one the links above the banner or on either of the two links in this paragraph, or maybe check out the right sidebar.
This article covers the installation of the roof shingles, Hardi Plank siding, and various other 3d day activities. From any slide show you can access various sizes of the prints for free download (instructions further down – “Getting Copies”).

Link to slide show – 170 pictures Click on picture or here
Link to a collection of all Habitat pictures (2007 and 2008) organized one set per day!
Getting Copies
The pictures shown here and in the slide show do not have the resolution you can get if you download them from the Flickr site. If you are viewing a slide show containing the picture you want, click on the link at the top left of the slide show to get to the full set at high resolution, or click on any picture in the slide show and then click on “View Main Page”. If you are looking at the mosaic of of a set for a particular day, you can click on the picture you want. Once there, you can click on the button above the picture “All Sizes”. It will open in the large size, but you can download any picture in any size free, or can order prints through the site that will be delivered in about an hour to your nearest Target store. It’s not obvious how to get to the Target option. First put a print in your shopping cart. When ready for checkout, you can send your prints to Target for printing for about 15 cents per copy or have them mailed to your home.
In addition, you can go to “Zassle” and have T-shirts, coffee mugs etc. made with your favorite print. Enjoy. Below are selected prints but only a small sample of what is available for free download.
The Third Day
It’s amazing what has been accomplished in the first two days! Not only are the walls up, but the walls are all up, the roof is decked and dried in, the exterior walls are covered with OSB, the windows are in all in and all but one door has been installed. Today the plan is to put the shingles on and get a good start on the siding.

The day, as always, starts with an orientation for new volunteers, a pep talk, then a safety talk and an introduction of the homeowner by our SPM (Site Project Manager), Jeff Vanderlip. If you peek through the tent above the person in the white tee-shirt, that is Jeff in the orange tee-shirt and floppy hat facing us. You can see that a couple of workers are already on the roof even before the rest of us get started. They are laying “starter” courses for us to work from. More about starter courses later.
Nicole Combs is the future homeowner and also in the picture. To the left of the tent is a man with a purple cap. Nicole is on the far side of the picture just to the right of him. She is also in the top picture right in front of the wheelbarrow (yellow shirt).

And this is Elijah. He is the son of of our future homeowner. He has a keen interest in what is going on as he will be living here, but he is too young to work on the site. When around, he is confined to the food tent or visiting inside after the work is done and helping clean up the property or just playing nearby. A great kid.
Shingles!

This is essentually the way we found the roof this morning. The starter edge courses are alrady in place and the bundles of shingles are on the peak of the roof. The shingles you see along the edges were put there by the Gray Ghosts that I’ve mentioned a number of times in my earlier posts.
The two people on the roof are putting on starter courses that run up the centerline of the roof in such a way that volunteers can work off each side of the centerline toward each edge of the house. That way at least four crews of workers can work at any one time. They’ve also started the porch roof and valley so that the valley shingles can be put in as a “weave” for good looks on the front.
To see the rest of this article and some great pictures, click here:

A look at progress after just a few minutes of volunteer work. The starter course is the patch of roof that runs all the way up. Volunteers can use that as a pattern on each side to work toward the edges. The ladder is on a stand-off to protect the new edge.

View of back of the house. Busy busy busy! Moving along nicely. People on the ground are getting ready for siding.

While the roof work is going on, others are on ladders finishing putting up the Tyvick roof wrapping.

This is the way the house looked by noon. After we broke for lunch the roof was too hot to send volunteers up to work on it. The tar in the roof had began to melt and if not walked on very carefully, could come loose and slip out of position, not to mention that volunteers could get burns and/or be overheated. Two experienced people went back up to finish and remove equipment. Notice the roof vents are installed at the top.
The tutorial which I am preparing has many detailed pictures of the valley, roof peaks and other construction features. Come back for that if you have an interest. The roof will be trimmed later in the week by the Gray Ghosts. I’ve done that job before and it is hot and tedious but fairly easy to do. Snap a line and cut along it very carefully.
Siding!

Gary gives us a demonstration of how to properly prepare a joint for the Hardi Plank siding. This is a change in procedure from years past. Notice a small piece of Tyvek has been inserted behind the plank. It has been stapled to the wall, then the edge of the plank and Tyvek is caulked. The next plank will butt up to the caulk and squeeze some of it out. A wet rag will wipe off the excess after it is nailed up and we are done. Joints always have to align with an interior stud. They cannot be within two studs of each other or be one over the other without at least 3 boards in between. They can’t occur directly under or over a window nor over a door frame. They have to be staggered and each joint receives the treatment as shown above. When joints occur above the bottom course, the Tyvek laps over the lower course slightly. So much to think about… nothing gets slapped up. It has to be done right – this is a Habitat house.

These young ladies are staying ahead of the siding crews. They are marking the studs. Someone always makes a joke about that. The studs have been marked on the concrete foundation below the walls and they use a level to extend that mark up so the siding crew will know where to nail and were to place the ends.
That is our Gray Ghost leader in the red hat. Checking our work. Most people do not know the wonderful job they do and how much work they have saved the volunteers.

Here a crew leader (hidden behind the worker) is giving close instruction to a volunteer on the proper way to nail the planks while another watched in the background.

Here the edges of the planking receive a final coat of caulk next to the store room door. All edges get this treatment. It is important that all edges and all exposed nails (such as along the top course) are caulked and all siding receive two coats of exterior paint.

Hmmm. I think we have seen this view several times before.

These two gentlemen are perhaps two of the most experienced Habitat volunteers in the country. Certainly in Cobb County and the metro Atlanta area. They are both SPM’s, both Gray Ghosts and have led and built houses all over this area. It is a pleasure to know them.
On the left is Roy Brumley and on the right is Jim Miller. You can find the website of the Gray Ghosts here. Don’t tell anyone that Jim Miller was on site. If you go to the Gray Ghost site you will find that I’m listed, but I’m not really qualified nor active enough to be listed. On the other hand Jim Miller is not listed. The reason for that is he is working on Habitat houses in another county and is an unofficial guest SPM at our site. He was the lead SPM for our Presbyterian Coalition for so many years before he left to work on Habitat Houses elsewhere that we invite him back every chance he is available. We love him and Roy so much. Don’t tell them I said that. Roy is the lead Gray Ghost and schedules their work.
Don’t forget to look at the slide show and/or picture sets (see link below the top picture of this blog article) and please come back for the tutorial when it is finished. If you click on the orange square below my picture below the banner of this blog, you can sign up to be notified each time I update this blog. Don’t worry, you can opt out at any time. No charge for either.
Enjoy,
Oldtimer
]]>
Note: If you came here looking for the homeless veterans site, this is it! If you came here looking for the homeless youth site, this is it!. I’m just taking a break to help out on a Habitat House and once a year I post what I saw, experienced and learned. Click on either of the two links in this paragraph or go to the side bar and select a category or search for what you want. Also look above the banner or to the right for popular articles on Homeless Veterans.

This is a a drawing I made of a generic roof truss, not too unlike what is actually installed. At least most of the parts are here. Below are pictures of the trusses we actually installed and you may note some minor differences. The major difference is the end trusses which have more vertical 2×4’s in the web so that there are places to nail OSB and siding. None of the ones we put up have a King Post.
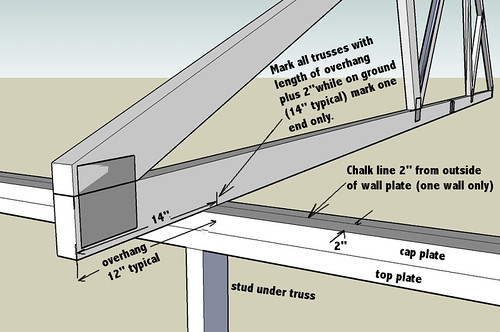
The trusses are marked with alignment marks while still on the ground. Each truss is marked 14″ from one end (only), that end being the end that goes on the longest wall, (in our case the back wall). A line is snapped along the back wall exactly 2″ from the back edge of the cap plate. The corresponding 14 inch mark on the roof truss allows for a 12 inch overhang and the 2 inch offset in the snapped line. When the roof truss is slid into place a volunteer aligns the truss mark with the snapped line on the cap plate. If one end is right, then both ends will be right on these manufactured trusses.
I was one of the two marking the trusses. The other was Max, son of our SPM, Jeff Vanderlip. Each truss also receives a mark along the top plate/top rail at 47 1/4 inches and at 9 feet. These marks go on both ends of each truss. The 47 1/4 inch mark is the top edge of the beginning course of the OSB deck (which allows for a 3/4 inch overhang over the end of the truss. 3/4 inch fascia board stretched across the ends of the trusses will take up this overhang. The 9 foot mark is the location of the 1×4 boards used to tie the tops of the trusses together while the trusses are going up. 9 ft is chosen so that two courses of OSB panels can be installed below the 1×4 boards.
To read the rest of this tutorial, click here:

Here I’m showing the first two trusses installed. It should be noted that when we left the site the previous week, the safety pole had an OSB strip mounted along it as shown and we had no roof trusses on site. The Gray Ghosts came in during the week, found the trusses had been delivered and added OSB to the middle of the web area on the two end trusses. They also removed the OSB on the safety pole so that the match up would remain perfectly vertical. In addition they cut OSB panels to fit each end truss, numbered them and the matching truss and left the panels in the front hall for us to find. A real time saver by our friendly Ghosts.
The drawing shows the marking of the trusses on the house at 2 feet apart with the exception of the first one from the starting end. These are 3/4 inch short of 2 feet, e.g. 23 1/4 inches for the first end of cap to truss spacing. The rest are on 24 inch marks from that one. All the trusses are actually on 2 foot spacing. The initial measurement is from the end of the cap plate, but the center of the first truss is 3/4 inch to the right making it centered on the 2 foot mark. The marks are spaced so that the mark can line up with the edge of the truss rather than trying to align to a mark under the truss.
The 1×4 temporary brace boards were also marked on 2 foot marks so that the tops of the trusses could be aligned easily as they go up. The board is marked 3/4 inch in from the first edge, that edge is marked “start” and then the rest marked 24 inch centers from the 3/4 inch mark. This allows the start end to lap the first truss completely and the other marks to align with the centers of the trusses.
Shown in the illustration are special alignment tools made for Cobb Habitat. The first was made by a Gray Ghost from 2×4’s and some of these are still around. I think they still make them.

Aleignment braces being picked up from a wheelbarrow. Note some are a little more refined than others, but all work the same. Drop them over two truss rails and they will be held rigidly at the proper spacing, truss-to-truss.
My drawings are all made with some free software, called “Google Sketchup”. Takes a little getting used to, but I did all four drawings for this article in a couple of hours.

This drawing illustrates the use of the 1×4 braces, the alignment tool, and the placement of angle braces within the underside of the top rails of the roof trusses. With Google Sketchup, once you have made a component (such as the first truss member in the top illustration), you can manipulate it in space and duplicate it anywhere. 2x4s and OSB are drawn in 3D in a matter of seconds and can be rotated and slid into place like real wood. The angle braces started outside of this drawing in free space and then repositioned and rotated in various directions to get it placed in the framing. Everything stays to scale and in perspective as you rotate things around, even look underneath. The angle braces greatly strengthen the house.


Here are pictures of one of the end trusses and of the house with the safety pole stripped of its OSB as we found it Saturday morning. Work of the Gray Ghosts.

Here are the OSB cutouts for the end trusses and the barge rafters already cut by the Gray Ghosts. Thanks guys! OSB is laid on the end trusses along the centers of the web and marked for cutout. The cutouts and the web are both marked so the the OSB can be lifted up to the installed truss and nailed on later. Hoisting a truss with the OSB installed can be done but it is a real strain and adds to the danger. Cutting the OSB from measurements after the truss is up is also possible but a real pain.
The barge rafter is easily cut on the ground using the truss as a pattern. The ends match the truss but so you will know, for a 5/12 roof, the angles are 45 degrees for the top cut and 67 1/2 degrees for the bottom cut. All four were cut in advance by the Gray Ghosts. Otherwise experienced volunteers would have done all of this before the last end truss went up so that they would have a pattern. Barge rafters go on the sloped ends of the roof on the drip line . I’ll have other pictures when I illustrate their installation later in this article.

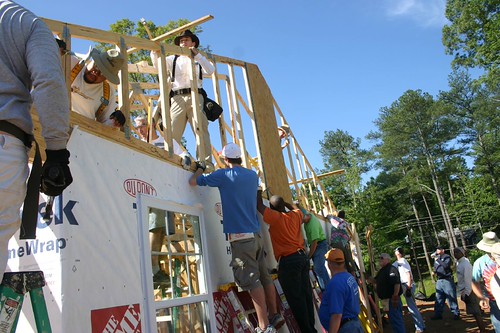
Here we are installing the fifth truss. Note that multiple alignment spacers are in use and so is the long 1×4 board used for temporary bracing. I’m illustrating the use of the made-on-site forked Y’s to lift and guide the truss onto the frame of the house. The fellow poking his head up is in real danger. He is ready to duck and all the volunteers are told to move the trusses in small increments as he helps them guide it through. He tries to stay visible to everyone on both sides of the wall and that helps them protect him as well.


There are people on the inside guiding the truss with their own poles. The safety beam (often called the “sissy beam”) which bridges across the living room (not in these pictures, partially in the picture below) helps hold the other end of the truss when it bridges that room and also keeps the top end of the “A” from tipping over and dropping down into the house. Jeff calls the people using the Y’s guys – “Wyse Guys”. “Com’on wyse guys pick your end up higher”. The truss tends to catch on the walls and have to be lifted and shoved at the same time to overcome that.

Here the bottom of the truss is held in its approximate final position and the top of the A frame is rotated up to join the others. Notice the extra spacing tools on the right ready to slip over the new truss to hold it at 2 feet from the last one. The sissy beam is the big beam in the bottom left of the picture. The top of the truss was lieing on this and without it could have fallen into the living area. This beam is removed soon after the trusses are up. When the bottoms are right (adjusted to the 14 inch mark on the truss and to the 2 foot mark on the cap beam) and the tops are secured with the braces, the bottoms at each end are nailed with 3 nails in each truss. Two 16d nails on one side and one on the other. More might weaken the truss. The trusses are not nailed to the interior walls. Hurricane straps will be added later.
The technique for the last truss is different. There is little to no space to slide it over and if it slid off, it would be a disaster to a number of people. First a number of step ladders are leaned against the house. The truss is brought around and set up vertically next to the ladders and then hoisted to rest on the tops of the ladders as people with Y’s and others in the rafters keep it from toppling over. Then the volunteers climb the ladders to the third step from the top and, on command from our fearless leader, lift it up as it is guided into place by those on ladders inside. The bottom edge is set against the deadwood and the frame shifted to the proper mark and the top secured with alignment tools. Then the hammers fly, driving nails into the side of the bottom chord into the deadwood on the wall. Job well done! The 14 inch markings on the trusses must have been good as they all lined up perfectly when sighted down the ends!
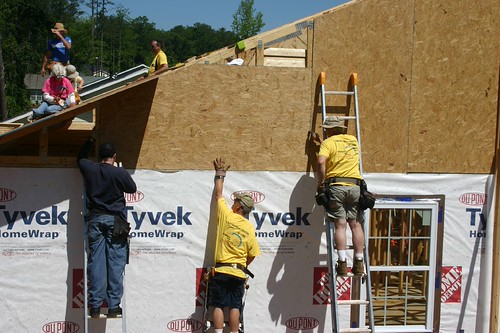
You can see from the picture above that some volunteers have already started the house-wrap. Actually it is almost done. They were working on this end as the other end was receiving trusses and on the other end as this end was being finished.

This picture was taken about a half hour earlier. One is unrolling and another smoothing. The wrap is nailed in place with roofing nails (don’t use the bottle cap nails!). The rolls are 9′ long. We cut a foot off the roll with a circular saw to get an 8 foot roll. Start 12 inches from one corner and nail it at the top corner at the top of the OSB. Roll it around that corner and nail it along the top edge as you go along. Cover all the windows and doors and X cut them out later. When the next corner is reached, stop and go back and nail the wrap approximately every 3 feet along the center and along the bottom. Keep rolling along the walls corner to corner. Use special tape for all seams.
This is one of the few houses where the wrap is right side up. The tendency is to wrap left to right and that always results in wrap that is upside down. Right to left as shown gets it right side up. It doesn’t matter, I’m just making noise here for the fun of it.
Cut windows out of the house wrap with a utility knife, by cutting diagonally from corner to corner and leave the triangle pieces to be folded and stapled inside. Repeat for the doors but cut out the bottom triangle and discard.

The bottom of window frames get a special treatment after the wrap is installed and stapled back. First the corners receive a window tape that wraps around the window opening and folds down across the bottom window plate. Then a second tape is run across the entire window that laps over as shown to the wall wrap. The cut corners of the tape are completely sealed in this manner. Water that gets between the wrap and the siding near the window has no place to accumulate and keeps on going down the outside.

Here is a wrapped window and door opening. The wrap is folded back and stapled before the window or door goes in. The top flap of the window also receives special treatment. The top flap is trimmed down to fit over the installed window flange and is not stapled inside. The idea is to have the wrap shed any moisture coming from above to the outside of the window flange and not carry it inside. The volunteers doing the wrapping don’t worry about this. They wrap and window installers take care of the top flap as they go along. The important part is not to cut out the entire window opening outline.

Here the top flap has already been trimmed and is being carefully tucked in on top of the outside of the flange above the window being installed. Thus water runs down the wrap and into a channel on the window that keeps it outside.

The window is secured to the wall with screws or nails in the slots. They can be purposely left a little loose so they can move as they expand and contract. The tapes, siding and interior trim will keep them from rattling or moving any noticeable amount inside. It doesn’t seem to matter much either way in this climate. I’m just reporting the recommendations.


The technique is to apply the window wrap foil across the bottom of the window, then the left and right edges and finally across the top of the window. That way all the water flows down like shingles on a house, shedding water all the way.

Here a volunteer is installing deadwood over the interior walls. These serve the purpose of providing a place to nail the drywall ceiling. In this case there are two 2×4 boards nailed to the interior wall cap plate, one on each side. You can just see the ends sticking out above the wall running left to right. The deadwood is needed only on the walls parallel to the rafters.

Meanwhile the decking is going on. Notice the house wrap however. The top flap is sitting above the window waiting for it to be properly placed and taped. Nothing left to chance. The plywood sheets are handed up by strong guys and gals on demand from the crew above. They position the first sheet on the 47 1/4 mark on the truss top rails and center the end on the 4th truss. That is 6 feet from the end (3 each 2′ openings) leaving a 2 foot overhang. That will be trimmed later to 12 inches or whatever the SPM desires.
OSB has a smooth side and a rough side. Always install with the rough side up. Snap a line from the 47 1/4 marks at each end of the roof and use that as a guide for the deck installation. I know we made marks on every truss as asked but the more experienced deck crews always chalk a good line, end to end.
Full 8 foot sheets are installed across the entire front and rear of the house before beginning a second course. The decking crew nails each sheet at the top and bottom of each sheet into the truss, 10 each 8d nails to the sheet. Others come back later and nail the sheets on a pattern of 6″ down the seams and 12″ in the fields. Someone on a ladder can do the bottom edge safely. I did that part.
The second course starts with an OSB sheet cut to be 4’x 4′ square and is offset to the second truss. This offsets this course for the second run and all the subsequent runs are similarly offset. The sheets overhang on each end by two feet.

When a rafter is bowed too much or kinked it is sometimes necessary to add “sister” 2x4s to add a little wood on one side or the other to catch the edges of the plywood properly. Here is a sister board going on for a slightly kinked rafter. Beams are sometimes repaired this way if a worrysome looking crack is found in the wood.

The OSB along the top ridge is left with a 1 1/2 inch gap on each side for installation of a ridge vent later. The gap does not extend all the way across. It should end on the 3d truss from each end. This is an inside view of the gap covered with tarpaper. The tarpaper is not cut out until the ridge vents are reay to install. The roof on the right side has not yet been covered so the H clip gap still shows.

This is an “H clip” (hurricane clip) that must be used between each course of the OSB. This is a view from the inside showing the clip causes a small intentional separation. The clip helps hold the boards together during high winds and big pressure differences from the attic to the outside.

H clip close up.

The decking is snapped with a chalk line at the proper overhang. This house was designed for a 12 inch overhang, but one side was offset to 10.5 inches and the other left at 12 inches. The reasoning seemed to be that one side would match the porch better at the 10.5 setting. Here the excess is trimmed off the 12 inch side with a skill saw moved up the roof in a continuous walk. I think he has done this a few times! A perfect cut. Watch out below! You can see the beginnings of lookouts already installed.
Lookouts are “U” shaped with the uprights extending from the wall to the barge rafter when it is installed. The portion shown is difficult to install (swing a hammer) if the barge rafter is put up first. Thinking ahead. More about them later.

This is the first barge rafter going up. This is the other end of the house from the previous picture and the far edge has not yet been trimmed. The rafter is patterned to the truss while it is on the ground. As mentioned earlier, it was cut by the Gray Ghosts during the week. The technique is to lift it up on one end and let the roof crew pull it up and position it. They have clamps ready. The rafter is lowered over the edge, pulled up to the OSB and carefully positioned, then clamped in place. This is the “long” one and fits at the top end to the OSB on the other side and aligns 3/4 inch above the bottom edge of the OSB at the bottom. The fascia along the bottom edge will lap this piece and make everything right. The “short barge rafter” fits against the bottom edge of the long one. Once clamped, they are nailed into place from the top on both sides of the roof using 8d nails. The barge rafters go on before the tar paper when possible.


Here is the same end of the house showing details of the installation. Notice the first (long) one is installed flush up against the overhanging roof on the other side and the second is butted against it. Notice that they are numbered and marked for each end of the house and where located.
This picture, taken earlier in the day, illustrates the installation of the panels pre-cut by the Gray Ghosts. Each panel had been laid out and cut to fit the truss while it was on the ground. Terry is crew-chiefing the installation on one end of the house and carefully fitting the panel into place.

Before the last end is closed up there are some things that must be done to ensure that nothing is left out of the attic. Terry is shoving long 2×4 boards to be used as catwalks and to stabilize the bottoms of the trusses which “float” above the interior walls. Installing these boards will stabilize the bottoms of the trusses so that they remain on 2′ centers for ease in drywall ceiling installation. Extra lumber also goes in for use by the heating and air guy to build an attic floor for his system. He will be happy to find sheets of OSB and lumber for his HVAC platform waiting for him. Sometimes the roof truss design includes a couple of trusses that have some of the web relocated to make a pocket for the HVAC unit.

Here one of the boards Terry shoved in earlier is being nailed down to the bottom rails of the trusses. Notice that she is using the spacers to maintain uniform and exact spacing, essential to those installing drywall ceilings later. Without these boards in place the rafters can move back and forth and could make ceiling installation a pain.

This photo illustrates two items of interest. The first is the drip edge applied to the lower edge of the roof. It typically goes on before the tar paper and the tar paper laps over it (bottom horizontal edges only). The second is the ladder hold-off positioned on blocks and secured by bent nails so that the ladder will not contact the drip edge or the roof as it is being installed.


Once the barge rafters are in place (or if rain threatens) the felt (tarpaper) can be applied. The felt is installed with the bottom edge even with the bottom edge of the roof. It should not overlap the roof edge. Overlap the higher courses by locating the bottom edge on a line on the felt, typically 4 inches. It must be installed as flat as possible. Larger wrinkles will show through the shingles. Nail tightly with plastic-cap roofing nails 3 across the felt and about 3 feet apart across the roof. Note: after doing this, we were told to go back and put more nails in the edges. We ended up with about 1 foot apart. We will install the shingles on our next work day.

Here the drip edge is applied over the tarpaper and against the new barge rafter. The drip edge has a wide and a narrow edge. I had a closeup picture of the drip edge ends, but somehow it got lost – sorry folks.
Install the wide edge on the roof and the narrow edge drops down over the fascia or barge rafter. Once again, the drip edge goes under the tar paper on the horizontal (bottom) edge of the house and on top of the tar paper along the sloping edge over the barge rafters. Attach the drip edge with 7/8 roofing nails every 24 inches. Overlap the joint where the downhill run meets the horizontal run at the corners. Overlap the drip edge at joints by 1/2 inch. This requires cutting away one of the webs with a metal shear.

This is a hurricane strap of the kind used to attach the top wall to the roof trusses. One end of each goes on the top wall cap and the other ends connect to a truss. This is in addition to the 3 nails already holding the truss in place at each end. The hurricane strap helps keep the roof on in high winds. Each strap is rated for holding down under more than 500 pounds of uplift and about 150 pounds of lateral load. Use 5 each 8d nails in each end of the strap. If a different style strap is furnished, a nail goes in every hole. Do not drill holes or use oversize or undersize nails. Different nails may be required for larger size straps. Use what you are told to use.


The first strap is properly installed. The second one had to be removed and replaced because the web extended down onto the cap plate and would interfere with the drywall on both the ceiling and the wall.

Now here is a Handy little device for where hammers are hard to swing. It is a palm hammer aka palm nailer. Pneumatically operated, it tap-tap-taps a nail in a matter of a couple of seconds. You insert the nail head into the working end, it grips it with a magnet and as soon as you touch the nail to the wood with a small amount of pressure, it drives it in. It will drive nails in very tight places and is easy to use.

I found this one on the Dewalt Factory Outlet web site for $89.00. It weighs 2.6 pounds, drives 6d to 16d nails. Stick a nail head into the opening at the bottom, press it to a board and it goes right in in about a second. Sears has a different brand for $215 made by Jet, claims 1000 blows per minute. I have no idea what the difference is between all these. Porter Cable has one about $119.00 to $130.00 They come with various attachements. Drives nails from 3d to 70d ???. Surely that is a typo. It did say it drives “stakes”. Home Depot did not list any.

Another safety feature is a the T shaped horizontal boards nailed across the end trusses at each end of the house. This consists of 3 2×4’s nailed with one of the 2×4’s trapped edgewise between the other two. This very strong structure was attached to the end trusses to reinforce them. It was made on site.

Here a caulk seal is being applied rather thickly to the outside walls to discourage wind, water and insects. The drywall that goes up later will cover this no matter how thick. Also the floor covering and base cove will catch anything that might show. Most of our caulk is donated. In the case of plumbing walls on the outside wall such as in the laundry, the caulk seal goes to the outter of the two walls. It is not needed on interior walls.

Here a window and door caulk is applied to the concrete in an exterior doorway just before the door is dropped in. A larger dollop is in the cut-nail hole. This is the first of several passes to make sure that it is well caulked. The door has already been checked for fit.

Here the door is being nailed in. The door was fitted, caulked, then carefully adjusted for vertical in all directions using the long level. This header and frame were a good fit. If the header is more than an inch above the door, then a 1×4 would be nailed in to the bottom of the header. Either side can be raised to make the gap at the top of the door even all the way across, meaning the gap you see above the swinging part of the door, not the frame vs door. The hinge side must be set vertical and then nailed with a single 16d galvanized finish nail through the brick mold on the outside top. This nail is left partially out so it can be removed if necessary. Check the door and then nail the center and bottom of the hinge-side brick mold. Then adjust the gap on each edge of the door making sure the the top and latch sides are even.
Drive shims into the gap between the door frame and the rough opening at each hinge and at the lock side jamb, and drive 16d galvanized finish nails to lock the frame into position. Once certain of the fit, use 16d galvanized finish nails every 16 inches around the door brick molding.

Shims installed and cut off.

6 inch fascia boards are shown here installed to the ends of the trusses. These will be covered with an aluminum fascia later. The aluminum fascia will be installed with the top edge behind the drip edge and will lap under the soffit that will also be installed later.

Here we are looking at the blocking installed earlier. We are looking from the inside but the blocking is installed from the outside between the trusses. OSB boards are cut to just fit between the rafters and tall enough to fit from the bottom of the cap plate to within 2 inches of the roof. The blocking is nailed to the cap plate and serve the purpose of holding back insulation from getting into the soffit while holding open a a gap for cooling air to enter the attic from the soffit. They are typically 9×22 inch boards cut from OSB or blue board where blue board is used on a house. This one is OSB all the way, no blue board. This picture happens to have two hurricane straps and the header of the master bedroom picture window. This is a well-built house Nicole!

Here the lookouts are being finished by Terry using the palm hammer. It was a very useful tool on the short boards running from the wall to the barge rafter and for reaching up one-handed to drive in the nails in the exterior of the barge rafter. It would be difficult to both hold and drive a nail without turning loose in a potentially overbalanced position on a tall ladder. Yes, there is a pneumatic tube there but it happens to be well hidden behind his arm.
In the past the barge rafters were built completely on the ground after measuring the gap. This resulted in a problem in driving the nails into the long board with the barge rafter in place. The solution was to first put up the running boards and cut the short ones to fit later. The palm hammer could have done the total job but it is still fairly heavy. We are still experimenting on where to use it. I can say that the ladies particularly like it as it gets the nails in quickly every time.

Lookouts are installed 4 to a roof edge. The top and bottom ones are installed with the outer ends about 18 inches from the top and bottom of the run and the other two are placed about evenly between them. The longer lookout block is 21 inches long. The shorter ones are cut to match the overhang. Lookouts serve to strengthen the overhang and barge rafter connection to the roof.

The day is done! Well except for the cleanup of course. Terry and Travis admire their finishing touches while most of the crew have moved on and/or toting things to the storage container. When I got home I sat down thinking I would take off my shoes in preparation for a shower. I woke up 4 1/2 hours later.
It was a busy day for all of us, but everybody did have fun! Look for more to come. This is only the second day of a 10 day run to build a house for Nicole.
Oldtimer
PS all the pictures and many more for this tutorial are available here: Tutorial Slide Show
]]>For those of you looking for the homeless veterans or homeless youth, this is it. Click on one the links above the banner or on either of the two links in this paragraph, or maybe check out the right sidebar.
This article covers the installation of the roof trusses, roof decking and various other 2d day activities. To see the slide show of 126 pictures click here or on any picture below! There is a (mostly) different set of 137 pictures (and growing) for the tutorial, by the way, so to see those check out the tutorials or click here for access to the tutorial slide show. From any slide show you can access various sizes of the prints for free download (instructions further down – “Getting Copies”).
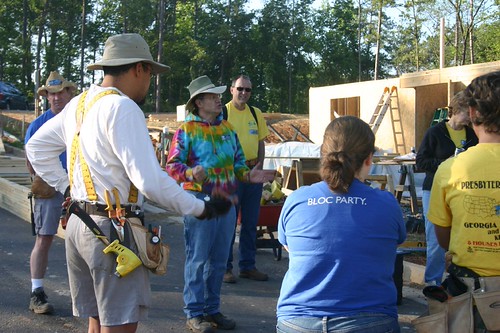
In the beginning there is the mandatory “have fun but be safe” safety and pep talk by Jeff Vanderlip, the fellow in the shirt of many colors.

Everybody is introduced to Nicole Combs in the front middle. She has already completed 100 hours of work on other homes and 100 hours of training on such things as mortgages, taxes, budgeting, how to maintain her new home, etc. She is very active in helping on this house and has been an excellent “quality control” person that is making certain that her house is built right. After the introductions, the crew leaders were introduced and jobs assigned to those willing to work in the rafters.
To read the rest of the story and see many more pictures, click here:

The work begins at 8:30 AM and once again, the photographer (me) gets into the shot by way of shadow on the pavement. These are the roof trusses that will be installed today, laid out on the side of the road. The Gray Ghosts have already been at work. The trusses arrived on site on Tuesday and the Gray Ghosts prepared the end trusses by installing the first sheet of OSB in the middle span. That meant that the OSB applied to the safety pole (barely showing at the far left) had to be removed from the top of the pole. They think of everything and removed it for us. They also laid out the OSB on both end trusses and cut them out to fit, numbered them and the trusses and stored the cut pieces in the front hall. Having the pieces pre-cut saves us from doing it this morning. We appreciate it, though few volunteers knew or noticed what they had done for us. Thanks guys and gals.

This is what “tricked out car” means to a Gray Ghost. Tool carriers on roll out shelves. The car belongs to Roy Brumley who is the unofficial lead Ghost and person to call to schedule Ghost work.
I’ve mentioned the Gray Ghosts in earlier posts, so look for them. It is a great organization of dedicated individuals, often older, sometimes younger, both men and women that are most often retired and willing to take one or two days each week to help the SPM (Site Project Manager) and the volunteers get something done that wasn’t completed during the previous work day.

Here is a truss being walked to the house. The trusses on the ground have been moved and re-stacked in the order of installation. There are several truss designs for the house depending on where the truss is to be located and they must be put up in their correct positions. They are numbered when they are made.

Here the fifth truss is hoisted onto the top of the house. There are volunteers with long forked poles near the front of the house and inside to guide the truss in. It will be positioned with the chord (long side) near the last truss, then rotated up and carefully positioned to marks on the truss (my job was marker), then stabilized with truss spacing tools and nailed in at the bottom and fastened to the long board sticking out to the right.

The last truss went up at 10:15 AM, just 1 hour and 45 minutes after start of work. The average time was just about 5 minutes per truss! Good job, good crew! And… most importantly, the most dangerous part of the build resulted in no injuries, again.

Here is a view of the completed roof truss assembly. There is a a beehive of activity going on around the perimeter of the house and inside as well. The house is being wrapped with a water proof membrane (we used to use tar paper, remember?), the windows are going in, and others are fitting doors. Soon we will put up a ladder so the fellow in the rafters can get down! Just kidding, of course. Soon the rafters will be full of volunteers adding catwalks, deadwood over walls, extra bracing for the end trusses and cross bracing across the entire roof span. There are hurricane straps to be installed on each end of each truss and flooring to be put in for use by the heating system that goes in the attic.

Our future homeowner, Nicole, keeps everybody cool with water and other cold drinks. This is Bob Kendall from Macland Presbyterian with his “Spring Chicken Run” T-shirt.

Someone has decorated Nicole’s floor with appropriate bible verses. They will never be erased but will be covered with carpet or vinyl to be discovered again many years later when they are replaced. Often people sign the interior studs and they forever become part of the house. I was struck by the shadow of a cross appearing on the floor here. Is that a hand holding the shadow near the top?
Getting Copies
The pictures shown here and in the slide show do not have the resolution you can get if you download them from the Flickr site. Go to the slide show and click on the link at the top left of the slide show to get to the full set at high resolution, or click on any picture in the slide show and then click on “View Main Page”. Once there, you can click on the button above the picture “All Sizes”. It will open in the large size, but you can download any picture in any size free, or can order prints through the site that will be delivered in about an hour to your nearest Target store. It’s not obvious how to get to the Target option. First put a print in your shopping cart. When ready for checkout, you can send your prints to Target for printing for about 15 cents per copy or have them mailed to your home.
In addition, you can go to “Zassle” and have T-shirts, coffee mugs etc. made with your favorite print. Enjoy. Below are selected prints but only a small sample of what is available for free download.

Here is a look at the back side. The people working back here often don’t get any press. Here the OSB decking is going on and others are working on windows below and on installing blocking at the top of the walls between the trusses. Blocking helps keep insulation in its place, but still allows air to be drawn into the attic to keep it cool. There are also sturdy guys and gals on the ground handing up sheets of OSB and later will be hoisting roll roofing. Everything is moving along nicely. The temporary boards just above the OSB will be taken down soon as they are no longer needed to stabilize the rafters.

Well deserved lunch break at 12:05. The house is almost decked, a little more on the front than the back but the front always gets the most attention because the ladders are closer to the street and get more volunteers. The guys and gals on the back work harder and will finish the back side almost at the same time. All the windows are in and properly taped. The other end of the house has all the OSB on the truss. This end is still open as there is a lot of stuff to be carried up and through the open wall to be loaded into the attic. Once the opening is closed, it will be harder to get long boards in there for bracing, catwalks, etc. Lunch and cool drinks and snacks for today was provided by Mars Hill Presbyterian Church. We appreciate it!

Lunch is over, back to work!!! Jeff only had to say it 3 times. Here the “barge rafters” go up. These are clamped in place and then nailed through the OSB. A matching rafter will be nailed on the other side after that side is trimmed to match this one. The boards under the roof on the other side are the beginnings of “look outs”. Matching fascia will be nailed across the front and back of the house to match the end of the barge rafter showing at the near end.

The roof has been covered with tar paper. It is a hot job and it is important for some of the work be done before the tar paper goes on, such as installing the barge rafters shown in the previous picture. The guys in shorts could have received burns if that work was done on the hot tar paper. The roof is officially “dried in”.

One of the things that must go on later is the drip edge for the sloped runs. The drip edge is installed below the tar paper at the bottom edge and above the tar paper on the sloped edge. The drip edge is the white metal flashing above the barge rafter.
This is the finished work for the day. Terry and Travis are inspecting their handwork on the last of the look-outs. The house has been wrapped, windowed, doored, roofed (except for shingles – next work day) and made sturdy with braces, hurricane straps and sweat.
There is a Habitat Tutorial – Part 3 already completed that tries to cover all the activity and show all the installations going on – an incredible number of tasks, big and small, are in work at any given instant. The tutorial is the third in the series – “Part 3” duh! It has many more pictures showing details of the work as it is being performed, along with a number of drawings to illustrate some of the more technical details. The Tutorial Slide Show includes the drawings and pictures from all 3 tutorials if you have any interest.
The slide show for this work day can be found by clicking on any picture above or by clicking on this link Habitat Slide Show day two. Through it you can access any of the 126 photos relating to the build except those set aside for the tutuorial which you can access through this tutorial slide show link. Enjoy!
Oldtimer
]]>This is the second part of a multi-part outline of what is involved in building a Habitat house. The first part is Habitat Tutorial – Prepration for Build. In addition, there are two sets of pictures with slide shows that have already been published that you may be interested in as they concentrate on people on the job site – volunteers. The first is Habitat for Humanity – 2008 Dinner on the Slab consisting of 25 pictures including our future homeowner Nicole Combs and her son Elijah. The second includes 115 pictures of the first day of the build – Habitat Build 2008 – First Day – Walls Go UP .
Note: If you came here looking for the homeless veterans site, this is it! If you came here looking for the homeless youth site, this is it!. I’m just taking a break to help out on a Habitat House and once a year I post what I saw, experienced and learned. Click on either of the two links in this paragraph or go to the side bar and select a category or search for what you want. Also look above the banner or to the right for popular articles on Homeless Veterans.

In the earlier tutorial I showed the plate markings. These two boards representing the top and bottom plates of a section of a wall are tacked together and left lying somewhere on the slab. All a volunteer has to do is separate the plates, remove the tack nails and insert studs, T’s, window or door frames and nail them up.

You can see in this picture a stack of top/bottom plates on the floor on the right, a separated set being stocked in the left foreground and one well on the way on the other side of the slab. A set of blueprints are laid out on the slab on the right, but it is seldom needed as the slab is already carefully marked with all the walls, doors, etc. and the sets of plates are numbered to match. The rod with the orange ball on top is the future grounding rod for the electrician. We will notch a wall to fit around it and around the various plumbing pipes (such as the blue pipe with the white top in the far right. The shadow on the slab at the bottom left is all you are going to see of me!

Before the walls go up, the walls receive a “Sill Seal” (the blue polystyrene strip shown partially loose on the bottom of the wall). The bottom all the exterior walls receive this sill seal to help seal out any air leaks. The corrugated side of the seal goes to the slab. The Sill seal is attached with roofing nails placed every 24 inches.
This one is loose because it was discovered that the notch for the electrical grounding rod would land on one of the studs. The sill seal was loosened and the stud removed (the one laying at an angle) and will be relocated slightly. Notchs are cut before the walls are installed.

This notch is bigger than needed because the first cut was not quite in the right place. Notches are cut with the wall on the ground with a skill saw with two cuts from the edge, then knocked out with a hammer or a chisel if handy. It is easier to get it right if the wall is lifted into place first, then marked, but this was a long wall so the position was calculated and slightly off. In the end, the wall was lifted twice anyway. You can see the top of “cut nails” in between the studs.

These are notches cut out for the plumbing wall. Plumbing walls are double walls and fit against the plumbing T shown in the first tutorial. Notches don’t have to be pretty but should leave some wood for nailing to the concrete to stabilize the studs. If necessary, the studs are relocated, and sometimes if a very short bottom plate is left after a big notch, a connecting board runs from one wall to the other to stabilize the hanging stud.

This is a plumbing wall installed. It may not be the same wall as shown above, or the notches may have been cut all the way through. See the cut nails in the blocks to keep the studs from moving on the two that are cut all the way through. The larger white pipes will be cut off by the plumber for the toilet drain. The mid size pipes are for sink drains and the blue wrapped pipes are cold water and the red marked ones for hot water. It appears that someone is already marking stud locations on the concrete.

Hurricane straps are buried in the concrete and the ends left sticking up for use to hold down the walls. I’m talking about the shiny strips hanging out of the wall at the bottom of the picture and also off the left side. There is one on each side of the board at every location spaced about 4 feet apart.

Every strap is bent tightly over the board and nailed, one to each side and 3 in each top. The top nails are angled so they don’t hit the concrete. 8d nails are used here. The straps are used to keep the walls from being easily lifted or pushed off the slab during high winds. There are similar straps used at the tops of the walls to keep the roof trusses attached so that the entire house is locked down to the slab.

This is a “cut nail”. It is very hard and can be easily driven into concrete. Safety goggles must be worn by anyone nearby when driving cut nails as they typically do not bend but break instead. The edges are sharp enough to produce cuts on the skin if handled roughly so be careful. The name comes from the way the nails are made. They are stamped out (cut out) of sheet metal then hardened, whereas our other nails are cut and formed from wire rolls. OK, a little more of me got into this picture.

This is not the optimum hammer for driving cut nails but it is heavy enough to do the job. There were a number of volunteers at work doing this job. A cut nail goes into each gap between studs. In this case this is a door opening so the nail goes into the space where the jack will sit on top of it. Some end up in the middle of doorways where they are knocked out later – unavoidable when volunteers get ahead of instructions. The nails are oriented to run with the grain to avoid splitting the wood.

Here is a standing wall section, typical for those on the site. Shown is a window unit in the middle with a wall brace running to a stake in the ground outside. To the right is a wall T for the connecting wall running to the back and an adjoining door. The wall T is oriented with the spacer to the back. To the left is a wall T waiting for an interior wall to butt against it, with the spacer oriented to the front. The walls are joined by nailing from the backside of the T into the end of the wall that runs up against it. Running sections of walls are joined by nailing through the studs that make up the ends of the walls. An example is the double stud to the left of the window. This is two wall sections joined together. A cap rail will be added to cap the wall which will span the wall end junctions so that they are firmly locked together.
If the walls are centered on the T’s they will eventually be perfectly vertical once the outside walls are straightened. Never straighten an inside wall until all the outside walls are done as the walls will straighten naturally if they are attached properly to the T’s. Notice the spacing on the cripples below the window. They are spaced on 16″ centers with the adjoining studs and not just based on the window opening. This provides uniform nailing points for the drywall and external sheathing. There is an extra cripple on the right to get the spacing right. Notice the hurricane straps about every 4 feet. Notice the one on the far left is nailed up the side of the T rather than attempting to nail through the small opening which already has a strap. This is OK.

Here are some interior walls stacked around waiting for installation. At some point the outside walls will be completed. It is nice to have all the inside walls on the slab so that no wall is required to be lifted over the top of an exterior wall. Even so, one wall ended up locked outside and had to be lifted over.
Walls leaning against walls is one of the reasons for carefully bracing the walls with angled braces. Also tired volunteers may decide to lean against a wall. We don’t want it falling over with him/her on top of someone trapped outside. Notice the one wall with a strip tacked across near the bottom. This is temporary to stabilize the sections cut out for plumbing.

This photo illustrates stud marking. Volunteers mark the location of every stud on the slab and on the cap plate of every wall, including the outside edge of the slab. The intent is to make it easier to find the studs when the outside sheathing is going on and when the drywall is going on or up.

Here the cap plate is going on the top plate of the wall. The cap plate ties walls together and straightens every joint. They must bridge the ends of wall sections by at least 4 feet and they should aways end on a stud. Cap plates should extend into a wall it butts into. In the case above the 4 foot rule will be violated as the adjoining wall is closer then 4 feet. The portion under his hand will be cut away to allow the cap plate from the adjoining wall to come through (someone, out of the picture, got ahead of himself?). Is OK, can be fixed.

Here is the cap plate properly installed. It is the same spot. The cap plate at the right was carefully cut to make room for the piece coming from the other wall. Notice that the adjoining wall is tied to the running wall by overlapping the running wall top plate. This prevents any movement of the two walls even in the worst of conditions.

Here are two ladder headers for interior non-load bearing walls. One runs to the hallway from a bedroom and the other into the master bath. These differ from the drawing in my first tutorial as the wall serves as the header instead of the two by four illustrated in the drawing. Notice the inside of the T to the left to catch the hall wall. Nails are through the block to the end stud of the wall. Notice the wider plumbing T through the doorway to the right. Two walls will be placed on the plumbing T to make a 7″ wide space for piping. There are other walls still stacked around in the back ground.
The “41 LDR HDR” means build a ladder header 41 inches wide. 1.5″ wide Jack posts will go on each side of this frame reducing the space to 38 inches. Then the interior door frame is made of two 3/4 inch wide boards reducing it again to 36.5 inches. This leaves 1/2 inch clearance for aligning the door frame for a 36″ door. Exterior doors headers are 41.5 inches wide to allow for the thicker door frames and the exterior headers are 10 inch wide boards spaced with a 1/2 inch plywood spacer instead of the cripples shown.

Debbie is installing metal strips that catch the OSB 4×8 sheets to be installed shortly. The top of the metal strip is aligned with the top of the 2x4s. The OSB rests in the J section in the bottom of the strip. the strip fits closely against the 2×4 base plate and drops below it helping to seal the junction between teh plate and the concrete from windblown water. The outside siding to be added later falls below this strip so no water collects anywhere it is not supposed to. There is already a crew installing the OSB behind her, out of the picture.
OSB stands for “Oriented Strand Board”. It is the pressed wood chip boards that are so commonly used today. The chips are placed more or less randomly but intentionally oriented to straighten the board in all directions then bonded together with an adhesive resin. This manufactured sheet has the chips oriented one way on the outside and crosswise on the inside though a sifting process on the assembly line. This is not left over pressed sawdust but instead is carefully engineered water resistant manufactured wood.

This is what OSB looks like (per copy from Wikipedia) before it is pressed. Notice the slight change in color near the middle third of the board where the chip orientation is different. The board is incredibly strong.

Steve and others are installing the OSB. The edges are nailed with 8d nails on 6 inch centers on all edges and 12 inch centers on the studs in the middle of the field. Studs are marked on the slab beforehand with magic markers and a level is used to draw vertical lines for nailing in the fields. Some OSB comes marked with the lines already drawn and a few experienced volunteers can find unmarked studs like radar.
It is necessary to remember that there are window or door openings and allow for nailing on 6 inch centers around those openings. Notice the insulation showing in the T’s.

Earlier we had to build an extra window frame because somehow we were short one (in another wall). Later Nicole asked why there was no door leading outside the kitchen. Oops, there was the missing window frame where a door should have gone. The rouge window was removed. In this picture the nails are still in place. These were cut off with a metal cutting blade in a saws-all. The extra door was still sitting on the ground outside (which should have been a clue). We are all standing around guarding the opening so no one steps on the nails while the saw if found.

Here Jeff positions the new door while Terry takes early advantage of the new opening. The window at the left was originally built the same as the others, then shortened to a kitchen window so it would fit over the counter top and sink. Additional Jacks and cripples made it easy. Notice the plumbing in front of it.

Here the sill plate is being cut out. The skill saw base plate is 1.5 inches wide so it is easy to use the stud as a guide. The jack post that goes next to the stud is already ready to be put in. It rests on the 1.5 inch piece remaining. The saw blade is adjusted carefully so that it does not quite touch the concrete and the bottom board leveraged up to get it out. Any cut nails in the concrete are loosed by hammer blows to the board beside them and they usually come up with the board or are broken off flush with the concrete. Any remains are driven in. A saws-all can do the job as well, but is harder to get a perfect cut.

An old chisel is used to remove the remaining bits of wood after the sill is cut out with a skill saw.

Here the porch beam is being constructed (long boards in the foreground) while others finish up the OSB siding and stil others prepare the house for straightening the walls. Notice the block of wood at the top right corner. More about that later. Notice that all the walls are up and capped and many of the braces appear to be removed. Actually they have been moved inside and positioned so the walls can be braced in new positions that keep the walls perfectly straight all around.

This is a view of the short end of the porch beam already in its “pocket”. The components of the porch beam includes the two sides and the one across the front. The beams are 2x10s with a 1/2 inch plywood sandwiched inside and well nailed together.

This is the other (longer side) of the porch beam side rails as it is being shoved into its pocket. There are 2×4 boards being readied for temporary outside support. Notice that the beam extends inside the house and into a built in pocket sized to keep it locked in place and stable.

Nailing the porch beam in place.

The beam must be absolutely level! Vertical braces are nailed on to the outside of the beam to stabilize it and supporting jacks nailed onto that. The beam must support the roof trusses as they are hoisted up later without moving.
This beam was cut a little short when it was first made, a mix up in communications between the guy measuring and the guy cutting. One was measuring between the inside of the outer boards on the side beams and the other cutting to the end of the outside beam. The result was a front beam that was 3.5 inches short. The front beam should lie across the side beams but was adjusted to fit to the inside of the side beams due to the measurement problem. 1/2 inch spacers were used to make up the difference. One result of all this is that the front overhang is a little wider than normal and the posts will sit a little closer to the house. No real harm done and a couple of expensive boards saved.

These fellows are installing “dead wood a.k.a. deadwood”. On the ends of the house where the trusses run parallel to the house, the deadwood serves the purpose of giving a place to nail the edge of the roof truss to the frame of the house. Deadwood also serves the purpose of providing a nailing strip for the ceiling drywall on that those ends of the house. The dead wood is a 2×4 board positioned so that it overhangs the room below. It is spaced from the edge of the wall by holding a short 2×4 board edgewise on the top outside edge of the cap plate. See the picture above. This spaces the board over by 1.5 inches giving a 2 inch nailing space on the cap plate and a 1.5 inch overhang that can be used to nail the ceiling drywall to..
The 1.5 inch wide roof truss fits down the outside (this side) of the dead wood and onto the cap plate so that the roof truss is in the same plane as the frame before the OSB goes on. OSB also goes on the outside of the roof truss so that it all fits correctly. The roof trusses are nailed directly to the deadwood and also toenailed to the frame.

Well, after writing all that, I figured I was confusing any novice that came along so I created this drawing to illustrate what is going on. The Wall stud, top plate, cap plate and the wall sheathing are all existing. The edge of a 2×4 block is placed where the future roof truss will go and a 2×4 board is nailed onto the top plate as illustrated. Later when the truss goes up, the bottom edge will be nailed to this dead wood and even later when the drywall goes up, the drywall will be nailed to the bottom edge of the overhanging deadwood.

Travis shows the proper offset technique.

This is one end of the setup for straightening the walls. There is a block like this at each end and a very tightly strung line. The line goes over a nail on the far side and then is wrapped around a nail as shown so that the line does not need to be cut. It will be moved around and used on each outside wall. Generally the longest wall is done first.

This work is easiest done from the inside. A board is moved along the wall inside of the string. Any variation in the wall will show as a gap or a bowed out line. Volunteers inside move 2×4 boards attached to a stud near the top of the wall pull or push the board until the board barely touches the line and then nail the board near the bottom of an adjacent wall or along the side of a butting wall, always at an angle sloping down. When done with all the walls, the walls will be perfectly steady and vertical throughout the house. Interior walls will generally be straightened as the outside walls are brought into plumb.

The board angling down on the right is a temporary cross brace that holds the outside wall perfectly vertical. It stays up until the roof trusses and decking are on. Notice the dead wood overhanging the cap plate on this wall.

When there are large areas with no interior walls to brace along or against, blocks of wood are cut nailed into the floor and wall braces attached to them. The technique is to first attach near the top of the wall and then push/pull until the wall is straight using the pole and then nailing the pole to the side of the block on the floor. The man on the ladder is calling out instructions to push or pull.

In most cases the windows are covered in OSB and cut out later. Here a saws-all is used to cut around the inside of the frame. A hole is started somewhere with a drill or through a gap in the wood or with the tip of the saws-all. Cut a long arc to get to another edge then back track to cut the arc out.

This picture shows several things. Notice that a top plate and cap plate have been added to the porch beam. Also deadwood has been added to the cap plate at the front. The porch roof truss will be set in front of the deadwood (on the other side of the beam as shown). Also notice the supports attached to stabilize the porch beam includes an angled 2×4 to keep it from twisting.

The tall pole at the side of the house is a very sturdy safety brace that will temporarily support the roof trusses as they go up. The first roof truss will be hoisted up using long forked poles over the front of the house and slid back to be parallel with the side with the pole. Then it will be lifted up and leaned against the pole and dropped into the pocket behind the deadwood. Volunteers with ladders outside will nail the truss to the deadwood and to the top of the tall pole. The following trusses will be nailed at the ends of the walls and tied to the first truss with temporary boards running across the tops of the trusses. The tall pole is a safety device as the trusses can easily fall over until the roof decking is up and the trusses cross braced underneath. The trusses are heavy enough that even one can severely injure someone and when they all fall over it can be deadly to several.

Here is an inside view of the safety pole. The piece of OSB attached near the top serves the purpose of matching the plane of the OSB on the bottom wall so that when the truss goes up, it will be vertical when it rests against the OSB on the pole. The first truss will be firmly attached to the pole.

Here a temporary walk beam has been added over the living area. It fits into a pocket at each end made up of a double jack below the beam and a 2×4 on the other side of the beam, locking it in. The pocket is built at both ends and an extra support added in the middle and attached to the floor. The beam is made of two 2×10’s with overlapping boards to get extra length. This beam serves the purpose of giving the roof trusses a place to rest as they are hoisted over the front wall.
The trusses are long enough to reach past each end of the house and as they go over the wall they can get overbalanced and fall in and fall on someone or scoot along the floor and possibly injure someone. The beam holds that end up temporarily to allow the truss to rest and slide easily to the back. The roof trusses are also shaped like an “A” and so even when they are completely across the house, the heavy top of the A can cause one to tip over and the top of the truss rotate and fall into the house. The walk beam prevents that from happening too. It is a sturdy safety device. It will be removed after the roof is fully stabilized.

A good day’s work! The house is ready for a roof! Saturday May 17, 2008. See your there?
Oldtimer
(corrections gratefully accepted)
]]>
This article covers the first day the volunteers show up, and includes a slide show for the entire day with 115 photos, almost all including the volunteers. My photo is hopefully the only one not included, as I am behind the camera. To see the slide show of 115 pictures click here or on any picture below!

This is the start of work, 8:23 AM. Safety instructions and a pep talk have already been given by our SPM (Site Project Manager), Jeff Vanderlip. That’s Jeff in the middle of the site with the orange shirt and big floppy hat. The various top and bottom plates are still tacked together and strewn hap-hazardly all over the site.
The top and bottom plates are numbered and well marked so it doesn’t matter what order the walls are built or if anyone knows exactly what they are building. Grab a set, pull it apart, remove the tack nails, lay them about 8 feet apart and start adding studs, T’s, doors and windows. See the tutorial for good examples.

A half hour later, the walls are well on their way. many of them are completed, including the addition of a sill seal foam tape (blue) on the bottom plate. Some of the build is taking place in the driveway of the house in the background. Often we take to the street. To do a good job we do need a flat area so the components line up properly.

Measure it twice, cut once! The gentleman on the left is our “cut man” for the day. The one on the right is “Pretty Boy” Miller, also known as “9 fingers”. He is our grand master of carpenters and a super-volunteer.
Getting Copies
The pictures shown here and in the slide show do not have the resolution you can get if you download them from the Flikr site. Go to the slide show and click on the link at the top left of the slide show to get to the full set at high resolution, or click on any picture in the slide show and then click on View Main Page. Once there, you can click on the button above the picture “All Sizes”. It will open in the large size, but you can download any picture in any size free, or can order prints through the site that will be delivered in about an hour to your nearest Target store. It’s not obvious how to get to the Target option. First put a print in your shopping cart. When ready for checkout, you can send your prints to Target for printing for about 15 cents per copy or have them mailed to your home.
In addition, you can go to “Zassle” and have T-shirts, coffee mugs etc. made with your favorite print. Enjoy. Below are selected prints but only a small sample of what is available for free download.
First Wall

Nicole installs the first wall to go up! This is always a photo opportunity and can’t be missed. There are several other shots of this in the slide show. The time is 9:09 AM, barely 46 minutes after we started! The all important wall brace is being wrestled into place on the far left. All the walls are braced by long 2×4’s to hold the walls vertical and to make sure they don’t get pushed over by loose walls stacked against them or a tired soul leaning heavily in the wrong place. Long stakes are driven into the ground and the brace is poked through the top of a window or doorway, if available, and nailed at each end when the wall is perfectly vertical.

The second wall. It includes a window unit and a couple of T’s. This is the back of the house and includes the utility room and a bedroom. Notice the brace at the left. Another is being readied off camera for this wall. There was no window or door in the first wall so the brace is through the wall itself. The reason for using window and doors for the braces is so that later much of the outside sheathing can proceed without removing the braces.

Neat Suspenders.

Time for a break. Picture windows make good seats. Don’t worry, I have front views of all these people in the slide show, including this one. Hmmm, more suspenders.

OK, these oldtimer’s deserve more respect. They are both Gray Ghosts and SPM’s as well. The Gray Ghosts are generally expert carpenters and woodworkers that have retired but like to stay busy helping the Habitat cause move along. When things don’t go right or don’t get finished, the SPM puts in a request for Gray Ghost help. They slip in after the volunteers are gone, review the work and fix any problems or complete any incomplete work so that the job stays on schedule. The volunteers may notice that someone finished the roof or fixed a window or completed a porch and wonder who did it. The answer is always “a gray ghost”. Unsung heroes to me. There is no telling how many houses they have led and how many more they have worked on as ghosts.

Hmm. Looks like Debbie found her job! Debbie is also an SPM and has already completed her house on this same street. She has lead many houses for her local high school and now that she is retired, continues on.

Every body is busy. Except for me, of course. I put the camera down from time to time to pick up my hammer, but to tell the truth, at my age, I can’t do that much anymore. I did plaster a few OSB walls with nails pretty well however. I’m trying to document the progress with the intention of keeping a working tutorial of the build. Wish me luck.

I believe the 5 people nearest the center of this picture are all board members or past members of the Presbyterian Coalition, 6 counting the guy behind the camera. There are many more on the site today. Everybody works.

Food on the way. Hamburgers and Hot Dogs. Each week a church has volunteered to fix the meal and serve drinks. The assigned church also provides the opening prayer and the food blessing and often a devotional at lunch time. First Presbyterian always provides the meal on the first day of build and Macland Presbyterian provides the meal for the last build day. Often the meals are donated by local restaurants. For example sometimes Papa John’s will provide free pizza dinners or perhaps Williams Brothers Bar-B-Que or Subway. Others are home cooked or maybe sandwiches. It doesn’t matter, we are so hungry you could serve worn out shoe leather and no one would complain.

This young lady is cutting insulation into strips to insulate the T’s. All of the outside walls must be insulated and no exceptions are made for small gaps. You may be able to see an insulted T in the far wall above her head. The T’s and corner posts must be insulated now because the OSB sheathing will cover much of it before the day is over. Another area to be insulated early will be the areas behind the tub enclosure before the tub goes in. Insulation can be a problem if the various inspections delay us from getting other things done. So very often a special day is set aside for a midweek day to insulate the walls. It has to be done after the house is dried in and plumbing and electrical done, but before the drywall goes up.

This is our leader, our SPM. Jeff Vanderlip, a tireless worker and hard task master. Always urging us to “have fun” then assigns us the most dreadful tasks.

This picture may look a little fuzzy but that is sawdust sprinkling down in front of Terry Barton’s face. It is particularly fine sawdust because he is using a metal cutting blade to cut a window opening – it was all he could find. I had a proper blade in my truck as did probably 5 others. Terry is our finance officer and past president of the Coalition. He is also a Master Gardner and does genetic family research on the side (or something like that). Anyway he can tell you if you are related to Napoleon or the guy you thought was a great great grand daddy but you’re not certain.

Here the house frame is being straightened and aligned with the aid of a couple of blocks of wood and a tight string. The block he is holding is positioned behind the string while others move braces inside the wall to bring the wall into perfect alignment. The technique is to put blocks at each end of the top of the wall, tightly stretch a string between them and adjust the wall to a third block that is moved between the wall and the string. The walls are virtually complete.

I was asked to capture these two together and just at that moment, one tried to get away.
There are about a hundred more pictures on the slide show and I’ve sort of randomly selected a few representative shots here. There is another slide show coming up as part of the continuing tutorial if anyone is interested in that. You would be amazed how many people visited last year’s pictures doing searches on construction such as “Hardi Plank” or “roofing” or “siding” or “framing”.
Job Well Done
Well, here is the last picture for the day. The time is 3:10 PM and everybody is gone, some 7 hours after the official start of the day. The house is sheathed, openings cut, all the walls are up and perfectly aligned, the porch beam is installed and the house is completely ready for the roof trusses that will go up next Saturday. Incidentally, the pole at the end of the house is a safety pole to hold the first roof truss as it goes up and prevent it from toppling over. The pole will remain in place until all the trusses are up and the roof completely braced and stable. There is a catwalk used for safety purposes installed over the living room that I’ve not shown. It will be in the tutorial and will come down after the trusses are in. Safety is much more important than finishing the house.
Click here or on any picture for the slide show and for access to the full sets of pictures for free downloads or for ordering prints.
Enjoy,
Oldtimer
]]>
Layout on the Saturday before the first day of volunteer build.
Caution, take with a grain of salt. This is from the experience of one volunteer, certainly not an expert and I will make errors. Keep in mind also that other Habitat leaders may do things entirely different. If you are looking for slide shows for the 2008 build, start with Dinner on the Slab.
Preparation for build could go all the way back to when Cobb Habitat began site selection through when the concrete or foundations are poured, street and utility construction and other site preparation. I’m not going that far! I have also left off details of squaring the slab which involves a careful analysis of the slab dimensions vs the house dimensions and then snapping lines that are perfectly perpendicular in all directions, matching the slab to the plans as best as possible. If the slab is perfectly rectangular and sized correctly, this is a no-brainer.
Often the slab is not poured perfectly and there are edges that are bowed, edges that dip or turn out, and corners that are not square. In addition, the middle of the slab can be bowed up (the usual case) or bowed down with resulting puddles after a rain to deal with. All of these things must be dealt with by adjustments to the layout to accomodate the anomalies – the concrete is poured and hard, the plumbing is where it is, and the volunteers will show up next week, and nothing is going to be ripped up and repoured.
This tutorial is, instead, a brief summary of the steps that the Site Project Manager (SPM) goes through with a few other volunteers to get the site ready for the volunteers first day of build. I am also omitting the extra work necessary to build a floor deck in the situation of a house with a crawl space. This year we are building on a slab withouth a crawl space, so that is all you get.
The previous Saturday several members of our group (The SPM, crew leaders and other invitees) met at the site and measured, “squared”, and “laid out: the site, meaning they checked the foundation and defined the outline of the home and all the interior walls. This involves laying out every window, door and wall section and outlining them with chalk lines. Corrections are made with different colored chalk and the final layout receives a clear waterproof spray in case of rain.
There were several problems to be overcome caused by the plumbers miscalculations that put the bathroom 2 feet into the living room and the utility plumbing outside the designated walls in several areas. Our future homeowner, Nicole was on site and agreed to a bigger closet and a smaller living room and all the adjustments were made to her satisfaction.
Unfortunately it rained in the middle of the layout, washing much of the markings away. Since the team ran out of chalk colors (red blue and green) the final outline was done mostly in pencil. That works too, if you have enough pencils as they wear quickly on concrete.
2×4 pressure treated boards are cut for each wall section to exactly fit the walls (ignoring door openings) and matching “white wood” (untreated) 2×4 boards are made for each one and tacked together in pairs. The pressure treated boards go on the concrete and the white boards will go on the top of the walls. Each board is numbered at each end and matching numbers are placed on the concrete between the drawn lines. There are drawings below to illustrate all this.
The location of all wall studs are outlined on the edges of the two boards and “X” marks placed in the outlines. The location of Jack studs (shorter studs inside of door and window frames) are marked with “J”. Doors, Windows and T’s and Ladder headers are also marked. T’s are located at points where walls intersect. Door types (left hand, right hand, width) and Window sizes are marked on the wall plates.
The two boards representing a wall (or section of a longer wall) are then placed back into the outline and everything checked again against the print. Each board has all the markings necessary for a group of volunteers to build that wall in a matter of a couple of minutes without any concern for where that wall will end up. If they follow the markings the wall will have studs, the proper size door and/or window and all connecting T’s for any intersecting walls. Any allowances for plumbing (such as slots or notches for pipes) will also be marked.
In addition, the team builds all the “T’s, door frames, window frames and corners and stack them in a pile.
Here is a fictitious example of a set of plates that have been tacked together and marked. Normally there is also a wall number on each end. I’ve omitted that. The pressure treated board goes next to the concrete on top of a foam strip (“Sill Seal”) that helps seal out moisture and air. Door openings are cut away later. X is marked for studs, J for Jacks, T’s are marked (see markings near right end above) and have an arrow on the plate to show which way it is to be oriented. The size of the door or window is marked on the plates as well.

These are a few of the components usually prepared before the volunteers show up. They are build by volunteers during the layout day if they have time, and often finished by the “Gray Ghosts” if they don’t. Sometimes a team of volunteers build them on the first day of build. We like to have them ready beforehand if possible to speed things up.
Corners and T’s are built exactly the same except for the orientation of the boards between them. Corners have the boards wide side to wide side between two studs. T’s have them positioned narrow side to wide side as shown in the middle illustration. Plumbing T’s need to be wider so the boards are turned lengthwise (7” long) and doubled up to give them more spacing. The purpose of the T’s is to give intersecting walls a place to be nailed to. Plumbing T’s need extra space for vents and piping.
The T’s are inserted in a wall and then an intersecting wall fits against the wide part of the spacers and nailed from the back side. Corner posts and T’s that are in outside walls are insulated. There is an illustartion near the bottom of an assembled wall with a T.

These are two types of door headers, interior and exterior. The widths of the interior doors vary greatly. The headers for 3′ exterior doors are 1/2 inch longer than for 3′ interior doors. The jacks are often left out of the sets made beforehand. The doors are set in place in the walls, the walls nailed to the concrete and the opening cut with a Skill saw (carefully set to not ruin the blade) or a “saws-all”. Leaving the jacks out allow a Skill saw to make the cut using the 1.5 inch guide on the saw. If the jacks are in place, the saws-all does a good job of making the cut. Ladder doors get their name from the series of “cripples” that form a ladder like shape. Exterior doors are always 2 each 2×10 boards with a 1/2 inch plywood spacer between them. The cripples are often inserted after the walls go up so that they can be matched to the nearest stud placement and to fit drywall or exterior sheathing. Also, you may notice from the “live” pictures that come in the next tutorial, all the darkened wood in the ladder illustration is sometimes left out in the initial assembly and the top bar omitted entirely so the cripples extend to the top plate of the house frame.

This is a typical window header, often prepared ahead of time whenever possible. The cripples are usually left off, measured and added after the walls are up and located such that they fall on 16″ centers to match the drywall or exterior sheathing after the wall goes in. There are usually 3 or 4 sizes of windows in a typical Habitat house. There is usually a “picture window” size, a shorter kitchen window for over the sink, and then the bedroom and side windows. sometimes there may be another size for some special purpose, perhaps for a bathroom or next to a deck.

Here is an assembled “fictitious wall” showing a match up of the plates and the assembled wall section. Wall sections are butted together for longer walls and the top plates joined by an overlaping cap plate. The end of an intersecting wall buts up to the near side of a T (in this case the side showing) and the nails are hammered in from the open back side. Cap plates run from the intersecting wall and cross over to the continuing wall so that they are locked together. Volunteers can assemble this wall in 2 or 3 minutes or someone that has never held a hammer may delay it for 4 or 5 minutes. We wait for him/her and give much encouragement and help. The idea is to have fun. We are not on a real schedule.
When the volunteers show up, they are instructed to grab the tacked-together plates, separate them and start inserting studs, T’s, window and door units. It takes all of 2 minutes for the whole slab to be covered with walls under construction. Volunteers help each other with the more experienced crew leaders make final judgements. The SPM usually resolves major problems quickly – such as a wall that intersects a door or a window where a door belongs, or a room with no door. It happens. The worst case is for windows and doors that arrive that are the wrong size for the frames that were built to the plan. Tear out and redo is often the solution.
Completed walls are stacked outside on the dirt until they are all finished. Then the walls for the exterior start to go up. The first wall stops everything as everybody gathers for the photo-op. Nicole was photographed driving in the final nail and helping position the wall. Then the other walls were carried onto the site in an order designed to get them all into place without having to shove any over the top of a wall. One was anyway.
Our volunteers started active work about 8:30 AM after prayers and safety instructions. By 11:30 all the walls were up and lunch was served (hamburgers and hotdogs grilled on-site).
By 3 PM all the walls had been sheaths and the frame squared and prepared for the A frames and roof, including the porch beams.
I’ll show pictures of all the various parts going into place in my next article – first day of build.
Next: Build Day 1 – Walls go UP!
The next article will have pictures and slide show for the first day of build – the day the walls go up. Watch for it here.
Oldtimer
]]>
(If you just want to see the pictures, click any picture for a slide show and link to pictures you can copy.)
First let me explain what this is all about. This blog is pretty much dedicated to the homeless, particularly homeless veterans and youth. But not completely, as each year I take some time off to work on a Habitat for Humanity home and post a progress report with slideshows, tutorial and pictures of the events. I’ll continue to add articles on homeless as I go along. You can access the articles by category, using the links in the header or the tags and categories to find the topics you are interested in. In general, you can find all Habitat for Humanity Articles here, all Homeless Veterans Articles here, All PSTD articles here, and all Homeless Youth Article here. The links above and to the right allow you to also find my most popular articles. When this is all done, you can find the 2008 Habitat Build here, or look at it on a running basis throughout the build.
This one is the first of a series of about a dozen articles on our current build. It will carry you from the day before we start to build (todays article) all the way through the dedication ceremony and house warming. If I do everything as planned, you will also get a “how to build a Habitat House Tutorial”. To be taken with a grain of salt as I am certainly not an expert, but reporting what I experience and the various jobs I take on during the build.
Background
Here is a little background. I am a member of Macland Prebyterian Church which is in return a member of the Presbyterian Coalition, Cobb Habitat for Humanity and I am their representative, a member of the board. The Coalition is composed of Presbyterian Churches in Cobb County, Georgia that raise money to sponsor one or two houses in our county each year. We raise the money, about $55,000 to pay for the lot and any undonated materials. We also build the house(s) and fund a number of houses in Kenya each year. After Hurricane Dennis we also helped Cobb Disaster Recovery in rebuilding damaged homes in Cobb.
This year we will build one house in Cobb County, Georgia (our 22d house in Cobb so far) and seven in Kenya (total 32 in Kenya)!

Nicole Combs, Future Homeowner stands on the site of her new home
(Click on any picture to start slide show)

This wonderful smiling face belongs to Elijah, Nicole’s son. Some of the framing can be seen behind him
The future homeowner, Nicole Combs has a son Elijah, 7. She will work on the house with our volunteers to get the house built. Homeowners come up with a down payment, are required to work on other houses as well as their own for some 200 hours of “sweat equity”. For us, it is mission work, Christ’s command: help the needy!
The homeowner will actually sign a contract to buy the house at a greatly reduced price (compared to the appraised value) and then make interest-free monthly payments until it is paid for. Cobb Habitat for Humanity takes care of selecting the homeowners, purchasing the land and preparing the streets and lots prior to the volunteers (that’s us) coming in. That includes getting either the concrete poured if it is to be built on a concrete floor, or building a block foundation if not. In the latter case, a few people, men and women from our group go out and frame and deck the floor prior to the volunteers arriving.
Schedule: The build dates are Saturdays May 10, 17, 31 and June 14. Then we go into blitz week where volunteers work all week to finish the house and landscaping June 16 through 21. (We have skipped an extra weekend this year due to Memorial Day weekend.)
Location: The site is located in the same subdivision as last year, but in the second phase of the development. Mableton, Hillcrest Subdivision. Take Barrett/East West Connector to Floyd Road, turn right, follow and continue as it changes to Mableton Parkway, turn right on South Gordon Road, then left on Hillcrest. Look for a new subdivision on the left.about 8/10 mile from South Gordon Road. About a 20 minute drive from our church.
Youth Take Notice:: The minimum age for the first four days is 16, 14 after that. (blitz week) All young folks, guys and gals are all welcome if you meet the age requirements. Drag your parents along!
Dinner on the Slab


Click on any picture or HERE for Slide Show
Dinner on the slab means bring a covered dish, utinsels to serve the dish and your own chair. Anyone that wants to come are welcome. We invite the future homeowner and their family and friends.
Cobb Habitat has already poured the concrete and it is hardened and ready to build, so all we have to do is clear out an area big enough to set up tables and chairs. There was chicken, bar-b-que, various salads and deserts, water, tea and soft drinks. Also a few well chosen wines (OK by Presbyterian standards).
For most of us, this is our first opportunity to meet the new homeowner and family. Nicole is going to be a joy to work with. Elijah is very bright, energetic, and inquiring, wants to know everything that is going on.
Copies of Pictures
To get copies of any picture, click on the slide show and look above the slide show and you wiil find a link to the group of pictues (“back to Habitat 2008 set”). Or click on any picture during the slide show and it will stop and allow you to select that picture (View Main Page). When you see a picture you like and you have it in your sights, look for a link above for a button that says all sizes. From there you can choose vearious sizes including a very large one. When you have the size you want, you can click download for a free copy. Copy as many as you want. Or here is a direct link to the set. Click on any picture for a larger view and copy insturctions. Enjoy
Oldtimer
]]>