| CARVIEW |
Kiana and Emily had a wonderful presentation on FreshGrade.
I learned that FreshGrade is a fantastic tool to engage parents in their child’s education. Although FreshGrade requires a fair bit of time and effort to curate everything and input it onto the app/website, it’s overall benefits outweigh the cons. Parents are able to see their child’s work and virtually be a part of the classroom which promotes parent engagement and allows easy communication between parents and the teacher.
Julia’s and my project was on TED-Ed in the classroom. TED-Ed is an educational platform that provides free, short, animated videos that are geared towards students and cover a wide range of topics.
Here is a recording of Julia’s and my presentation on TED-Ed in the classroom:
TED-Ed is a wonderful resource, which I plan to include in my future classrooms!
]]>This content is password protected. To view it please enter your password below:
]]>
I do not have anything particularly exciting to show this week in regards to my breakout box (without giving away part of the final product), so I decided that I would make a post talking about my experience designing and creating a slide show for an inquiry presentation in another class.
In EDCI250 Elementary Field Experience Seminar I, we had to come up with an inquiry question that is related to education within the classroom and then research and present our findings.
My research question was, “How can I create interactive, hands-on learning opportunities that promote critical thinking?”.
This was an interesting and exciting topic for me to explore, as someone who enjoys hands-on experiential learning myself, I thought it was fun and interesting to see what experts in their field have to say about this topic.
I did some research, and spoke to some educators, and was ready to put together my findings. We had to present our work in a synchronous online meeting, with having approximately 5 minutes to present. But how was I going to do this? I have not presented a project since I was about 13 or 14 years old, nor have I ever created a slideshow before.
I decided to go with Google Slides as my document was easily shareable and I can access on any of my devices.
It took some getting used to and organizing, but once I figured out some of the kinks (user error, not technological error) my slides were well on their way!
We presented our work this past Wednesday, and I was pleased with my overall product. Now that I have made one, I feel confident that I can use this platform to present projects in the future.
Check out my practice presentation of my EDCI250 Final Inquiry Project below!
Thank you for checking it out! I am happy with the journey that I have taken so far, and I look forward to the future!
]]>We worked together to brainstorm the positives that we have experienced with online learning this year so far. Here are some of our results:
- Breakout rooms encourage group collaboration
- Don’t have to commute → gives more time for school work, less money spent
- Comfort of your own home, can learn anywhere (don’t have to be in Victoria)
- Equal interaction because of breakout rooms, not always being with someone you know
- Easy to meet up with others for group projects
We also brainstormed of some the negatives that we have witnessed or experienced in regards to online learning:
- Classes aren’t always on the same page as to workload and expectations
- Hard to separate school time when at home
- Tuition is the same price
- Zoom fatigue (sore eyes, tired, etc.)
In addition to the positives and negatives, we also explored asynchronous and synchronous classes and activities. We took a look and made a diagram of where we believe all of our activities and learning in EDCI336 fall within these realms:
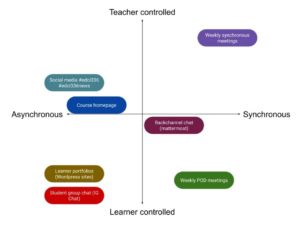
It was interesting to see that activities are not completely asynchronous or synchronous, and that many of them (not only in EDCI336) are a mixture of both.
Finally, we finished the class off with brainstorm qualities that are only made possible by face-to-face learning, and those that are only made possible by online learning. Here are some of our results:
Only Face-to-face:
- Most physical activities as a group
- Chemistry and Biological labs (experiments that require specific resources – dissections, chemicals)
- PE class, team games
- More interactive
Only Online:
- Breakout rooms providing a private space for groups to talk and work on projects
- Remote learning
- Grouping up is quicker online, if teacher directed. Takes longer face to face to break into groups.
- Access to shared doc’s to work on together
I am both sad and excited that this term is nearing an end. I do look forward to seeing how our learning takes shape in the future, whether it be online or face-to-face, and I am looking forward to that journey.
]]>This content is password protected. To view it please enter your password below:
]]>
Chantelle spoke with us about equity in the classroom. With having first hand experience, she was able to provide an interesting and eye opening session on inclusivity in schools.
During this session, Chantelle had us break into groups and she posed some questions for us to discuss. This questions included:
- How can you assess a student’s needs?
- What technology can you use if the child is averse to touching paper?
- How can you include a student in music class who is physically incapable of holding an instrument, but does have mobility enough for an Augmentative and Alternative Communication (AAC) device?
- What if the student has fine motor challenges and cannot write well? What technology can you use and how will you go about applying it in the class?
- What are some ways you can build a relationship with the student?
- How will you build a relationship with the family?
My group had a lengthy discussion about all of these questions. The thoughts and ideas from everyone was an interesting and insightful learning experience.
Chantelle also shared the following videos with us. The videos show a glimpse into the reality of having a disability and being within the BC school system.
After viewing these videos, it opened my eyes to what being an inclusive educator really means. How what I do may do, even if the right intentions are there, may still create the sense of segregation.
I will be taking these lessons to heart and carry them with me during my future endeavors as an educator.
Thank you Chantelle Morvay-Adams and BCEdAccess!
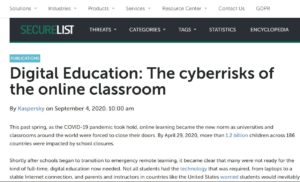
]]>This article put out by SecureList states that in June “the education industry accounted for 61 percent of the 7.7 million malware encounters experienced by enterprises in the previous 30 days” (Kaspersky, 2020) .
I decided to take a look at the platform that I am using to create and share my Virtual Breakout Box, Deck.Toys, and see where they sit on the cyber safety scale.
I used the site, Common Sense Education, to see if I can find a review and safety rating for Deck.Toys. Without any luck, I was unable to find a review for this platform. So I decided to explore further.
I was able to find reviews from G2, where people have given Deck.Toys a 4.5 star review. Sadly, it does not go into detail about cyber security.
Exploring further, I was only able to find positive remarks and reviews about this platform. I was unable to find any concerning features in regards to cyber security.
Despite only finding positives, we should still be wary of what we do and use on the internet. Just because it appears safe, we are still taking that risk of a potential online hazard.
I look forward to continuing exploring how I can safely integrate technology into the classroom.
]]>
This content is password protected. To view it please enter your password below:
]]>
This week I spent some time configuring the background image of my virtual breakout box.
Check out the video below to see how I did it!
I can’t wait to display the finished project. I am certainly getting closer!
Check out next week’s post for more updates!
Thank you for reading and watching!
]]>Recently, the teacher of this class was able to share their entire Evolution unit with me. This addition to my resources has been fantastic. Not only as a resource for future classes, but it also allows me to draw upon concepts that are being directly covered in their class and include them in my breakout box.
I was speaking with this teacher the other day and I asked them what might be something they would like to see included in this virtual breakout activity. They responded these requests:
- That the activity will act as a form of review
- Could possibly be done in pairs or small groups
- Has checkpoints where a student needs to check-in with the teacher
These points were great ideas for me to consider when continuing the development of my activity. I was already planning on this activity to act a fun way to review, as it will be drawing on previously known concepts and ideas rather than instructing and teaching new ones.
Luckily this activity is pretty easy to work on in pairs or in groups of three. The students can work together to solve the puzzles that they are presented with. The teacher suggested this just in case they were unable to use a full set of iPads or Chromebooks.
I loved the idea of having teacher check-in’s throughout the activity. This makes it more interactive than simply being on the iPad the entire time.
The video below shows how I’m making changes to my activity to allow check-in’s with the teacher:
Next week I’ll be sharing my progress with customizing and sprucing up the appearance of my virtual breakout box.
Thanks for reading an watching!
]]>As someone who knows very little about coding, it was interesting to see the wide variety of activities that you can do with the kids, on and offline.
I believe that it is important to include coding in the classroom, starting at an early age. The technology around us is constantly evolving, and more and more jobs are needed to design, monitor and use this technology. Providing children with the base knowledge around coding and computer science helps prepare them for the future.
One site that was a fun place to explore coding was Scratch! On Scratch, you can create and play various games which help build your knowledge around basic coding. If you explore the site further there is even a ScratchJr., which is for ages 5-7, and ScratchEd, which is an awesome resource for educators looking to include coding with Scratch in their classroom.
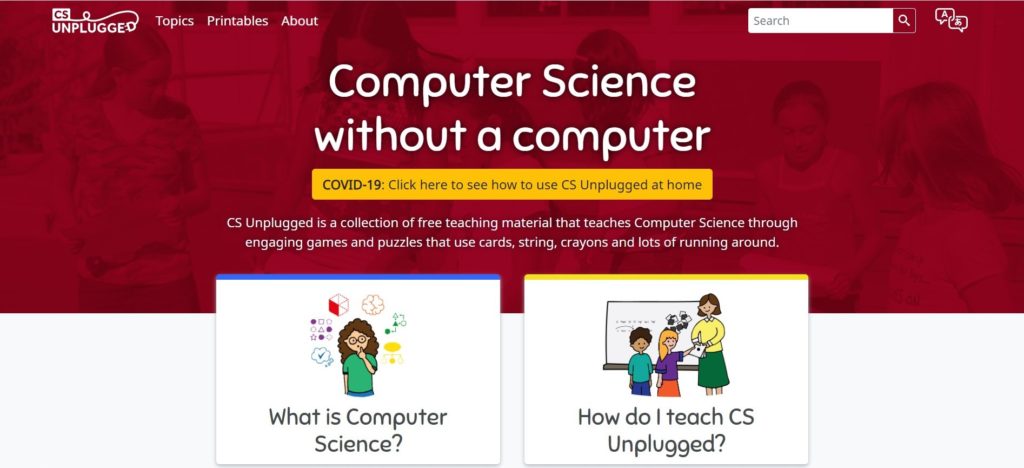
Another fantastic website was, CS Unplugged. This website is an incredible resource for introducing coding without the need of a computer or tablet. CS Unplugged has many ready-to-go activities and lesson plans which are useful when wanting to introduce coding with a cross-curricular approach. CS Unplugged is also a fantastic resource for still being able to teach coding even if technology is limited for your classroom.
I look forward to exploring how coding can be implemented within my future classroom. This topic strongly connects to developing critical and creative thinking, and can easily be taught on an inter-disciplinary level.
I can’t wait to learn more!
]]>
EdCamp is a user-generated method of having an educational conference. Typically, the attendees generate topics that they are interested in and the ideas are then explored.
We did something similar to this, where we all took to a Google Doc and started listing topics that we thought would be interesting to discuss. These topics included Inquiry, A Teachers Professional Path, and Gender Identity within the Classroom.
We then voted on a few topics that we wished to focus on, and then we broke up into prospective groups.
The group that I join was discussing how to break the gender binary within the classroom. Our conversation was short, but one thing that was mentioned was a study (can’t remember by who or when) that involved a group of 5 year olds. They were asked to draw people of different professions such as a firefighter, police officer, nurse, doctor, and a teacher. The firefighter, police officer, and the doctor were all drawn as men, while professions such as nurses and teachers were drawn as women.
We then discussed that it is views and ideas such as these gender stereotypes that we need to be able to address and change within our classroom.

We were unable to share ideas and thought any further, but I am sure our discussion will be continue in the future, and I look forward to future EdCamp opportunities with me colleagues.
]]>
This project has been fun to experiment with. Having the opportunity to explore an idea while completing a task for a class has been fantastic. This is a project that I have thought about attempting, but haven’t really had the chance to devote some time to.
Right now I am working on inputting content and material that is related to what has been covered in my target classroom. Once I have the information that I need, I will be organizing it into various games and activities within my virtual breakout box!
Check out the short tour of my virtual breakout box so far. I am using DeckToys as my game platform, and I used Screencast-O-Matic and YouTube to record and share the video.
I have many branches and game options so far. Once I input the material that I want the students to work with I may narrow it down and remove some of the branches and activities. I am also hoping to rearrange and change the background image so that it gives the student the impression that they are travelling from place to place as they progress through the challenges.
Thanks for checking this out, stay tuned for future updates on my virtual breakout box!
]]>
From changing my ukulele from the key of D to the key of C, learning new chords, and deciding which songs to play, so far the ukulele has been quite the learning experience!
Originally, on my Musical Growth Plan, I listed that I planned on learning and demonstrating songs such as “Little Tommy Tinker”, and “Johnny One Hammer”, which would have been played using the chord of D (if tuned to key of D), or the chord of C (if tuned to the key of C).
I have practiced these songs and have decided to challenge myself and work on a more complicated song. I have chosen to practice and demonstrate the song “Hush Little Baby”, which use the chords F and C7.

I chose this song to challenge myself and my hand coordination. I have found it difficult to transition between chords, but I believe I am making progress!
Another challenge that I am having is strumming. I have seen various people strum different ways and I am unsure if I am using an acceptable method. I have seen some players use an open hand method, where they strum down with their thumb and up with their index finger. I have also witnessed musicians pinching both their thumb and forefinger together and using this to strum up and down. Additionally, I have seen ukulelists have their ukulele resting on their hip, or thigh if sitting. I have also been instructed that the ukulele should be held up with the body of the ukulele resting in the crook of your arm. All of these are somewhat contradictory of each other and are a little confusing for a beginner such as myself. This just demonstrates some of the possible roadblocks of learning an instrument at home.
Below is a link to the video of myself attempting the song, “Hush Little Baby”. Filming this video was a true test for me. Digital stage fright and the inability to sing led to some internal struggle. But I was able to push through it and ultimately I’m happy with what I was able to produce, even if it is not perfect!
Thank you for watching and reading! I am very proud of the progress that I have made so far, and I look forward to reflecting on my musical journey at the end of the term and admiring how far I’ve come!
]]>My original plan was to have a portion of my virtual breakout box completed this week and to demonstrate it using the Screencast-O-Matic program that we were recently introduced to. But, as we all know, plans don’t always work out.
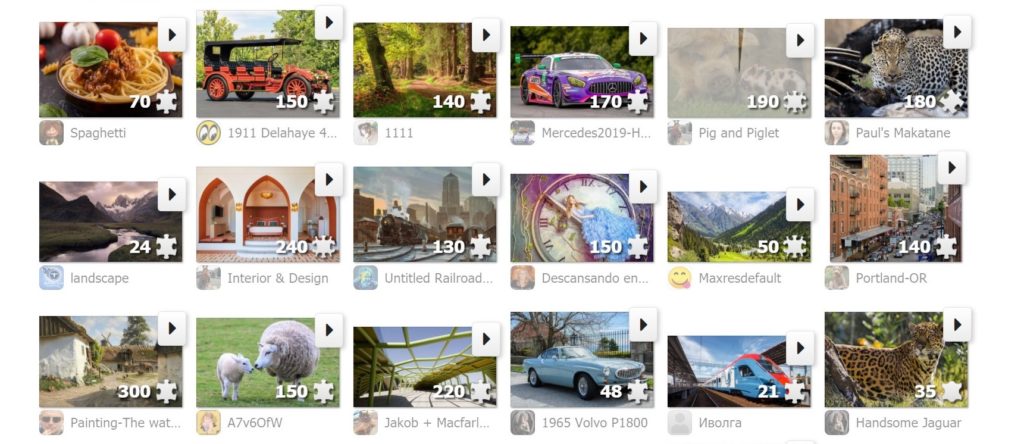
I was however able to view some fun online games such as Jigsaw Planet. This website allows people to create, share, and play virtual jigsaw puzzles! This site will be extremely helpful when designing activities for my virtual breakout box.
Want to try one yourself? Click on the image below to try the fun, prehistoric puzzle created by CarolBaez6:
Maybe this coming week I’ll be able to put aside more time to work on my Free Inquiry project and test out the Screencast-O-Matic! Wish me luck!
]]>
Some forms of educational videos include:
- Recorded lectures
- Screencasts of lessons, or how-to’s
- Talking head videos
- Presentations
- Interviews
We were introduced to the screen recording tool, Screencast-O-Matic, and shown how to download it for our own personal use. I have not had a chance to test it out, but I do plan on using it for part of my Free Inquiry project, and for an inquiry presentation in another class.
I did however make great use of the YouTube tutorial! Seeing how videos can be uploaded, and made to be unlisted, was quite helpful for a recent assignment in EDCI 300. I used the YouTube tutorial, as well as my new video editing program, DaVinci Resolve, to make and share a video of myself solving a problem using manipulatives.
The problem went something like this:
There are golf carts with three wheels, and there are golf carts with four wheels. All together there are 25 wheels. How many three-wheeled golf carts are there, and how many four-wheeled golf carts are there?
Here is my YouTube video of one of my strategies that I used to solve the problem (guess and check using manipulatives):
Overall, I’ve found all the concepts and information covered in this recent class to be helpful and informative! I look forward to seeing what new programs we will be learning about next class.
I know now that a chord is a set of musical notes played at the same time harmoniously. Instruments such as the piano and the guitar (and of course the ukulele) are able to play chords as they can play multiple notes at once.
A key part of learning the ukulele is learning the various chords and the hand/finger positions that they require. This has been quite the learning curve for me. Positioning my left hand in a claw-like position while placing my fingers awkwardly on the strings has been a struggle for sure. I am severely right handed and using my left hand has been a test of my ambidexterity. I can now see how learning an instrument can positively affect a students physical development.
Originally, I had set the goal of learning three chords in the key of D. The chords were: D, A7, and G. Since then I have had to tune my ukulele to the key of C, which changes the chords that I will be learning. At the moment I have been focusing on the chords C, F, and C7.
Looking at the chord chart provided by MusicPlayOnline, I believe that these chords might be the easiest to learn and will provide me with the practice of finger position and transitioning between chords. Once I have mastered these three I will then attempt at experimenting with some of the trickier chords and finger positions.
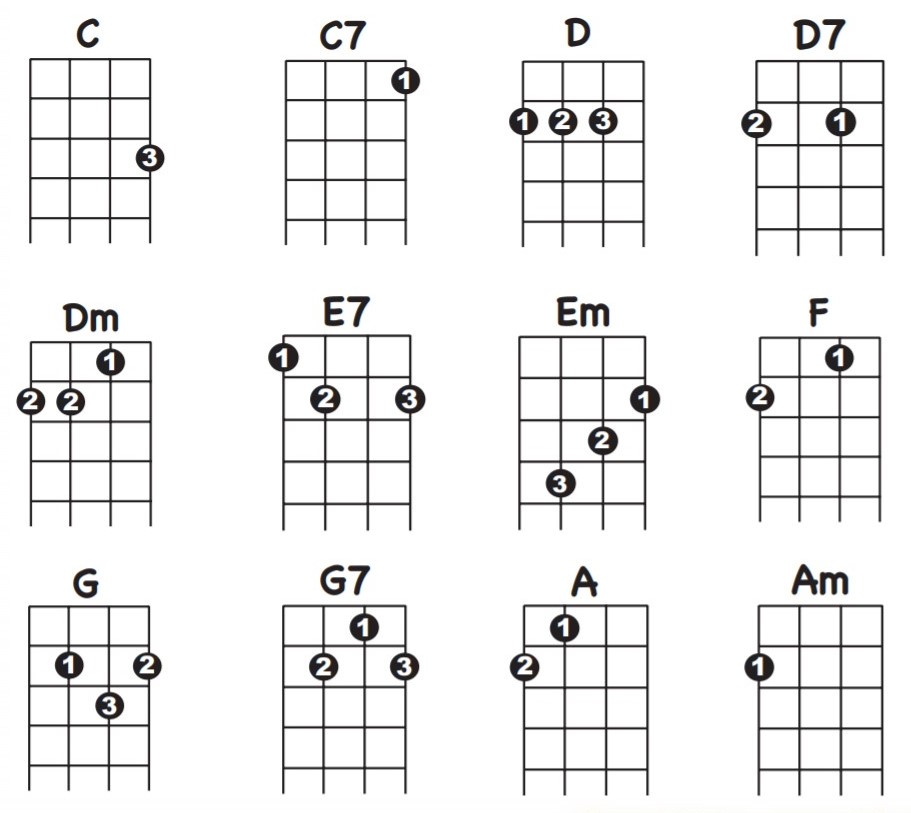
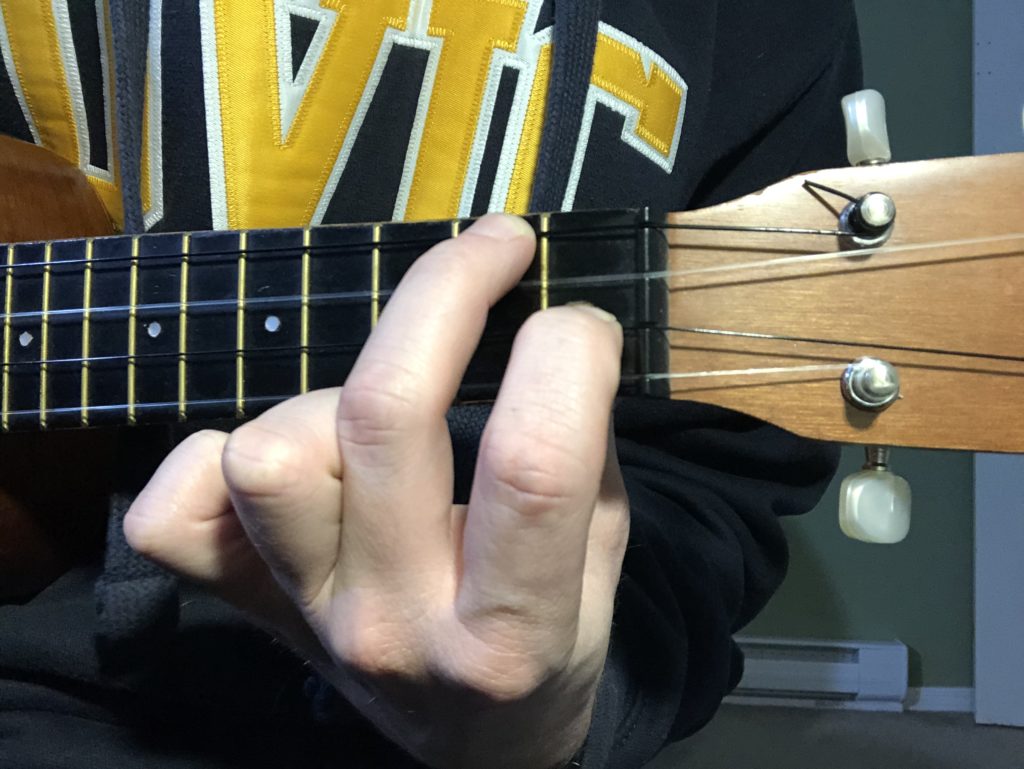
Below are some images of myself displaying the finger positions for the three chords that I am learning. I learned through taking these images that I am not very quick at my transitions and that it is awkward to take a picture of yourself displaying different chords.
Chord C:

Chord C7:

Chord F:
Throughout the upcoming weeks I will be continuing my practice of these chords and my transitions between them. I hope to be able to put them into practice by learning and performing the songs, “Johnny One Hammer” and “Hush Little Baby”.
Next post will be an exciting one! Stay tuned for the (not-so) velvety voice of moi, and the (hopefully) successful performance of “Hush Little Baby”.
]]>Some of these programs include:
- Trello
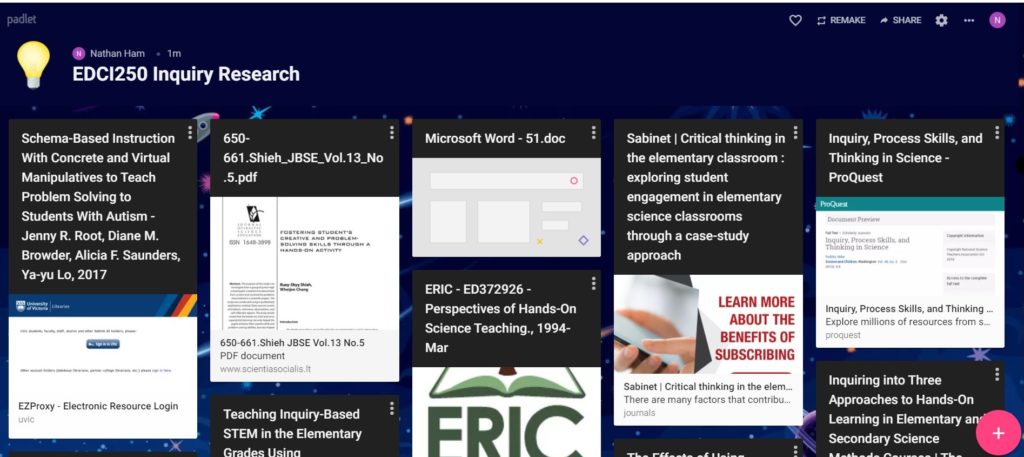
- Padlet
- Microsoft PowerPoint
- Mirror Lab
- Audacity
and
After seeing and exploring all of these applications I decided to install Padlet as a Chrome extension and give it a try. Since then, I have been using it to help curate and organize my research for my EDCI 250 teacher inquiry, and it has been incredibly helpful! If I find a resource that I like or am interested in, I simply click on the extension and click “Post Here” on my inquiry dashboard and it saves it for later access. Super simple!
Additionally, after seeing PowerPoint being demonstrated in our last class I chose to install Microsoft Office 365, which includes PowerPoint. I purchased a new laptop at the beginning of September, and because it is new it lacks many of the programs that my older computer had accumulated over the years. Thankfully, as a student at UVic, I was able to install Microsoft Office 365 free of charge. I simply went to UVic’s University Systems page for Microsoft Office and followed the steps!
Once I had PowerPoint installed I decided to explore it myself, following many of the examples that were shown to us in class. I used some of these tools to edit and play with the image below.

As we only had one EDCI 336 class within the past two weeks due to the Thanksgiving holiday, this provided us time to explore the audio editing program, Audacity, and the video editing program, DaVinci Resolve. My previous computer was a Mac, so I was accustomed to using iMovie for editing videos. It was nice to be able to install and explore a video editing program on my new computer, as well as having a step-by-step walkthrough of the video editing process. I know that I will certainly be making use of this program later on this term!
Overall, I found this class to be extremely insightful on graphic design and on applications that will help us with our tech projects in the future. I will be using these resources to organize and create my final project for EDCI 250, and I look forward to discovering how I can incorporate these programs into my other classes!
]]>Fortunately for me, I played the B♭ clarinet for about 5 years, and the bass clarinet for about 2 years, during elementary and middle school. I even had my very own white B♭ clarinet! Unfortunately, I have not played within the past 15 years. This means that much of the musical concepts that we’ll be covering is in my brain somewhere, it’s just buried deep in a dusty corner in the back of my mind.
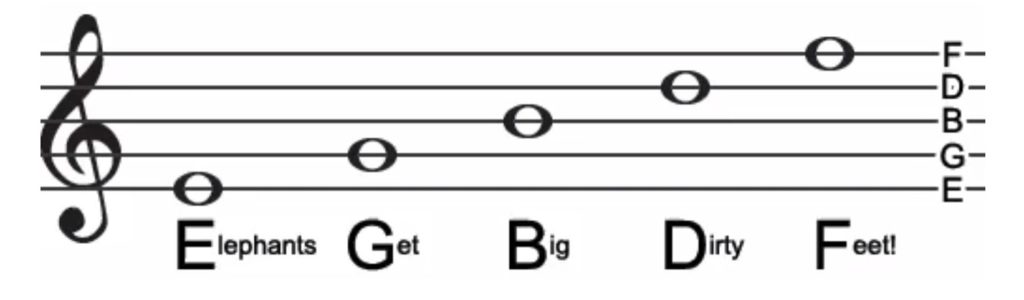
My first goal for this term is to remember how to read a sheet of music. Some terms jumped out to me right away, such as crescendo or staccato, while some took a moment to resurface. I even felt a little embarrassed by myself when we were shown a few measures with notes, and I could not remember the names of each of the notes. It was not until Dr. Prest provided us with a mnemonic to remember the notes that I began to recall them all.
I don’t remember the exact mnemonic that Dr. Prest gave us, but I was able to remember the one that I learned as a child. It goes like this, “Every Good Boy Deserves Fudge”.
Thinking about it now, this is not a mnemonic that I would use to teach students today. I would find or develop a mnemonic that is gender neutral or refers to objects rather than people.
After a quick Google search, I found other useful mnemonics such as:
- “Every Good Band Draws Fans” – dummies.com
- “Empty Garbage Before Dad Flips” – Nandua Middle School
and
- “Elephants Go Break Dancing Fridays” – Nandua Middle School
Another challenge that I encountered is learning the ukulele. My experience with woodwind instruments is moderate, but my experience with string instruments is non-existent. Even the concept of tuning every time I play is odd, and so far my experience with tuning has not been fun!
The ukulele that I am renting was originally tuned to the key of D. Not long after I picked it up I noticed that two of the strings were sounding very similar and none of them really sounded like they should, as demonstrated by the tuner on MusicPlayOnline. I then decided to set out and download a tuner to my phone. I downloaded a few that were “free”, but after I used them to tune once they then required me to pay a subscription fee. I decided to try other options. I found a few others, but either they were free for the first week, or they only tuned to the key of C. I would have gone to UVic to have my ukulele tuned, but I often am unable to make it there when the music department is open due to class times and my work hours. It also isn’t realistic as the ukulele requires frequent tuning.
After much frustration with tuning I decided to simply tune my ukulele to the key of C. I was happy with my decision as I was able to easily tune it, and when we had our like-instrument peer session within EDCI 306A I discovered that everyone else’s ukuleles were also tuned to the key of C. This will make it easier for future discussions and peer sessions.
Overall my musical journey within EDCI 306A has been fun and positive! I look forward to what comes next, and to my ukulele-learning journey!
Next time, we’ll see if I can demonstrate these odd things called “chords”!
]]>I have decided to give Deck Toys a try as my platform for my virtual activity. The site appears to be easy to use, and this tutorial has been extremely helpful as well!
My current storyline for this activity sets the player (student) as a research assistant for a biologist. This biologist has just spent the last five years traveling the world researching adaptation and natural selection. The player has been given the task of helping the biologist prepare for a big presentation. But unfortunately all the files got mixed up! The player must help the biologist organize their research before the event and save the day!
Because the player will have to sort and organize the biologist’s research, I have decided to use a “web” layout for the learning paths in this activity. With this layout the student must solve and complete each branch to reach the end goal. This way I can set up each branch with a specific focus, whether it be on traits, adaptations, natural selection, or invasive species.

Stay tuned for further progress and links to my virtual breakout box!
]]>
Jesse gave us a wonderful presentation on Digital Privacy and Safety on the internet. He enlightened us with the different views and opinions of cellphones within the classroom, and how many schools are addressing cellphones with their students. Some believe that cellphones do not belong within schools, while many believe that cellphones are now a part of today’s reality and should not be discouraged but managed within the classroom and even used as an educational tool. The point was also made that children learn and develop habits from their parents and the people around them. If they see the adults in their lives constantly checking their devices and spending enormous amounts of time being active online, then they will follow suit and do the same once they acquire their own devices. This instilled a sense of self-awareness in me. How often am I on my phone? How will I present this to my future children? How will I address device usage in my future classrooms?
The sense of self-awareness grew greatly when we delved into the topic of our own online presence on the internet and through social media. Having many teachers in my life, I have been pretty careful about what I present online and how public my accounts could be. Despite this, I know that there was a time in my life where I was much younger, social media was new, and the thought of becoming an educator wasn’t there. How safe was I being then? What could I have shared or put online in the past that may affect me now? What might friends or acquaintances tagged me in that may not be appropriate now? We were instructed to search our names online and see what came up – to perform an audit of our digital footprint. Thankfully, I couldn’t find anything about myself other than my name being up on the website of my workplace. I went a step further to insure my privacy and safety and double checked that my social media accounts were indeed set to private. I also went through the content that I have shared, and looked over what has been linked to my accounts to insure that I am portraying an appropriate and respectful image.
I recommend that you, too, perform a quick search for your name. What came up? Is it what you would want your image to be? Let’s work together to make sure that our online presence relays a positive message to others and to future students who may stumble upon our content.
]]>
Lock Paper Scissors has laid out the Breakout Box development process into four distinct steps:
- Create a storyline:
- Why are the students completing these challenges?
- What’s the objective?
- Is there an antagonist?
- Is the story understandable?
2. Design some puzzles and challenges:
- What is the intended level of difficulty for these challenges?
- How many challenges should there be?
- What is the content for the puzzles? Math? Language arts? Science?
- How long should each challenge take to complete?
- How will each challenge be presented?
3. Add the theme to your space:
- What is the theme?
- Arrange the room/site to suit your theme.
- Decorate and add visuals to aid in the experience.
4. Test out your Breakout Box:
- Do the activities flow?
- Does it make sense?
- Is the overall activity too long or too short?
- Does it meet the intended objective?
I’ll be following these steps as a guide throughout my virtual Breakout Box designing and developing process.
For now, I know that my virtual Breakout Box will be science based. Particularly based on the content listed in British Columbia’s grade 7 science curriculum, with a focus on evolution and natural selection.
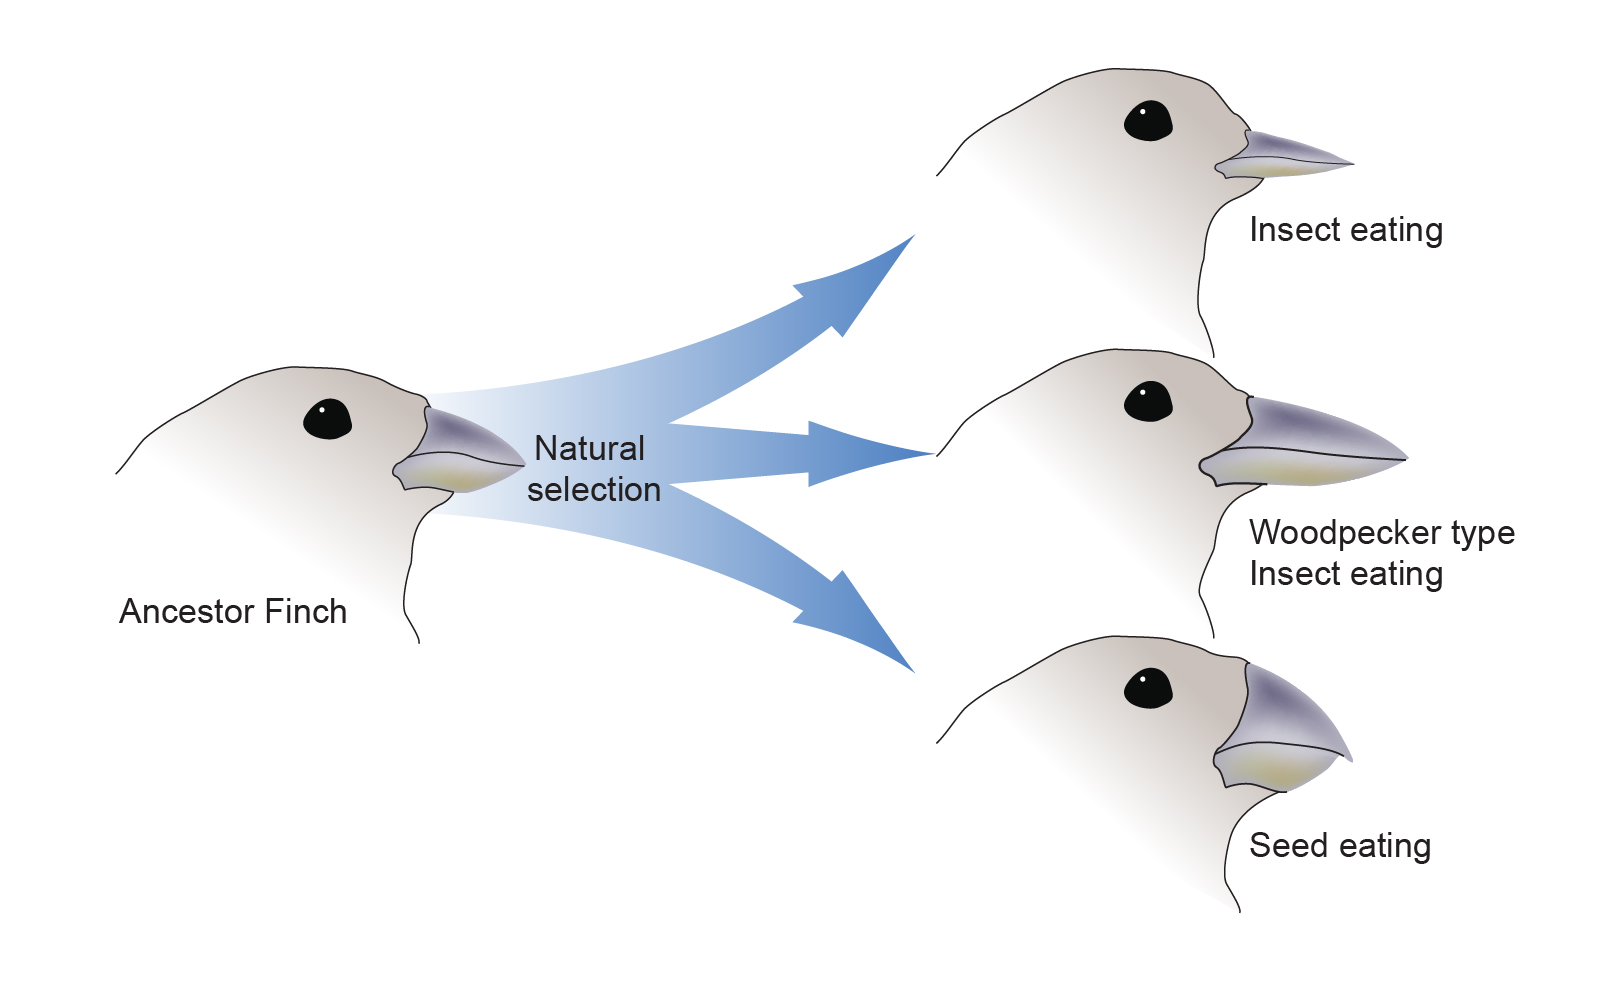
Image from: https://www.genome.gov/genetics-glossary/Evolution
My objective is to create an activity that reviews and strengthens the students’ knowledge on concepts that they have already covered class. My next blog post will be covering my attempt at the beginning stages of building the virtual Breakout Box.
Tune in next week to see my progress!
]]>We covered the difference between Copyright materials and the various Creative Commons licences, as well as going into the Fair Dealings Guidelines. It was my previous understanding that Copyright materials couldn’t be reproduced, sold, or altered. I did not know that in reality Copyright materials could be used if only 10% or less of the original copy was reproduced. This is incredibly important information for teachers to know so that they follow the legal guidelines when creating and distributing resources.
In addition to Copyright materials, we also covered Open Education Resources. Open Educational Resources are created and put out there so that individuals and educators can freely access materials without spending a fortune on resources and textbooks.
One site that is often used (and I’ve used myself for resources for kids’ camps) is Teachers Pay Teachers. This site is an excellent resource for lesson plans, activities, and various other classroom resources. One downfall of TPT is that many of the materials do cost money, but you can find some useful items for free. Teachers Pay Teachers is also a great place if you wish to possibly earn a few dollars off of the resources that you have created.
![]()
Other OER sources include OER Commons, Khan Academy, and our local elementary digital library from BC’s School District #61. Ben Koning, the teacher librarian from Tillicum Elementary, shared the digital library link to us. While looking through the library one can instantly see how this site can be a useful companion when creating lesson plans and collecting resources for students. It’s neatly organized, easy to use, and up to date. A site that I will certainly use before and after I become a teacher!
]]>
After attempting a few of the games available, I noticed that the majority of the games were created by using two different platforms. One being Google Sites, while the other was using Deck Toys. I enjoyed games from both platforms, but I did notice some pros and cons from each.
Google Sites – Pros:
- Free to use
- Easy to create
- Easily can link other games and activities
- Customizable
- Can easily be shared and monitored
Google Sites – Cons:
- Have to develop your game from scratch
- All steps are generally listed on one page
- Not as visually appealing
Deck Toys – Pros:
- Large gallery of ready-to-go game templates (which include puzzles, locks, mazes, etc.)
- Templates are arranged by subject and grade level
- Customizable
- Linear in game-play (must complete A to move onto B)
- Allows the teacher to view and monitor student’s progress and input
- Able to test and view the games in various formats (teacher view, student view, etc.)
Deck Toys – Cons:
- Free account has limitations:
-
- 2 classrooms
- 3 private decks (games)
- 100 public decks (games)
- Up to 40 students per classroom
- 7-day classroom data retention
- Can only assign up to 2 decks per classroom at a time
-
- Must pay for upgraded features
-
- $8 USD/month
- Features include:
- 10 classrooms
- 100 private decks
- 200 public decks
- Up to 60 students per classroom
- 30-day classroom retention
- Can assign up to 10 decks per classroom at a time
- Upload voice clips to Study Sets and Slide Activities
-
Overall, I could see myself using both options within the future to create a fun, educational game experience for my classroom. But for this activity I think that I am going to attempt to use Deck Toys to create my first virtual Breakout Box due to the vast array of ready-to-go features.
Stay tuned for my exploration, planning, and progress in this fun and exciting experiment!
]]>After our class, we were assigned with the task of attempting to create our very own Word Press site and blog! I personally had never set up a site before, nor am I super tech savvy, but I did thoroughly enjoy the freedom to create and design my own online space. I know that I spent way too much time looking through background and header images, and I am still not content with what I have chosen. I spent majority of my time looking through Unsplash. Unsplash has a fantastic assortment of high quality photos that are free to download and are perfect for backgrounds, headers, and accent images.
A challenge that I experienced while working on my blog was remembering to press the “Update” button after editing a post. After taking some time to write out a reflection, I highly suggest pressing that very important button. I did not, and I found myself having to rewrite the reflection for a second time. Not ideal, but it is all part of the learning process!
I am excited to see how my own, and the rest of my cohort’s blogs will look at the end of this semester. It will be interesting to see how each has grown and developed, with the inclusion of our individual Free Inquiry projects, our post from EDCI306A, and our class reflections.
]]>Most people have heard, or have even participated, in an Escape Room. But what about a Breakout Box?
A Breakout, whether a room or box, provides a group of people the opportunity to incorporate problem solving, collaboration, and fun in an activity that is rewarding and engaging. An Escape Room requires teamwork to be able to escape a locked room, while a Breakout Box requires the same method but to break into a locked box, or use the puzzles and clues to reach an end goal.
Breakout Boxes can be used in almost any environment, and can be adapted for a level most suited for the participants. When used within the classroom, or in a childcare setting, Breakout Boxes can be designed to fit within a certain grade level’s curriculum and can be a great opportunity for some cross-curricular practice and problem solving.
I was first introduced to Breakout Boxes when the out-of-school care program that I currently work at, Keating Out of School Care, ordered a kit from BreakoutEDU. BreakoutEDU is a popular option amongst educators for their variety and convenience. BreakoutEDU offers ready-to-go kits which include boxes, various locks, invisible markers, and many other useful items. Purchasing a kit also grant you a subscription to their site which gains you access to downloadable games and activities. Simply select the one most fitting for your group, download, print, and follow the instructions!

While the BreakoutEDU is a fantastic option, their kits do start at $125 and increase from there. After the initial purchase my work was unable to maintain the subscription, but I was still keen on keeping the activities going. That’s when I started designing and creating my own Breakout Box activities!
Most of the Breakout Box activities that I have designed have been used with groups of kids within grades 2-5. This blog will document my progress and exploration of various Breakout designs, including how to design and create activities that can be used in the Kindergarten setting, as well as my attempt at learning to design virtual Breakout activities that could be used within a middle school classroom (grades 6-8).
Stay tuned!
]]>