Everything is finished except for the toggles and I don’t think I’ll get to them tonight. I started feeling a little under the weather this afternoon and then traffic was a nightmare so I got home a bit later than expected – 45 minutes to drive 6.5 miles, argh! I don’t feel alert enough to work on the most important part of the coat (the toggles!) so I’ll save that for Saturday. And I promise I’ll post the steps!
Instead, I thought I’d write a quick post about bagging a lining. Lots of books cover bagging but most of them don’t ever mention how to properly deal with that little bit of unfinished facing where it meets the hem. So you try to make it look okay with handsewing but it never really does. I’m going to show you how to finish that area easily and neatly by machine. Now, I’m not a technical writer so I just sewed it and took photos of the steps – hopefully the steps are clear. For more professional instructions please refer to Palmer/Pletsch’s jacket book and/or DVD (I don’t believe I’ve ever seen this technique covered in any other home sewing/tailoring book).
To use this technique, partially sew the facing/lining seam (leaving at least a few inches unsewn at the bottom) and press up the jacket hem (but do not stitch). Leave a large opening in one of your sleeve lining seams so that the jacket may be turned right side out later.
Step 1 Turn the facing back and stitch, stopping 5/8″ from the edge (or whatever your facing/lining seam allowance is).

Step 2 Trim the seam allowance.

Step 3 Right sides together, stitch lining and hem allowance together. I used a 1/2″ seam allowance in this instance. This lining was a ravelly nightmare!

Step 4 Clip jacket front ONLY to the point where you ended your stitching. The wonkiness you see is the hem being pulled up by the lining – pay no attention to that. 🙂
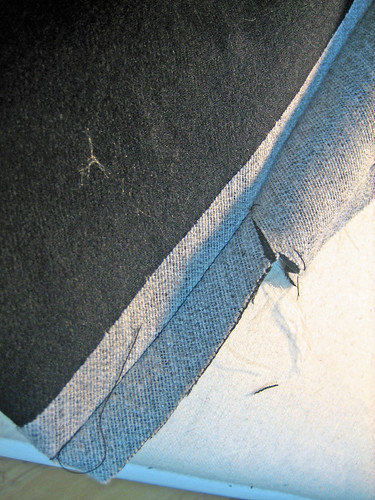
Step 5 Turn hem allowance up (right sides together) tucking lining inside.

Step 6 Fold facing back out of the way exposing lining/facing seam.

Step 7 Stitch remaining lining/facing seam down to the hemline.

Step 8 Turn RS out and Voila! even before pressing it looks good.
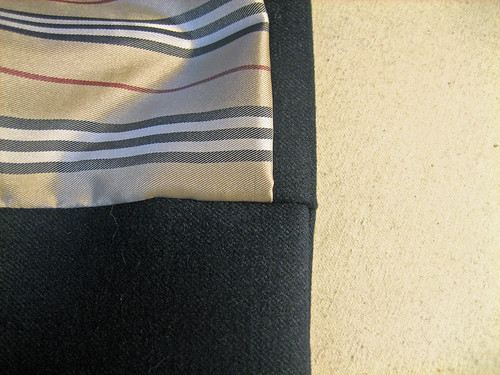
Step 9 After pressing.

Step 10 The jump hem is formed automatically.

At this point, I hand stitch the hem, attach the sleeve linings to the hems by machine and then turn the jacket right side out through the opening in the sleeve. Stitch the sleeve opening closed either by hand or by machine (my preferred method). If your sleeves have vents, it is easier to hand stitch the lining to the hems after turning the jacket right side out.
ETA: I originally learned this technique from Kathleen at Fashion-Incubator. I’ve been using it for awhile and couldn’t remember where I learned it until I was reminded today. Once you do it once or twice it will just stay with you! Here’s the original link, part of the Nameless Tutorial series: Bagging a Lining. Enjoy!


