| CARVIEW |
QuickStart Java applications with Oracle Database (On-premises)
This quick start guide shows how to successfully establish a connection to the Oracle Database (On-Premises) or Oracle Cloud Database that uses TCP connections. You can check out Develop Java Applications for Oracle Autonomous Database if you want to connect to Oracle Autonomous Database.
1. Install Oracle Database
Follow these steps to install and run Oracle Database Express Edition (XE) v21c. If you already have installed database and have database credentials, then you can skip this step.
- Windows or Linux platform: Download and Install 21c Oracle XE QuickStart
- Docker on Mac: Install and Run the Oracle XE on Docker following the instructions from this blog Deliver Oracle Database 18c Express Edition in Containers. Change the version from 18.4.0 to 21.3.0 while following the commands from the blog.
- More Resources: Video showing how to install Oracle Database XE on Windows and conduct basic administration.
2. Install the JDK8
Install JDK81 or higher JDK versions. JDK8, JDK11, and JDK17 are long term support releases. Make sure to use any one of these versions.
1 Use "java -version" to check the JDK version that you have installed. Use "java -jar ojdbc8.jar" to check the JDBC driver version.
3. Create the Database User (Optional)
Note: If you already have a database user and password then you can skip this step. We recommend using a new database user when verifying the database connection. If you are not familiar with creating a database user and assigning privileges then you can use CreateUser.java to create a new database user. - Edit the file CreateUser.java , provide connection string, admin user, and admin password along with new database user and password to be created. - Download the latest Oracle JDBC driver and UCP. - Make sure that the Oracle database is running before compiling and running the sample.
Alternately, you can use the commands below to create a new database user if you are using Docker.# Compile the Java program javac -classpath ./test/ojdbc8.jar:./test/ucp.jar CreateUser.java # Run the Java program java -classpath ./test/ojdbc8.jar:./test/ucp.jar:. CreateUser# These are instructions to create a new database user #Step 1: Make sure docker is running before running the below docker command #Step 2: Enter the admin password for your database on the console #Step 3: Provide the new database user and password to be created # Create a session within the container with Oracle as user docker exec -it --user oracle \ -e 'ORACLE_HOME=/opt/oracle/product/18c/dbhomeXE' \ $(docker ps --format '{{.ID}}') \ /bin/bash -c 'exec ${ORACLE_HOME}/bin/sqlplus "sys@xepdb1 as sysdba"' # Create a new database user and grant required privileges. # Replace "{newdbuser}" and "{newdbpassword}" with the new DB user and password that you want to create grant CREATE SESSION, CREATE VIEW, CREATE SEQUENCE,CREATE PROCEDURE, CREATE TABLE, CREATE TRIGGER, CREATE TYPE, CREATE MATERIALIZED VIEW to {newdbuser} identified by {newdbpassword};4. Download a sample program from Github
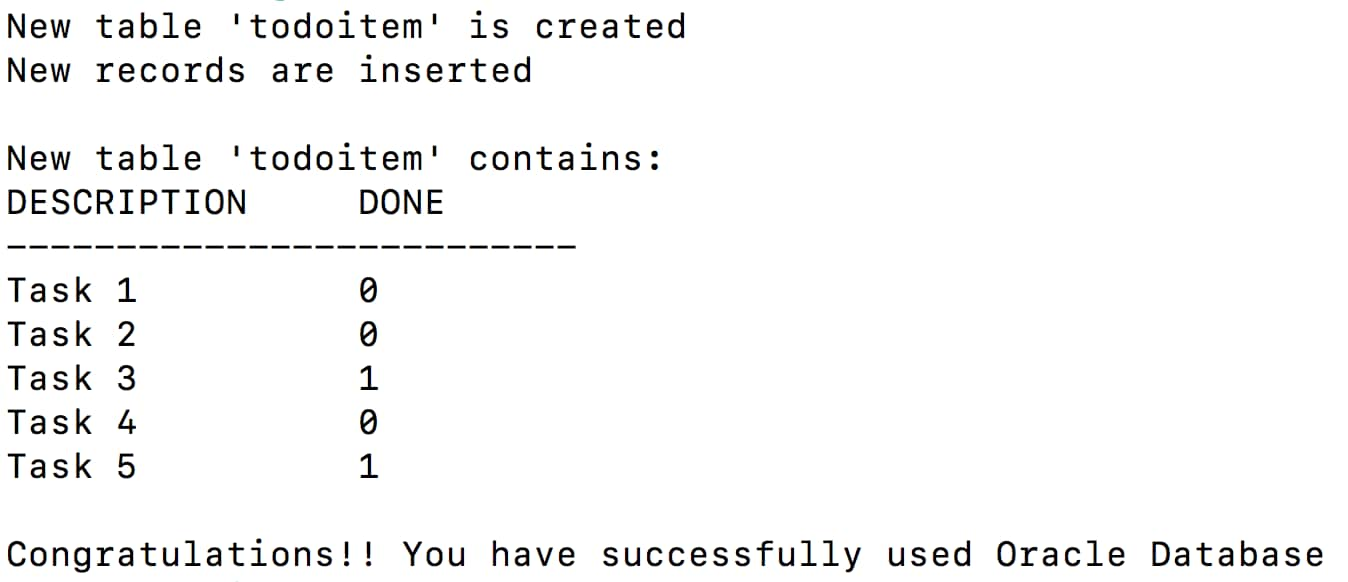
- Download QuickStart.java from Github. This sample application creates a table 'todoitem' that contains tasks and task completion status, inserts few rows, and displays the contents of the table.
-
Edit QuickStart.java to include your database connection information:
- DB_USER: Use the database user from step 3.
- DB_PASSWORD: Use the database password from step 3.
- DB_URL: Enter the connection string of the Oracle Database. For Oracle Database XE, use the below connection string.
Example :
DB_URL = "jdbc:oracle:thin:@//localhost:1521/XEPDB1"
- Save changes to QuickStart.java
Pre-requisites
Open all Close all1. Setup a Maven project
-
Pre-requisites: Make sure to complete all the steps from pre-requisites section.
-
Create a Maven project : Download Apache Maven and set the PATH before using mvn commands. Use the following maven command to create a project.
mvn archetype:generate -DgroupId=com.oracle.jdbctest -DartifactId=jdbc-test-project -DarchetypeArtifactId=maven-archetype-quickstart -DinteractiveMode=false -
Copy QuickStart.java to
srcdirectory : Copy QuickStart.java tosrc/main/java/com/oracle/jdbctestdirectory. -
Modify
pom.xmlwith the following changes:
Add Oracle JDBC driver as a dependency. Note: ojdbc8-production downloads Oracle JDBC driver(ojdbc8.jar)along with UCP, a client side connection pool(ucp.jar). Refer to Maven Central Guide for more details.<properties> <maven.compiler.source>11</maven.compiler.source> <maven.compiler.target>11</maven.compiler.target> </properties> <dependencies> <dependency> <groupId>com.oracle.database.jdbc</groupId> <artifactId>ojdbc8-production</artifactId> <version>19.9.0.0</version> <type>pom</type> </dependency> </dependencies>
-
2. Build and Run a Sample Java Program
Make sure you are in the directory where
pom.xmlis present.-
Clean and Compile the Java code: Use the following commands.
mvn cleanmvn compile -
Run the sample Java program
mvn exec:java -Dexec.cleanupDaemonThreads=false -Dexec.mainClass="com.oracle.jdbctest.QuickStart" - Sample Output:
You will see the queried rows returned from the new table 'todoitem' and a message Congratulations! You have successfully used Oracle Database as shown in the screenshot below.
-
Maven Project
Open all Close all
1. Setup a Gradle project
- Pre-requisites: Make sure to complete all the steps from pre-requisites section.
-
Create a Gradle project : Follow the instructions from Gradle Guide for Gradle download and build instructions and set the PATH before using gradle commands. As a first step, create a gradle project using the below command. Make sure to choose "2: application" for 'Select type of project to generate'. Also, for "Source package (default: temp):" use
com.oracle.jdbctest.gradle init -
Copy QuickStart.java to
srcdirectory : Make sure to copy QuickStart.java to thesrc/main/java/com/oracle/jdbctestdirectory. -
Modify
build.gradlewith the following changes:- Add
mavenCentral()as a repository - Add the Oracle JDBC driver as a dependency.
Note: ojdbc8-production downloads Oracle JDBC driver
(ojdbc8.jar)along with UCP as a client side connection pool(ucp.jar). Refer to Maven Central Guide for more details. - Update the 'mainClassName' to QuickStart.
repositories { // Maven Central mavenCentral() } dependencies { // Get the 21.1.0.0 Oracle JDBC driver along with other companion jars implementation("com.oracle.database.jdbc:ojdbc8-production:19.9.0.0") } application { // Define the main class for the application mainClassName ='{your_project_directory}.QuickStart' } - Add
2. Build and Run the Gradle App
Make sure you are in the directory where
build.gradleis present.-
Compile the Java code: Use the below command.
./gradlew build Run the sample Java program
./gradlew run- Sample Output:
You will see the queried rows returned from the new table 'todoitem' and a message Congratulations! You have successfully used Oracle Database as shown in the screenshot below.
-
Gradle Project
Open all Close all1. Setup a Maven project
-
Pre-requisites: Make sure to complete all the steps from pre-requisites section.
-
Create a Maven project :
- File -->New --> Project --> Maven Project. You can either use maven archetype or check on 'Create a simple project (skip archetype selection)' .
- Choose GAV for your Maven project: These will appear in pom.xml for the project. Group Id: com.oracle Artifact Id: JDBCquickstart Version: Leave it as 0.0.1-SNAPSHOT
-
Create QuickStart.java: Right click on
src/main/java. and click on, New -> Class. Enter the following values. Package: com.oracle.jdbctest Name: QuickStart and Click 'Finish'. Make sure to copy contents of QuickStart.java to this new file created. -
Modify
pom.xmlwith the following changes:
Add Oracle JDBC driver as a dependency. Note: ojdbc8-production will download Oracle JDBC driver (ojdbc8.jar) along with other companion jars such asucp.jar(It is a required jar for using UCP as a client side connection pool). Refer to Maven Central Guide for more details.<properties> <maven.compiler.source>11</maven.compiler.source> <maven.compiler.target>11</maven.compiler.target> </properties> <dependencies> <dependency> <groupId>com.oracle.database.jdbc</groupId> <artifactId>ojdbc8-production</artifactId> <version>21.1.0.0</version> <type>pom</type> </dependency> </dependencies>
-
2. Build and Run a Sample Java Program
Make sure you do not have any compilation error in the Java code and you are using the latest JDK version in Eclipse. Also, make sure that Oracle Database is running on Docker.
-
Run the sample Java program: Right Click on QuickStart.java --> Run As --> Java Application.
- Sample Output:
You will see the queried rows returned from the new table 'todoitem' and a message Congratulations! You have successfully used Oracle Database as shown in the screenshot below.
-
Eclipse
Open all Close all1. Setup a Maven project
- Pre-requisites: Make sure to complete all the steps from pre-requisites section.
-
Create a Maven project :
- Click on File --> New --> Project
- Choose 'Maven' on the left hand side and choose the latest version of JDK as 'Project SDK'. You can use any maven archetype or add your own. Click Next.
- Give 'Name' as Quickstart
-
Create QuickStart.java : Right click on
src /main/java. Click on New --> Java Class. Entercom.oracle.jdbctest.QuickStart.javaThis will create the required package structure as well. Make sure to copy contents of QuickStart.java to this new file. -
Modify
pom.xmlwith the following changes:
Add Oracle JDBC driver as a dependency. Note: ojdbc8-production will download Oracle JDBC driver (ojdbc8.jar) along withucp.jar(It is a jar required for using UCP as a client side connection pool). Refer to Maven Central Guide for more details.<properties> <maven.compiler.source>11</maven.compiler.source> <maven.compiler.target>11</maven.compiler.target> </properties> <dependencies> <dependency> <groupId>com.oracle.database.jdbc</groupId> <artifactId>ojdbc8-production</artifactId> <version>21.1.0.0</version> <type>pom</type> </dependency> </dependencies>
2. Build and Run QuickStart
-
Compile the Java code: Right click on QuickStart.java --> Build Module 'QuickStart'. Make sure there are no compilation errors. Make sure that Oracle Database is running on Docker and accessible.
Run the sample Java program: Right click on QuickStart.java --> Run 'QuickStart.main()'.
- Sample Output:
You will see the queried rows returned from the database and a message Congratulations! You have successfully used Oracle Database as shown in the screenshot below.
-
IntelliJ
Open all Close all1. Download JDBC Driver and other Jars
-
Make sure to complete all the steps from pre-requisites section.
-
Download ojdbc8-full.tar.gz from OTN and unzip the contents to your classpath. Note: ojdbc8-full.tar.gz contains the latest JDBC driver
(ojdbc8.jar)and UCP as a client side connection pool(ucp.jar)
-
2. Build and Run a Sample Java Program
-
Compile the Java program Make sure to provide the correct path for the required jars in the classpath.
javac -classpath ./lib/ojdbc8.jar:./lib/ucp.jar com/oracle/jdbctest/QuickStart.java -
Run the sample Java program Make sure to provide the correct path for the required jars in the classpath.
java -classpath ./lib/ojdbc8.jar:./lib/ucp.jar:. com.oracle.jdbctest.QuickStart - Sample Output:
You will see the queried rows returned from the new table 'todoitem' and a message Congratulations! You have successfully used Oracle Database as shown in the screenshot below.
-