CRUD Operations in Django Admin
Last Updated :
23 Jul, 2025
Django Admin is a built-in tool that automatically generates a web interface for your models. Instead of building separate pages or forms, Django Admin handles:
Prerequisites: Django Admin Interface
In this article, we will create a simple Django project named projectName with an app called app. We will define a real-world example model called Book, representing books in a library, and perform CRUD operations using the Django Admin panel.
Creating the App and Model
Step 1: Create Your Django Project and App
After creating the app, make sure to add your app to the INSTALLED_APPS list in settings.py file of projectName.
Step 2: Define the Book Model
In app/models.py, define a Book model to represent books in your library. This model will include common book details like title, author, published date, ISBN, number of pages, and availability status.
Python
from django.db import models
from django.db import models
class Book(models.Model):
    title = models.CharField(max_length=200)
    author = models.CharField(max_length=100)
    published_date = models.DateField()
    isbn = models.CharField(max_length=13, unique=True)
    pages = models.IntegerField()
    available = models.BooleanField(default=True)
    def __str__(self):
        return f"{self.title} by {self.author}"
Step 3: Migrate Your Database
After defining the model, apply the changes to your database by running the following commands in the terminal:
python manage.py makemigrations
python manage.py migrate
This creates the necessary tables for your new Book model.
Step 4: Register the Model in Django Admin
To manage Book records via the admin panel, register your model in app/admin.py:
Python
from django.contrib import admin
from django.contrib import admin
from .models import Book
@admin.register(Book)
class BookAdmin(admin.ModelAdmin):
    list_display = ('title', 'author', 'published_date', 'isbn', 'available')
    search_fields = ('title', 'author', 'isbn')
    list_filter = ('available', 'published_date')
This customizes the admin interface to show important book details and helps you find books faster using search and filters.
Step 5: Create a Superuser to Access Admin
Create a superuser account to log into the admin panel:
python manage.py createsuperuser
Follow the prompts to set your username, email, and password. After creating the superuser, you will be to access the admin panel by logging in using the credentials.
Step 6: Run the Development Server
Start the Django server:
python manage.py runserver
After the development server is running, open your web browser and go to: https://127.0.0.1:8000/admin/ and log in with your superuser credentials.
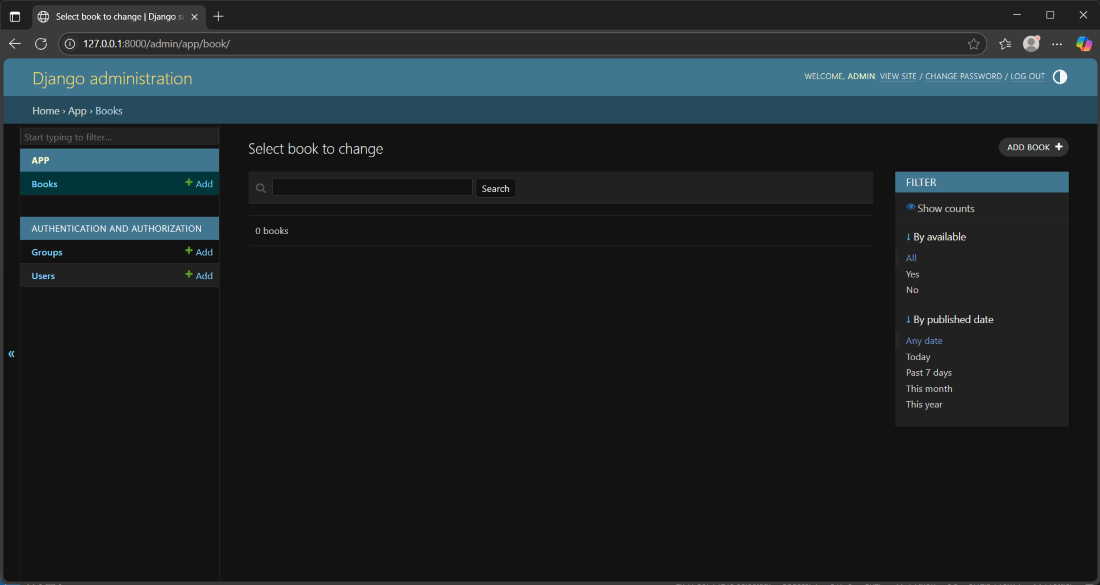 Snapshot of admin panel
1. Create New Book Records
- Click Books in the admin sidebar.
- Click Add Book.
- Fill in details like title, author, and ISBN.
- Click Save to add the book.
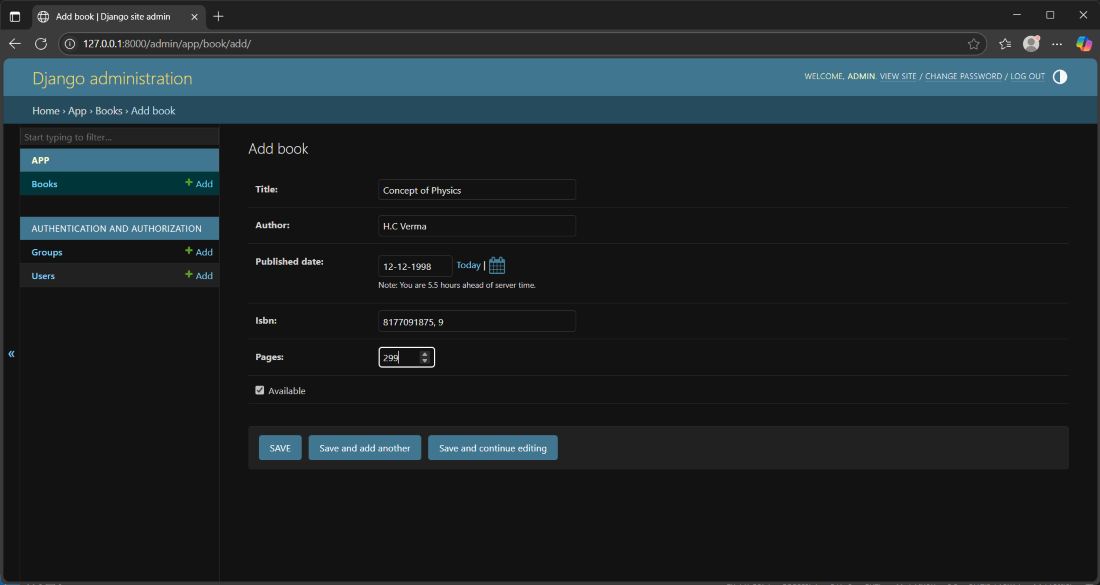 Adding new book
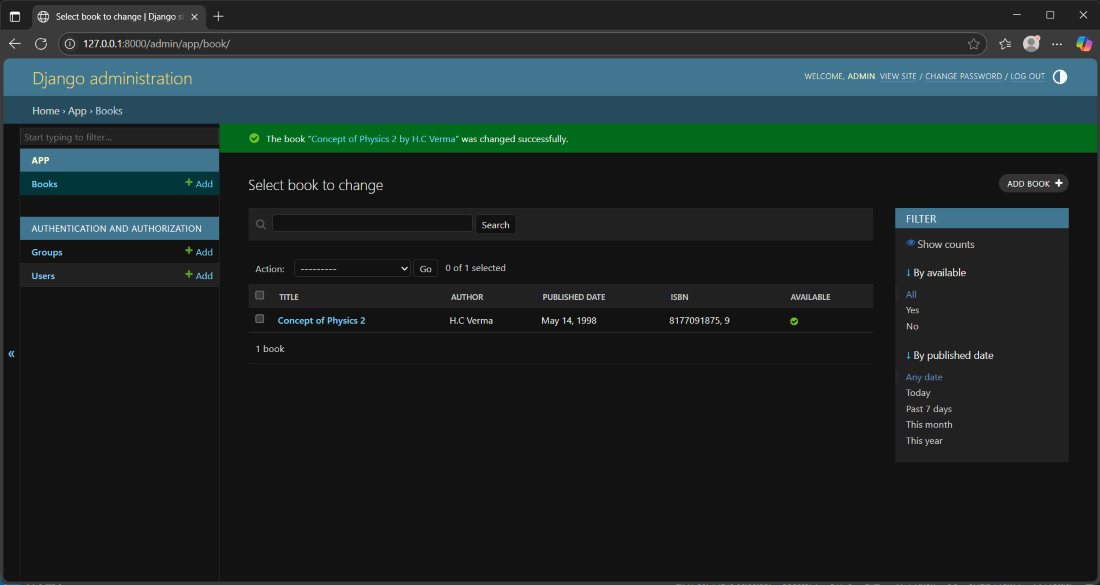
2. View (Read) Books
- The Books list page shows all saved books.
- Use the search bar or filters on the right to find specific books quickly.
 Viewing all entries
 3. Edit Existing Books
- Click on a book title from the list.
- Update any details in the form.
- Click Save to apply changes.
 Editing existing entry
4. Delete Books
- Select the book/books.
- Select the DELETE option from the dropdown above the list of books.
- Confirm to permanently remove the book.
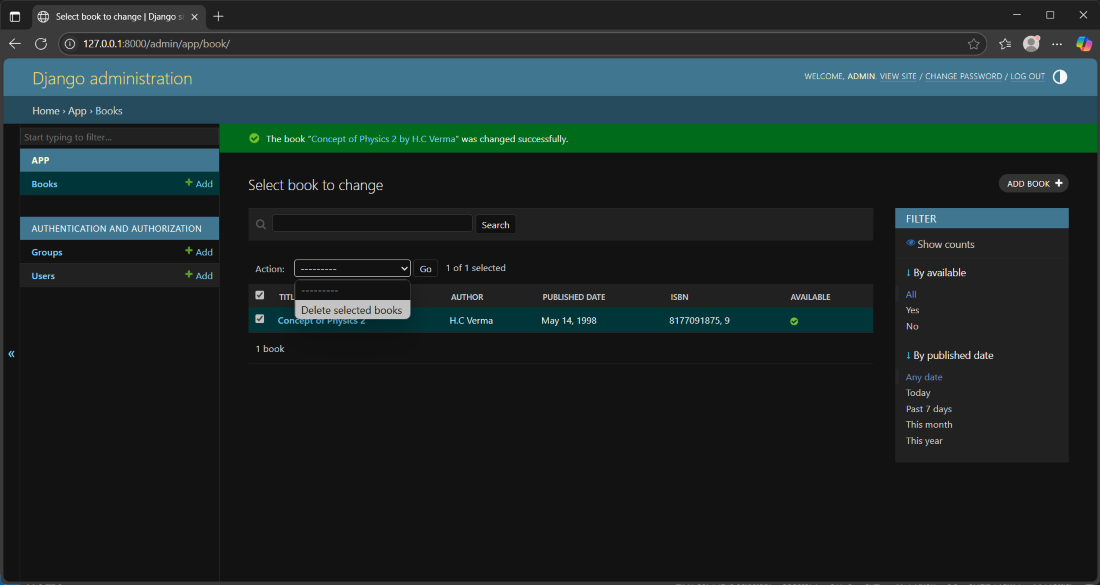 Deleting Records